Configure Email Information & Settings
Introduction
This step-by-step guide will show you how to Define and Configure the Email Settings for your Company and Employees within the SEMS application.
This task of setting up Company Email Settings is typically done by the SEMS System Administrator in your Organisation.
Email Setup in the SEMS application is important for two reasons:
- These details will be printed on Reports & Transaction documents created in the SEMS application (e.g. Customer documents including Quotes, Sales Orders & Invoices, as well as Supplier documents such as Purchase Orders and Supplier Claim Forms)
- One-Time-Pins (OTP) can be emailed to, and received by SEMS users ("Forgot Password" & related Login / System accessibility issues).
Email configuration details will be required for this process, and can be obtained from your Email Service Provider.
Company Profile
Primary & Alternate Email
- Navigate to the Company Profile screen in the SEMS system.
Refer to the document titled "Company Profile & Settings".
To make changes to the Company Profile screen, click the Deactivate button on the form Action Bar.
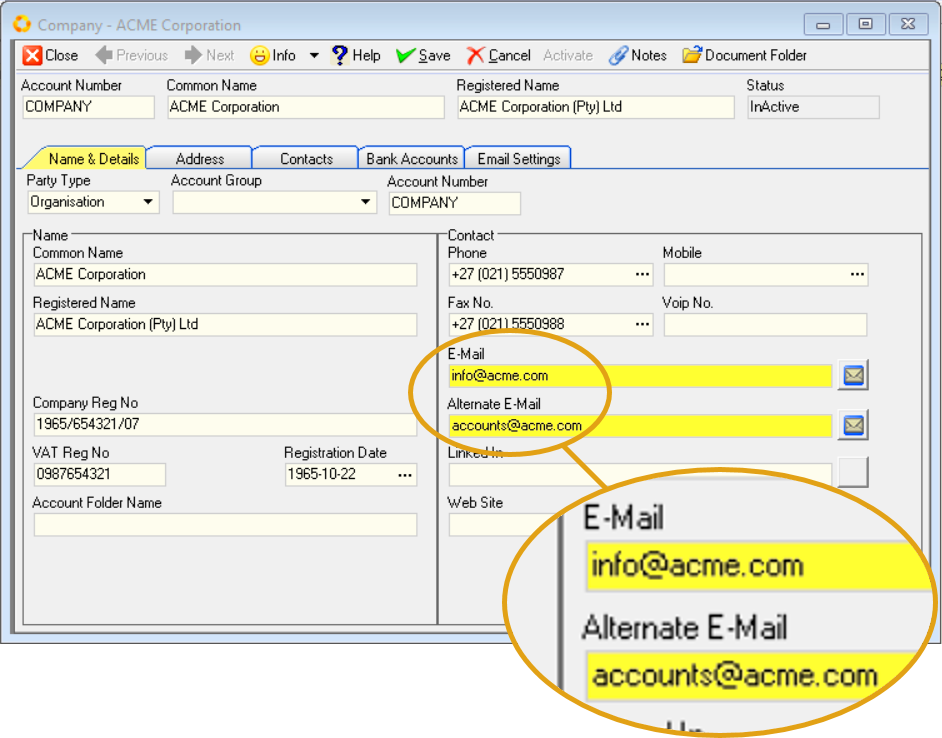
Your Company's Primary Email and Alternate Email addresses are captured in the Name & Details TAB sheet, under the Contact section.
-
If not already captured, enter the Company's Primary Email address in the E-Mail field.
-
Type the Alternate Email address in the Alternate E-Mail field.
To send a test email, click on the Mail Icon on the right of any of these two fields.
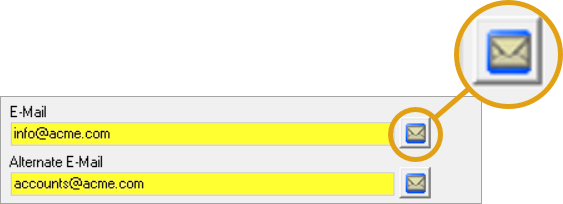
Your default email client application will open, enabling you to compose a new email and send it to the relevant address.
- Click the Save button on the form Action Bar.
Email settings - Outgoing
- Click the Email Settings TAB to access the sheet with Outgoing Mail settings fields.

The primary and alternate email addresses will be displayed in the Email fields, as captured previously.
Email configuration details will be required for the next steps in the process, and can be obtained from your Email Service Provider.
-
Click on the Mail Host field (under the Outgoing Mail section), and enter the email host information.
-
Click on the Mail Port field and enter the email port number(s).
-
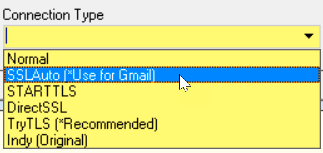
Click the drop-down arrow in the Connection Type field, and then select the relevant option from the list.
-
Click on the Password field to enter the associated password for the email account.
-
Repeat the steps above to enter the details in the fields under the Outgoing Alternative Mail section.
-
Once you have entered the necessary and available information, you should click the Save button on the form Action Bar.
-
The Test Email button now becomes accessible.
Test Email
-
To test that the outgoing email settings have been correctly captured, click the Test Mail icon on the form Action Bar.
-
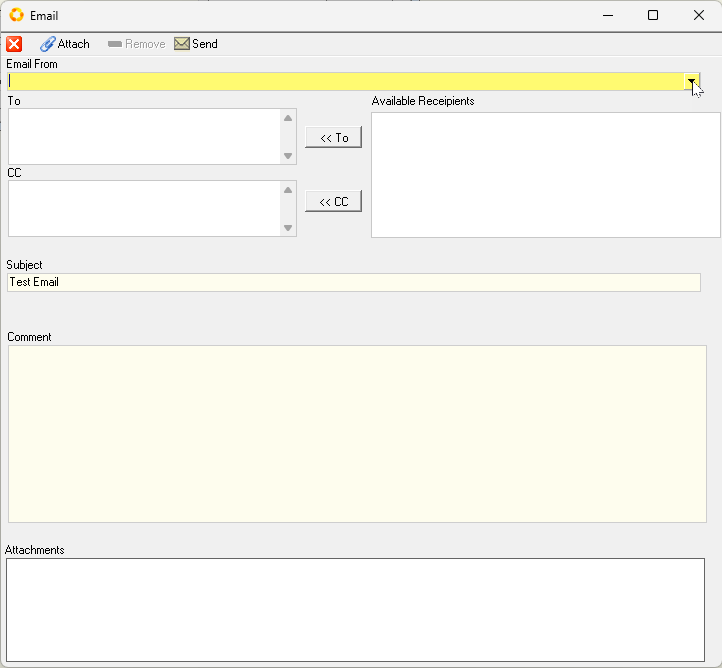
The program will display the Email window.
-
Click the drop-down arrow in the Email From field. Then select the Primary outgoing email address option.
-
Type in the email address you would like to send to in the To field.
-
You can add additional email addresses as required in either the To or Copy (CC) fields.
-
The program will automatically populate the Subject line with "Test Email". Alter this if needed.
-
You can add any text for the email you are sending in the Comment field.
-
And you can add any addition attachments to the email by clicking the
button at the top of the form.
-
When you have completed your email, click the
button at the top of the form.
The Information dialog will display "email was sent successfully!".
-
Click [ Ok ] to continue.
-
Repeat the above steps to test the Alternate Outgoing Email address.
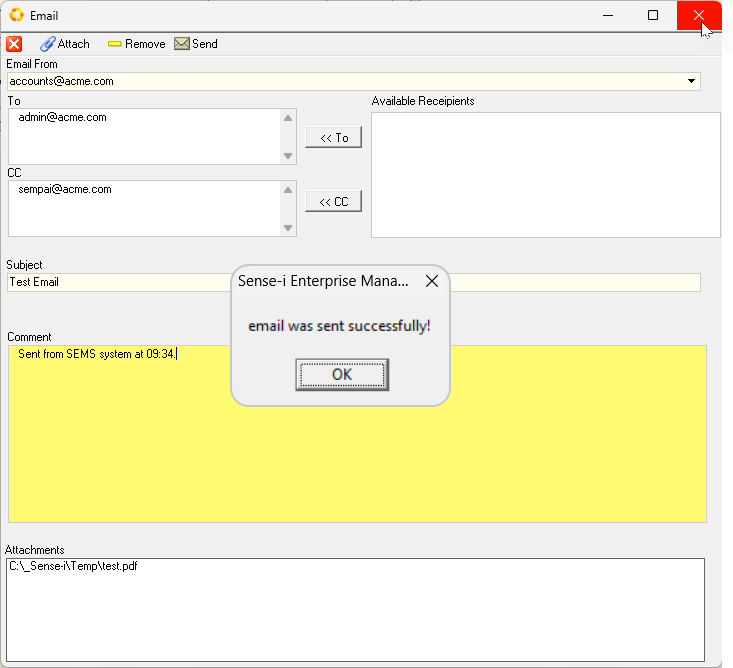
- To close the Email screen, click the X icon button at the top-right of the screen.
The system will close this screen and return you to the Company Profile screen.
-
Once you have entered the necessary information, you should click on the Save button on the form Action Bar to save this information to the database.
-
To Activate the Company Profile, select the Name & Details TAB, then click on the Activate button.
Employee Profile
The Setup and Configuration of Employee Emails in the SEMS application is of significant importance, especially for those Employees that are Company Representatives.
The information captured in this process will be included on Transactional documents and reports, including Customer documents such as Sales Quotes, Sales Orders and Sales Invoices, as well as those documents pertaining to Suppliers such as Purchase Orders & Supplier Claim Forms.
Refer to the document titled "Capture Employee Information".
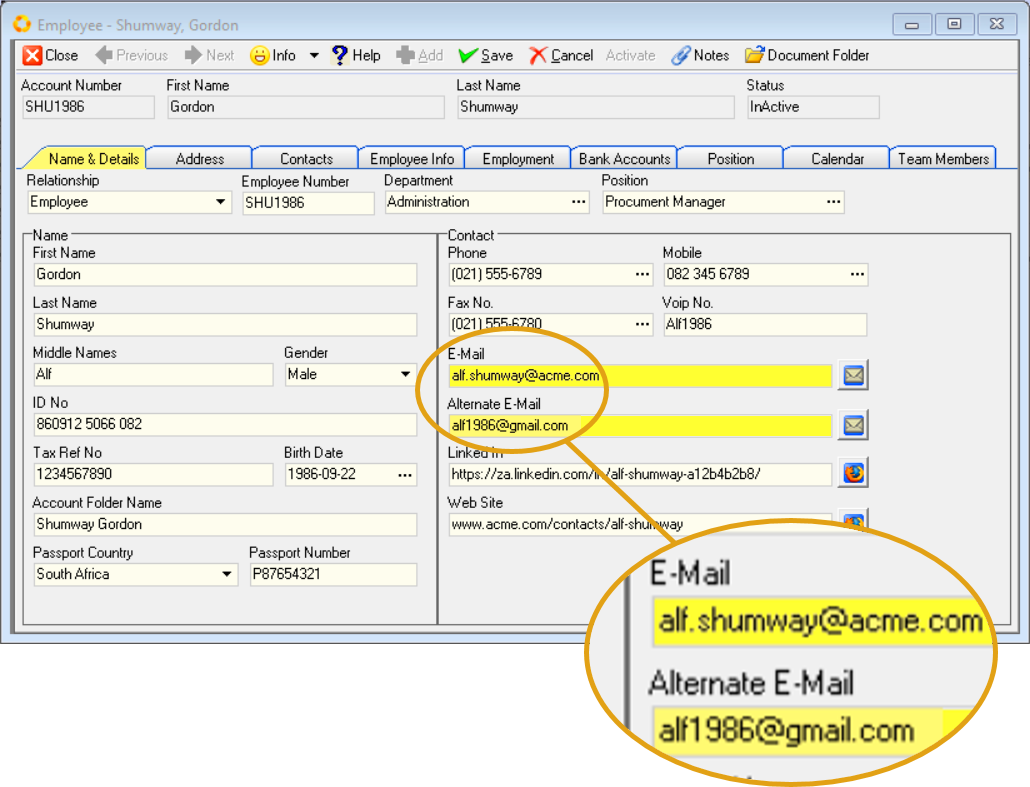
Employee's Primary Email and Alternate Email addresses are captured in the Name & Details TAB sheet, under the Contact section.
To make changes to the Employee Profile, click the Deactivate button on the form Action Bar.
-
Enter the Employee's Primary Email address in the E-Mail field.
-
Type the Alternate Email address in the Alternate E-Mail field.
To send a test email, click on the Mail Icon on the right of any of these two fields.

Your default email client application will open, enabling you to compose a new email and send it to the relevant address.
- Click the Save button on the form Action Bar.
SEMS Logon User Code
This procedure is relevant where the Employee will be using the SEMS system as a Company Representative, and will use the Outgoing Email function to send Transaction documents to Customers / Suppliers.
The SEMS System Administrator must first add the Employee to the Login User list.
Refer to the document titled Add SEMS Users.
- Click the Employment TAB.
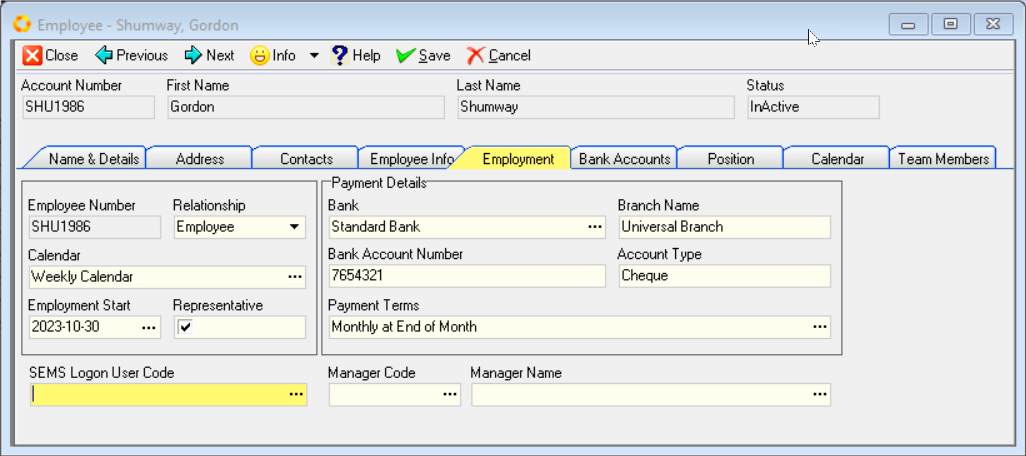
The Employment worksheet is displayed.
- Click on the three-dot button in the SEMS Logon User Code field.
The Select Logon User screen is displayed.
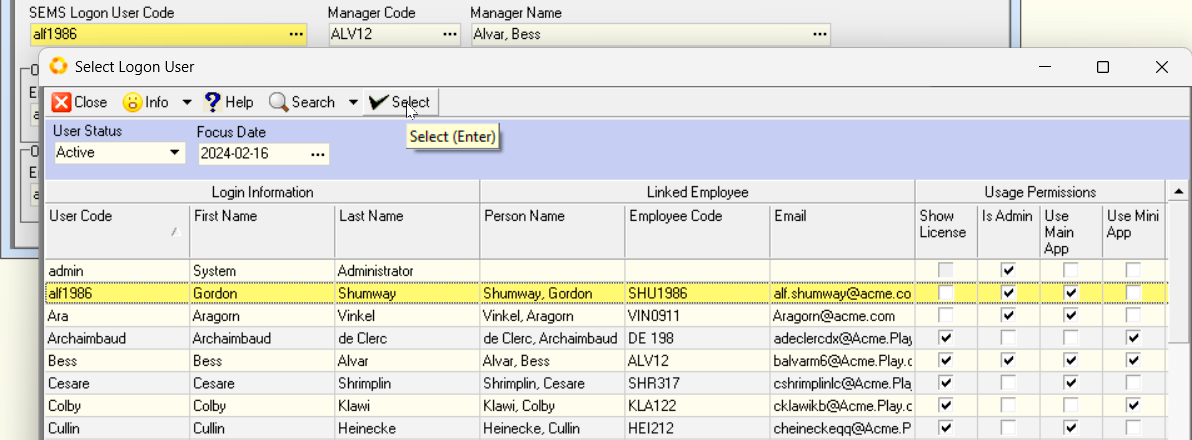
- Click on the relevant record row, and then click the Select button on the list Action Bar.
The system will return to the Employee Profile screen.
The Outgoing Mail and Outgoing Alternative Mail sections now become available and accessible.

Employee Email settings - Outgoing
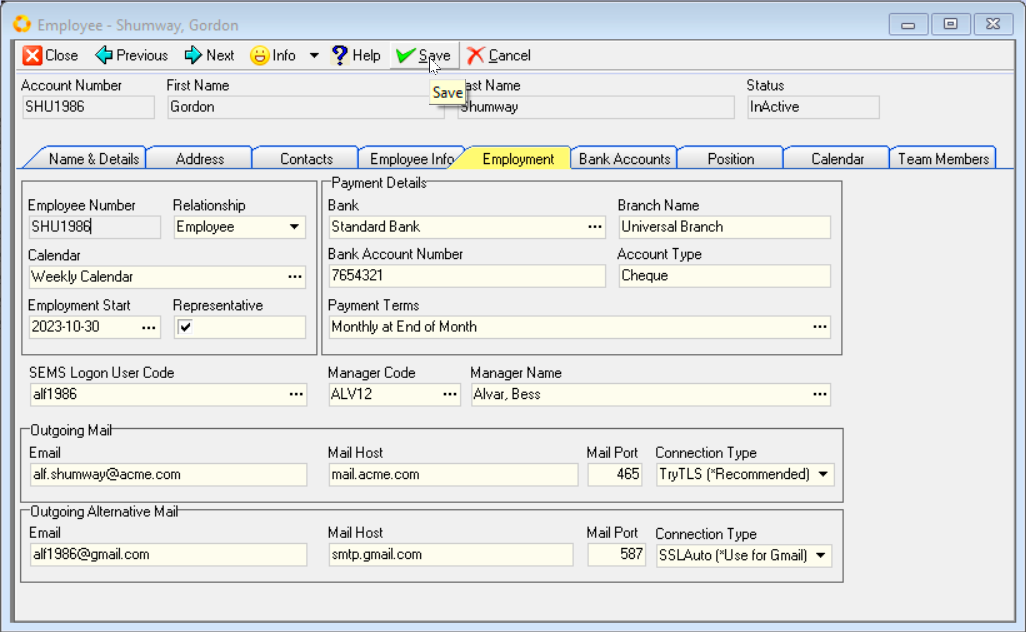
The primary and alternate email addresses will be displayed in the Email fields, as captured previously in the Name & Details TAB.
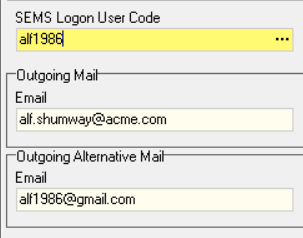
Email configuration details will be required for the next steps in the process, and can be obtained from your Email Service Provider.
- Click on the Mail Host field (under the Outgoing Mail section), and enter the email host information.

-
Click on the Mail Port field and enter the email port number(s).
-
Click the drop-down arrow in the Connection Type field, and then select the relevant option from the list.

- Repeat the steps above to enter the details in the fields under the Outgoing Alternative Mail section.
-
Once you have entered the necessary information, you should click on the Save button on the form Action Bar to save this information to the database.
-
To Activate the Employee Profile, select the Name & Details TAB, then click on the Activate button.
SEMS Log in & Email Password Setup
Once the Email settings have been captured, the next step would be for the Employee / SEMS User to Log in to the SEMS application.
Then the Employee / SEMS User will be able to set his/her Email password and test the outgoing Email function.
Employee SEMS Log in
Refer to the document titled Log in & Maintain Password.
- Log in to the SEMS application with SEMS Logon User Code as received from the SEMS System Administrator.
Setup Email Password
-
Click the Tools button on the Main Navigation bar.
-
Then click Email Settings in the drop-down menu.
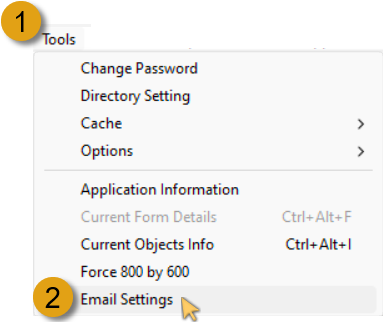
The Email Settings screen is displayed, with the Email address, Mail Host, Mail Port and Connection Type fields populated with the information as previously entered by the SEMS System Administrator.

-
Click on the Password field under the Outgoing Mail section.
-
Enter the Password for the Email Account as received from your Email Service Provider.
-
Repeat the steps above to enter the password under the Outgoing Alternative Mail section.
-
Click the Save button on the Action Bar.
-
The Test Mail button now becomes accessible.
Test Outgoing Email
-
To test that the outgoing email settings have been correctly captured, click the Test Mail icon on the Action Bar.
-
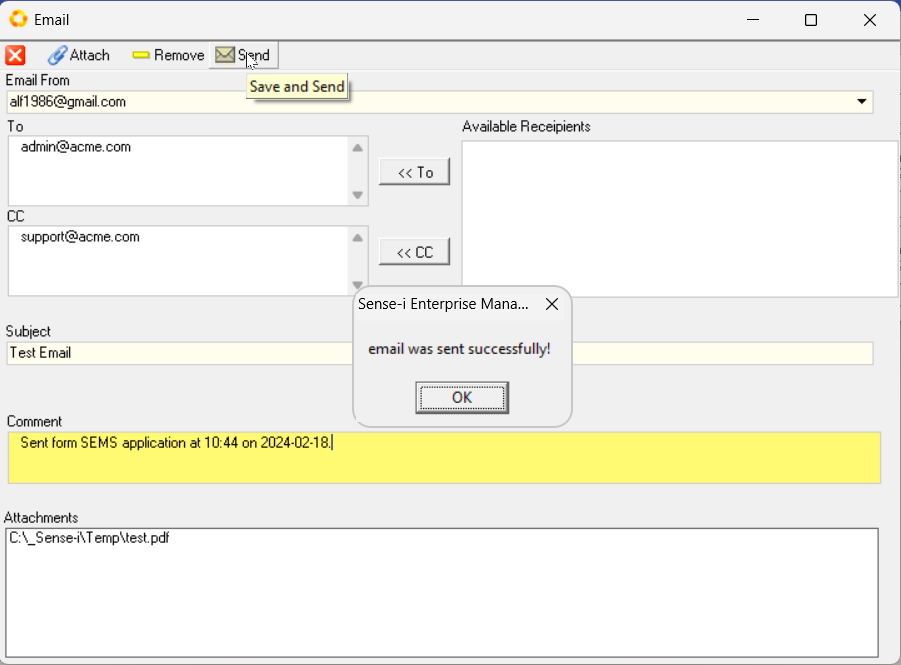
The program will display the Email window.

- Click the drop-down arrow in the Email From field. Then select the Primary outgoing email address option.

-
Type in the email address you would like to send to in the To field.
-
You can add additional email addresses as required in either the To or Copy (CC) fields.
-
The program will automatically populate the Subject line with "Test Email". Alter this if needed.
-
You can add any text for the email you are sending in the Comment field.
-
And you can add any addition attachments to the email by clicking the
button at the top of the form.
-
When you have completed your email, click the
button at the top of the form.
The Information dialog will display "email was sent successfully!".
-
Click [ Ok ] to continue.
-
Repeat the above steps to test the Alternate Outgoing Email address.
- To close the Email screen, click the X icon button at the top-right of the screen.
The system will close this screen and return you to the Email Settings screen.
- Click the Close button on the Action Bar.
This is the end of this procedure.