Company Profile & Settings
Introduction and Overview
This step-by-step guide will show you how to Define and Configure the Company Profile within the SEMS application.
This task is typically done by the SEMS System Administrator in your Organisation.
The Setup and Configuration of your Company in the SEMS application is of paramount importance.
The information captured in this process will be included on Transactional documents and reports, including Client-facing documents such as Sales Quotes, Sales Orders and Sales Invoices, as well as those documents pertaining to Suppliers such as Purchase Orders & Supplier Claim forms.
Navigate to Company Setup
-
Click Setup on the Main Navigation Menu.
-
Then click Company in the drop-down menu.
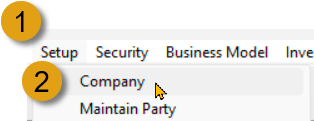
- The system will open a screen titled "Company List", with the Company listed in the first row of the grid.
- Select the row, then click the Open button on the Action Bar.
You can also double-click the row to open the Company Profile screen.
Company Profile
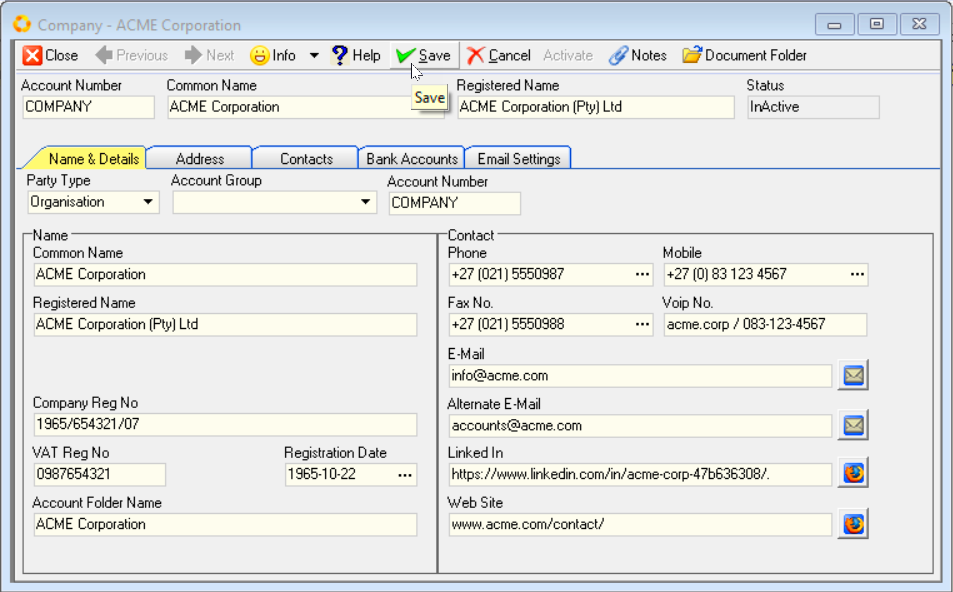
The Company Profile screen, Company - "Name of the Company", is displayed.
This screen consists of:
- The form Action Bar, with various buttons, at the top.
- The Header section with the Company Account Number, Common Name and Registered Name fields. The Status field displays the current status of the Company Profile.
- The TAB sheets:
- Name & Details
- Address
- Contacts (Employees)
- Bank Accounts, and
- Email Settings
You enter information about the Company in the fields on these TAB sheets.
The Header information fields are automatically pre-populated. This from information received by the Sense-i team on initial setup of the Company Database.
If the Status of the Company Profile screen is Active, the various fields will be greyed out and won't be accessible.
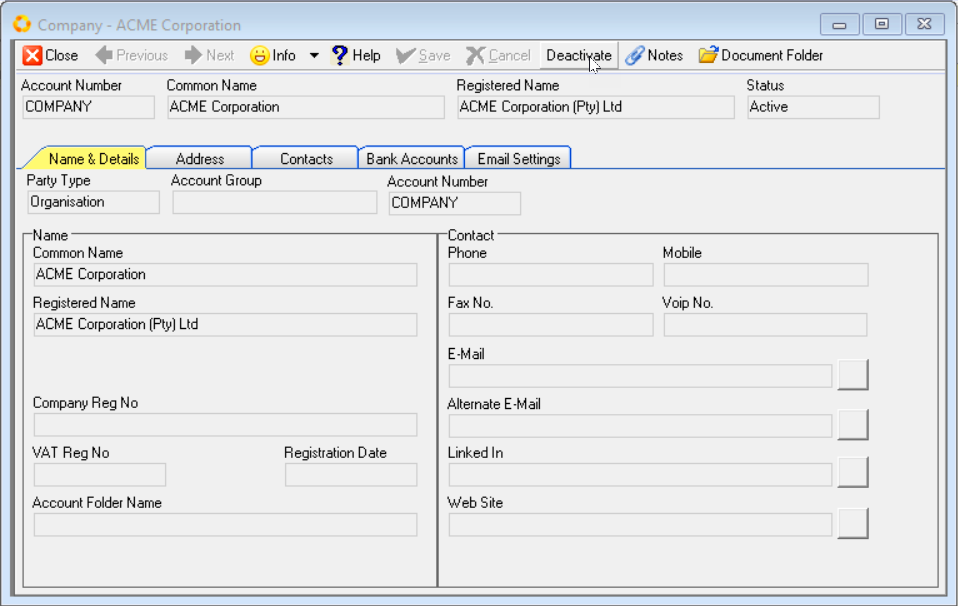
To enter information and/or make changes to the Company Profile screen, click the Deactivate button on the form Action Bar.
Name & Details
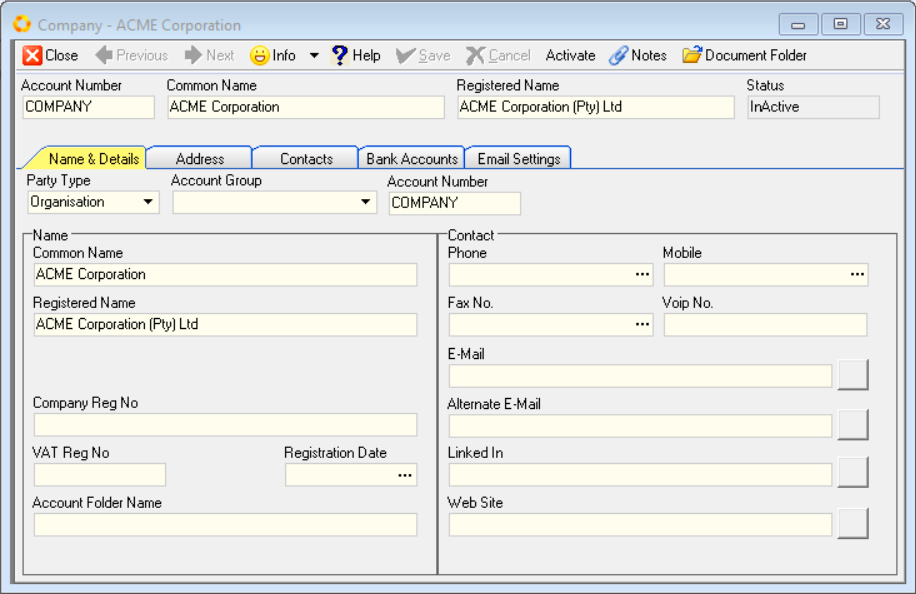
Under the Name section, the Common Name & Registered Name fields are automatically pre-populated from information received by the Sense-i team on initial setup of the Company Database.
-
Enter the Company Registration Number in the Company Reg No field.
-
Enter the VAT Registration Number in the VAT Reg No field.
-
Click the three-dot button in the Registration Date field to capture or set the Registration Date - that is the date on which the company was registered.
The Account Folder Name field contains the folder/sub-directory name that will be used by the system to store various documents relevant to the Company.
The Company Directory needs to be established under Party Document Folders.
If your Company utilises the SEMS Certificates Module, the Company Certificate Directory needs to be established under Party Certificate Folder section.
These directories can be setup by selecting Tools / Directory Setting from the Main Navigation Menu.
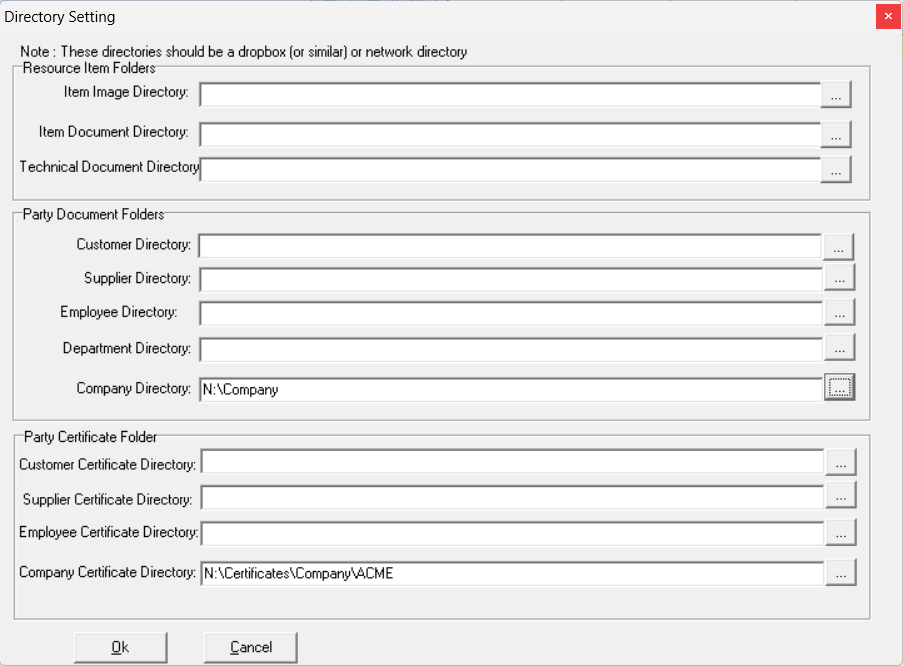
These directories should be created as shared folders on your company's Local Area Network OR shared Cloud-based drive.
Refer to the document titled "Directory Settings".
- Enter a custom Account Folder Name, of your choice, in the Account Folder Name field.
Primary Contact Information
The Primary Contact Information fields are displayed under the Contact section of the Name & Details TAB.
-
Enter the main phone number for the Company in the Phone (number) field.
-
Enter the mobile number of the Company in the Mobile (number) field.
-
Enter the Fax Number in the Fax No. field.
-
If you use the internet to communicate using an application like Skype / WhatApp / Telegram, enter the Company's VOIP (number / name) in this field.
-
Enter the Company's Primary Email address in the E-Mail field.
-
Type the Alternate Email address in the Alternate E-Mail field.
To send a test email, click on the Mail Icon on the right of any of these two fields.
Your default email client application will open, enabling you to compose a new email and send it to the relevant address.
-
Enter the Company's LinkedIn URL address.
-
Enter the Website Address for the Company in the Web Site address field.
-
Once you have entered the necessary and available information, you should click on the Save button to save this information to the database.
Once the Company Information has been saved, click on the button (top-right of the form) and confirm the relevant folder to be created and shared across the network.


This folder is typically used to store relevant & important Company documents, such as Company Registration documents, VAT Registration documents, Bank Account Confirmation letters etc.
Address
Address information is used on Company letterheads, Transaction Documents and Reports, as well as Department Profiles when defining the Company / Organisation Structure.
- Click the Address Tab to add Addresses for the Company.

-
To add an address for the Company to the database, click the Add button on the Action Bar.
-
The system will display a window titled Add Address that enables you to store various Physical, Postal and Shipping Addresses.
-
You can enter an Address Name for the address you are capturing.
-
Choose the Address Type from the drop-down List.
-
Enter the Street / P.O. Box address. You can do this over two lines.
-
Enter the Suburb.
-
Enter the City.
-
Enter the Province (State) in which the Company is located.
-
Enter the Postal Code (Zip Code).
-
Select the Country.
The system maintains a list of all suburbs, cities, provinces and postal codes for the country. When you have entered sufficient information for the system to find a unique match, you can click the Fill button and the system will complete the address with the correct information.
- Click the Save button once you have completely entered the address and then click the Close button.
If you need to create additional addresses for the Company then repeat the steps above for each address you need to load.
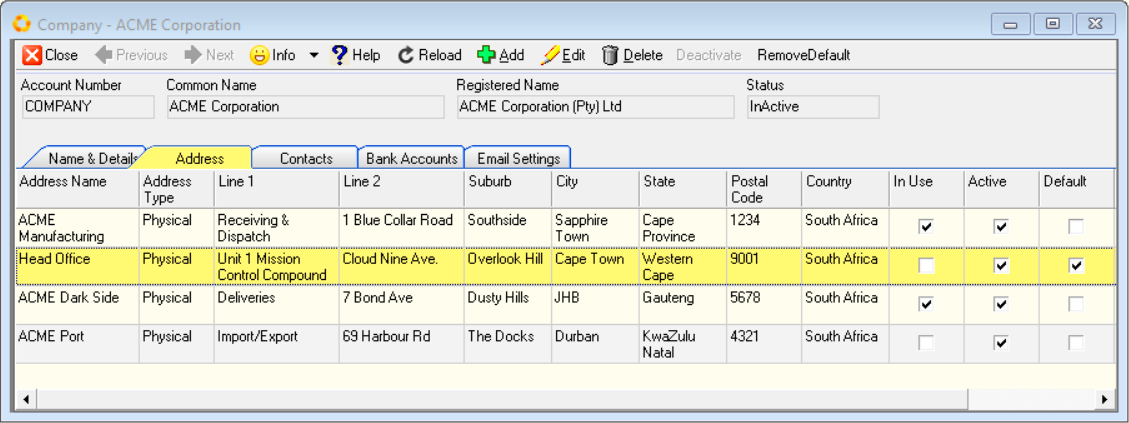
The system will display each address you have added in a list of addresses on the Address Tab.
Contacts
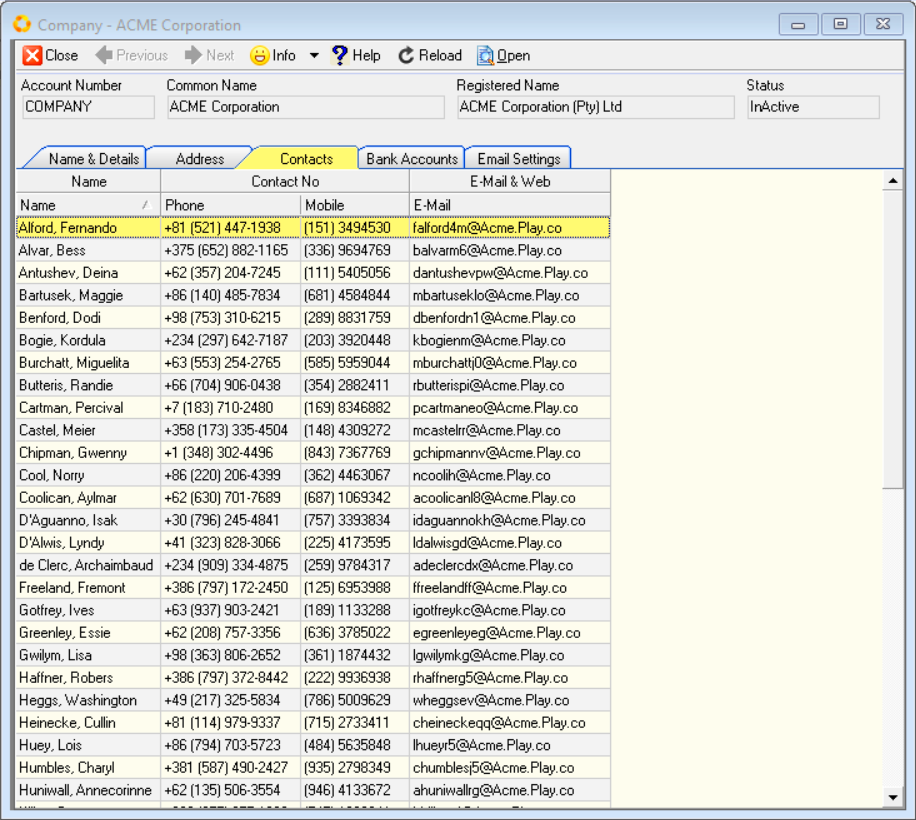
- Click on the Contacts TAB to view the Company's Employee grid list.
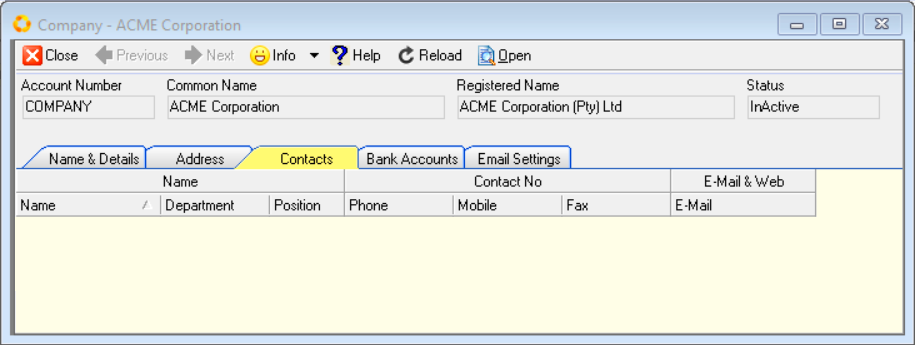
Company Employee's are automatically displayed in the Contacts list grid once Employee Profiles have been captured in the SEMS application.
To Add Employee Contacts to the grid list, refer to the document titled "Capture Employee Information".
- Once the Add Employee procedure has been followed, click the Reload button.
The Contacts TAB sheet will display the updated Employee details.
Bank Accounts
-
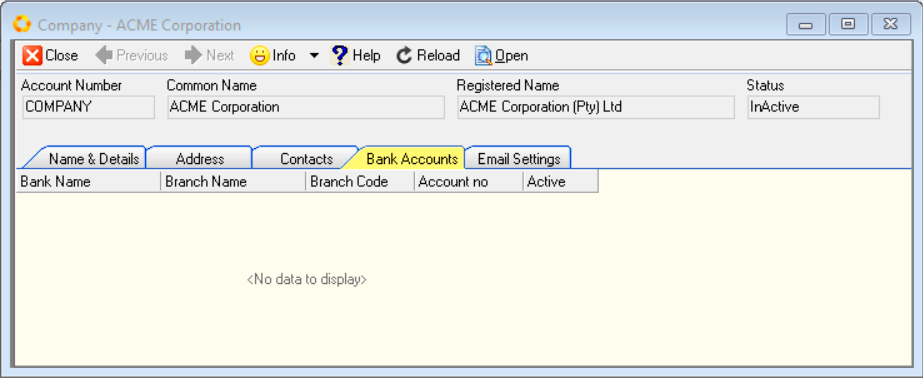
To view Bank Account details for the Company, click the Bank Accounts TAB.
The Bank Accounts grid list screen will be displayed.
To Add Bank Accounts to the grid list, refer to the document titled "Bank Account(s) (SAF-4001)".
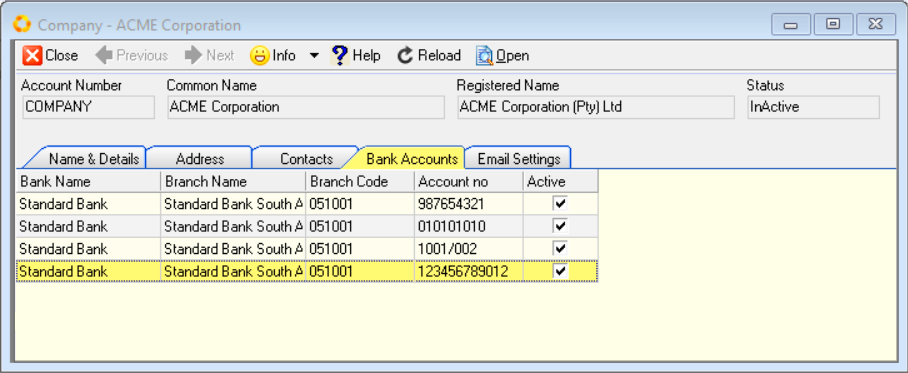
- Once the Add Bank Accounts procedure has been followed, click the Reload button.
The Bank Accounts TAB sheet will display the updated Bank Account details.
Email settings - Outgoing
- Click the Email Settings TAB to access the sheet with Outgoing Mail settings fields.

The primary and alternate email addresses will be displayed in the Email fields, as captured previously.
Email configuration details will be required for the next steps in the process, and can be obtained from your Email Service Provider.
For detailed guidelines on configuring Outgoing Email Settings, refer to the document titled "Configure Outgoing Email Settings"
- Once you have entered the necessary information, you should click on the Save button on the form Action Bar to save this information to the database.
Save & Activate
Once you have reveiwed all the information in the different TABs on the Company Profile screen, and you are satisfied that the information is correct, the Company Profile is complete.
-
Ensure you are on the Name & Details TAB.
-
Click the Save button, then click the Activate button on the form Action bar.
-
Click the Close button to close and exit the Company Profile screen, and return to the Company grid List screen.
The information you have entered will be included on Reports and Transaction documents, including Customer-facing documents such as Sales Quotes, Sales Orders and Sales Invoices, as well as those documents pertaining to Suppliers such as Purchase Orders & Supplier Claim forms.
This is the end of the procedure.