Configuration - Directory Path Settings
Introduction
This guideline relates to the procedure used to define, add and maintain Directory Path folders relevant to product & materials (Resource Items), and specific parties, including Customers, Suppliers, Employees, Departments, and the organisation / Company itself.
Step-by-step Guideline
Creating Directories and Folders
This process is usually performed by the System Administrator with the necessary rights and security access to create and maintain Directory Structures on a specific shared drive.
The directories and folders created should be shared with relevant colleagues, SEMS users and/or management of the company - this could be a shared Local Area Network (LAN) directory or shared cloud-based folders (e.g. Dropbox, Google Drive etc.).
-
Open the Windows File Manager.
-
Navigate to the relevant SEMS Shared Network Drive or Cloud based folder.
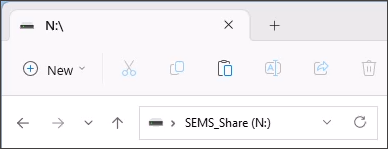
- Create the following directories;
- Company
- Departments
- Customer
- Supplier
- Employee
- Resource Items
Under Resource Items create individual folders for;- Images
- Documents,
- Technical Documents
If your company utilises the Certificates & Rating system module, create the following directory and sub-directories;
- Certificates
Under Certificates create individual folders for;- Customer
- Supplier
- Employee
- Company
Once created, the directory structure would resemble the following;
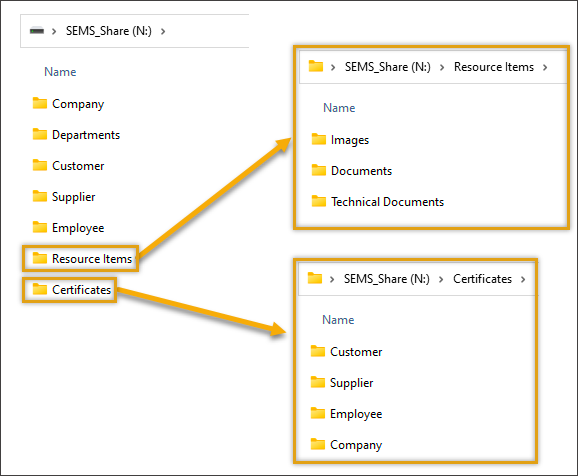
The above directory structure relates directly to the Directory Settings naming convention in the SEMS application. The naming convention for directory creation on your shared drive/folder could be structured to conform to your company specific naming/numbering conventions.
-
Assign the appropriate access rights and securities to the individul SEMS users and team collegues within your organisation - this for each folder.
-
Inform your relevant collegues of the above network location and structure.
SEMS Configuration - Directory Settings
In this guideline, we will focus on the process of adding and maintaining directories, sub-directories and folders for Resource Items in the SEMS application.
The same principles and procedures should be used when defining, adding and maintaining directories, sub-directories and folders relevant to specific parties - Customers, Suppliers, Employees, Departments, and the Company.
This procedure should be done by/for each individual and workstation using the SEMS application.
-
Select the Tools option from the Main Navigation Menu.
-
Then click on Directory Setting.
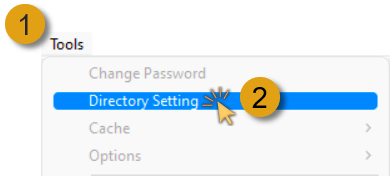
- The system will open a screen titled "Directory Setting".
This screen lists all the fields for Directories & Folders relevant to Resource Items and each specific party group.
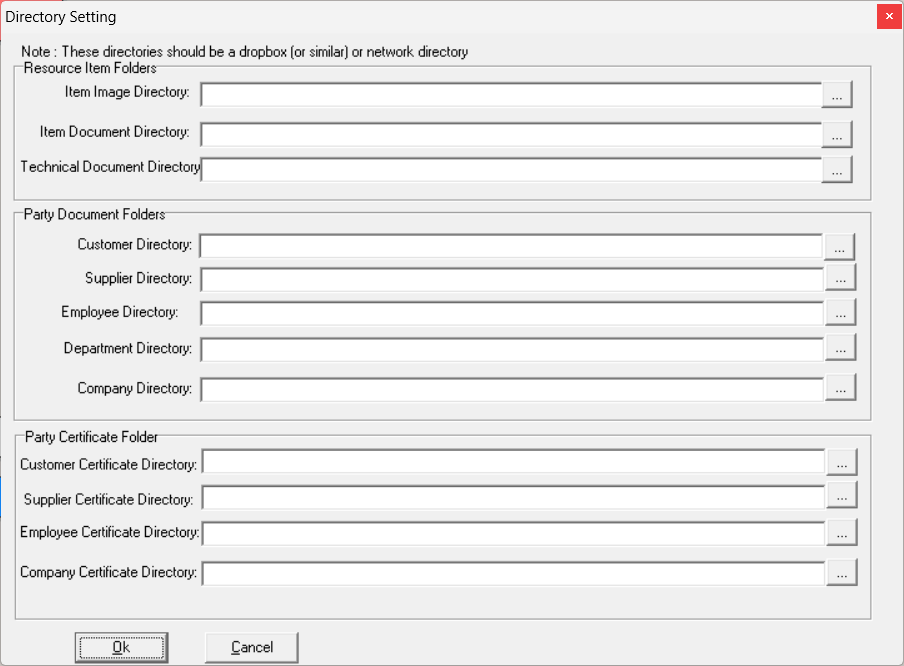
In this example we will define the Resource Item Folder paths.
- In the Resource Item Folders section, click on the three-dot button in the Item Image Directory field.
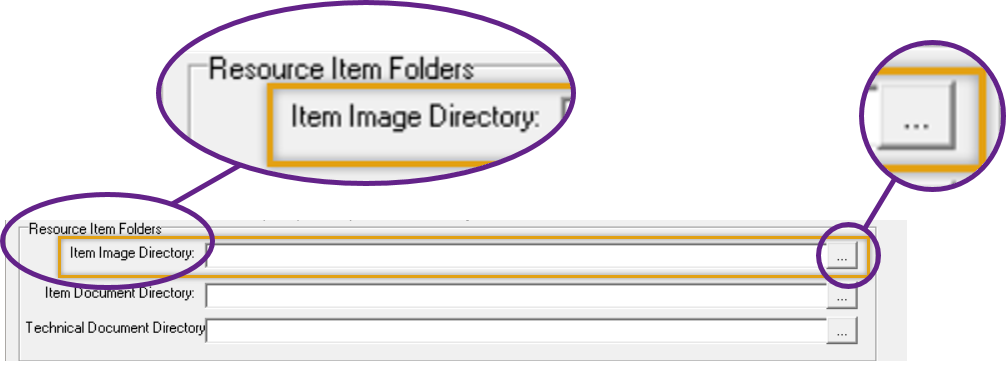
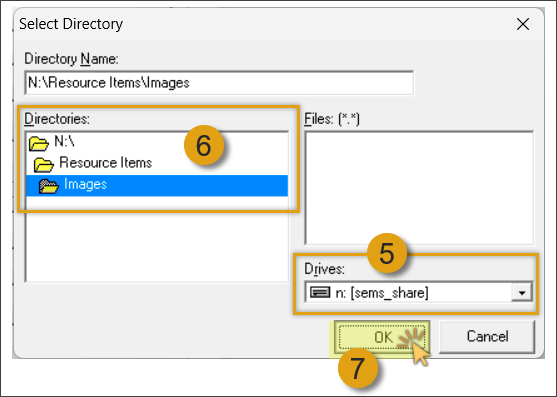
The Select Directory pop-up screen is displayed.
-
Select the shared network Drive (LAN drive or cloud-based storage drive).
-
Navigate to the relevant folder in the Directories field, and double-click the appropriate folder.
-
Click the OK button.
In this instance we have selected N:\Resource Items\Images as displayed in the Directory Name field.
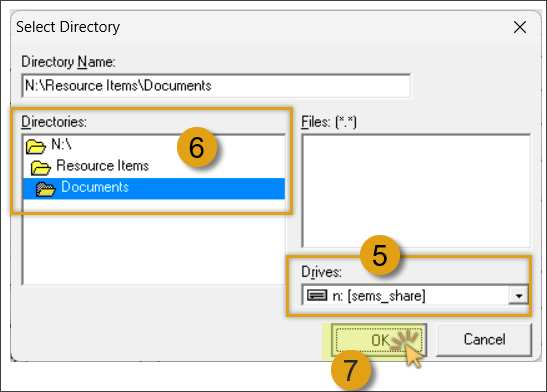
- In the Resource Item Folders section, click on the three-dot button in the Item Document Directory field.

The Select Directory pop-up screen is displayed.
-
Repeat Steps 5 - 7 as above.
-
Repeat the above process to add the Technical Document Directory path.
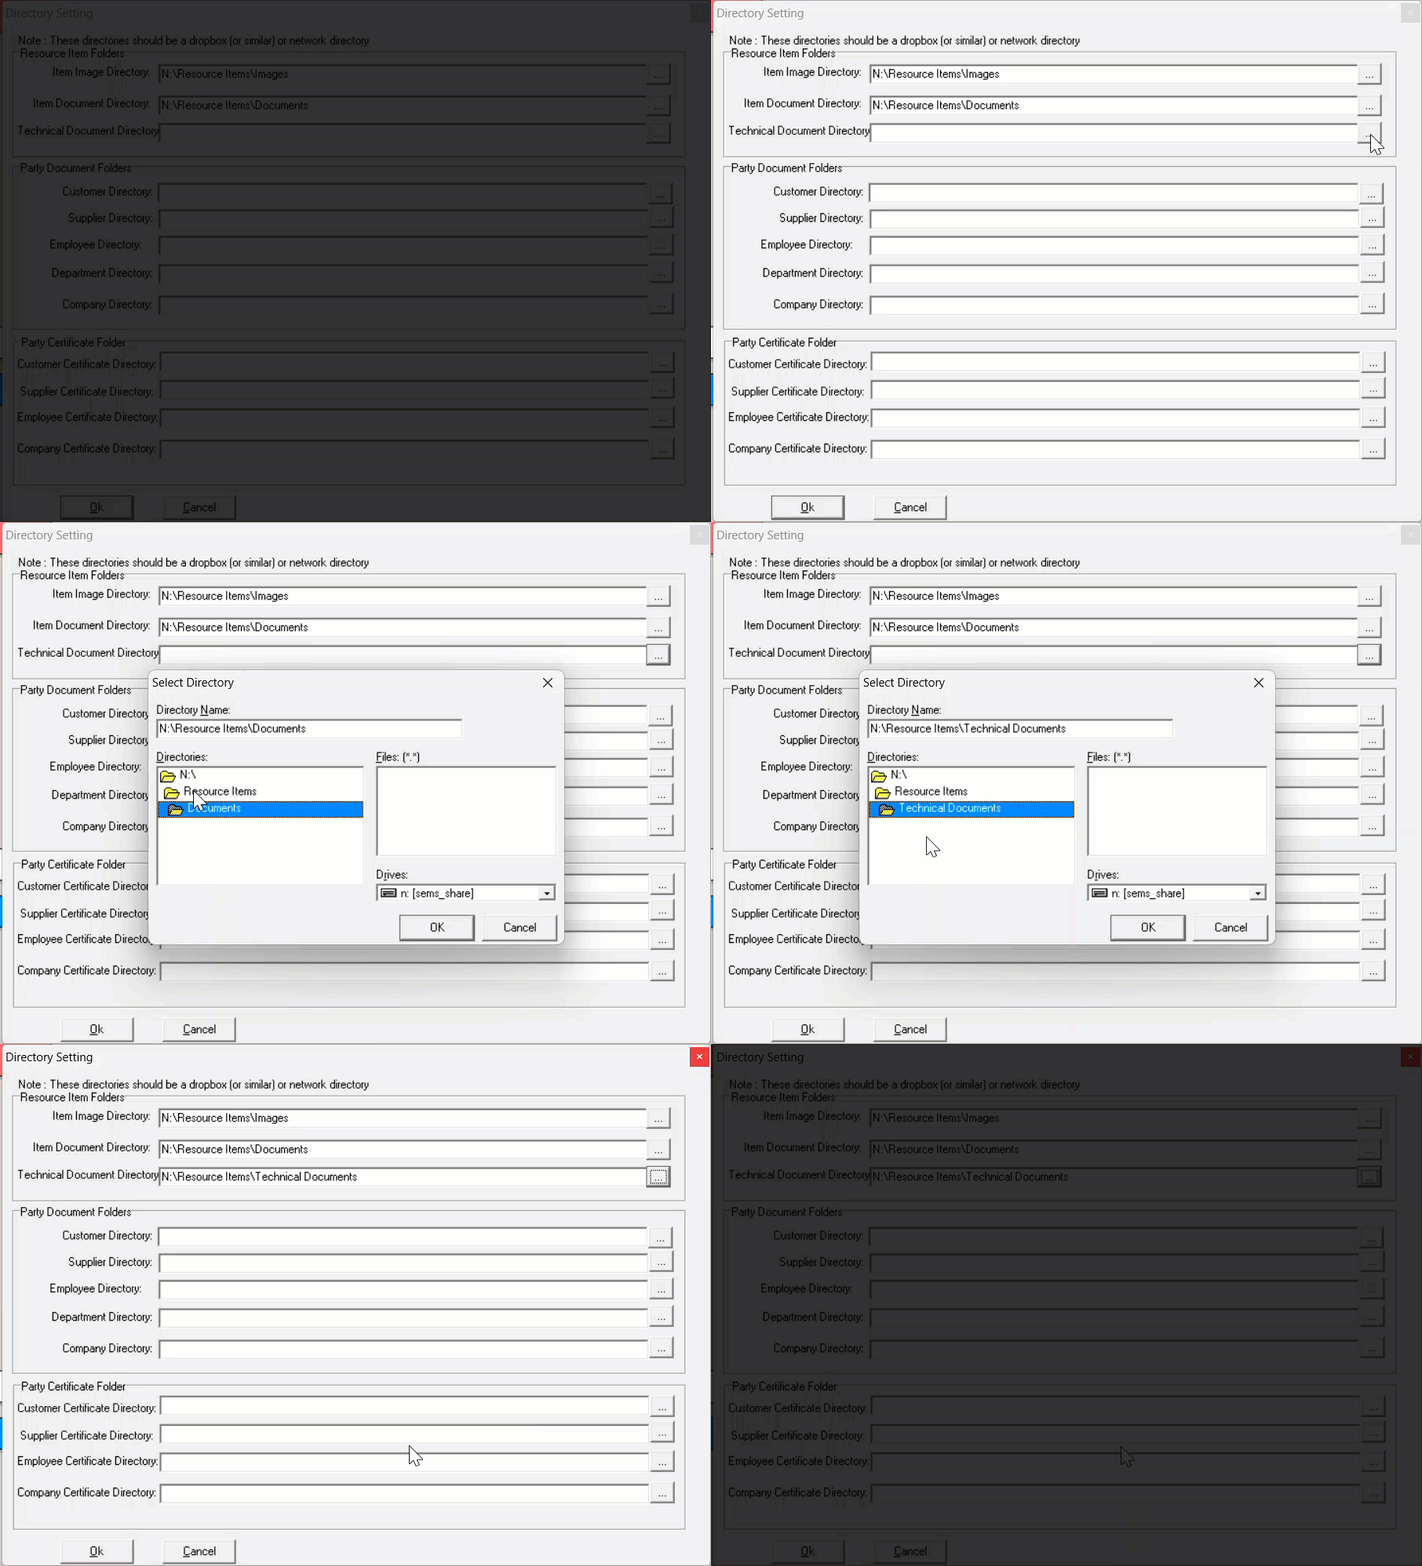
The Directory Settings for Resource Item Folders have now been defined.
Follow the same procedure as detailed above to define the Directory Settings for Customers, Suppliers, Departments and the Company.
If your company utilises the Certificates & Rating system module, create the directory paths in the same manner.
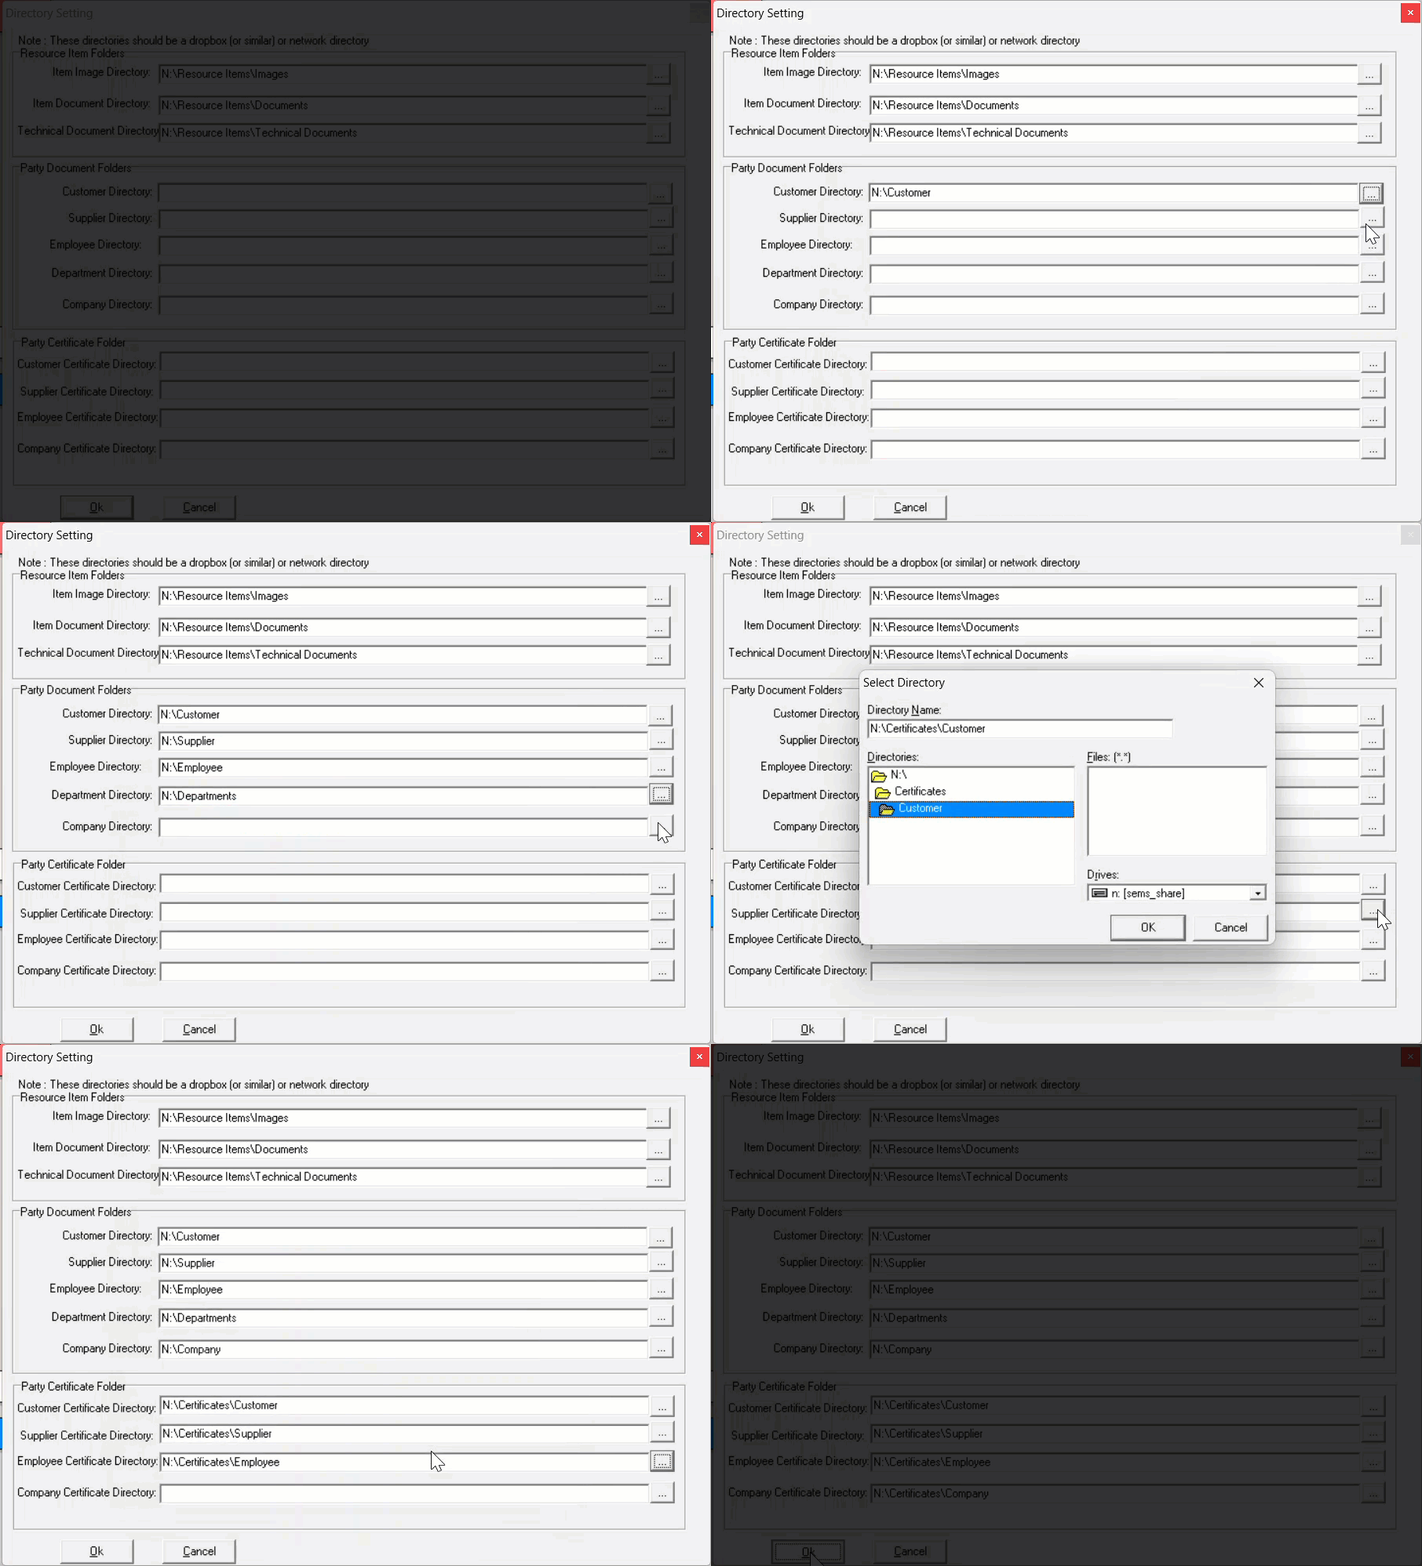
- Once you have entered all the information for Directory Settings click the OK button.
This is the end of this procedure.