Capture Email Addresses (Part 1)
Introduction
This step-by-step guide will show you how to capture the Email Addresses for your Company, Employees, Customers and Suppliers within the SEMS application.
Entering Email Addresses of Parties in the SEMS application is important for the following reasons:
- These details will be referenced in Reports & Transaction documents created in the SEMS application.
- Company email address on letterheads.
- Employee (Company Representative) email address appear as Sender on Customer documents including Quotes, Sales Orders & Invoices, as well as Supplier documents such as Purchase Orders and Supplier Claim Forms.
-
Customer / Supplier email details should be captured in order to contact them.
-
One-Time-Pins (OTP) can be requested by SEMS users ("Forgot Password" & related Login / System accessibility issues).
Primary & Alternate Email
Company Profile
- Navigate to the Company Profile screen in the SEMS system.
Refer to the document titled "Company Profile & Settings".
If the Status of the Company Profile screen is Active, the various fields will be greyed out and won't be accessible.
To enter information and/or make changes to the Company Profile screen, click the Deactivate button on the form Action Bar.
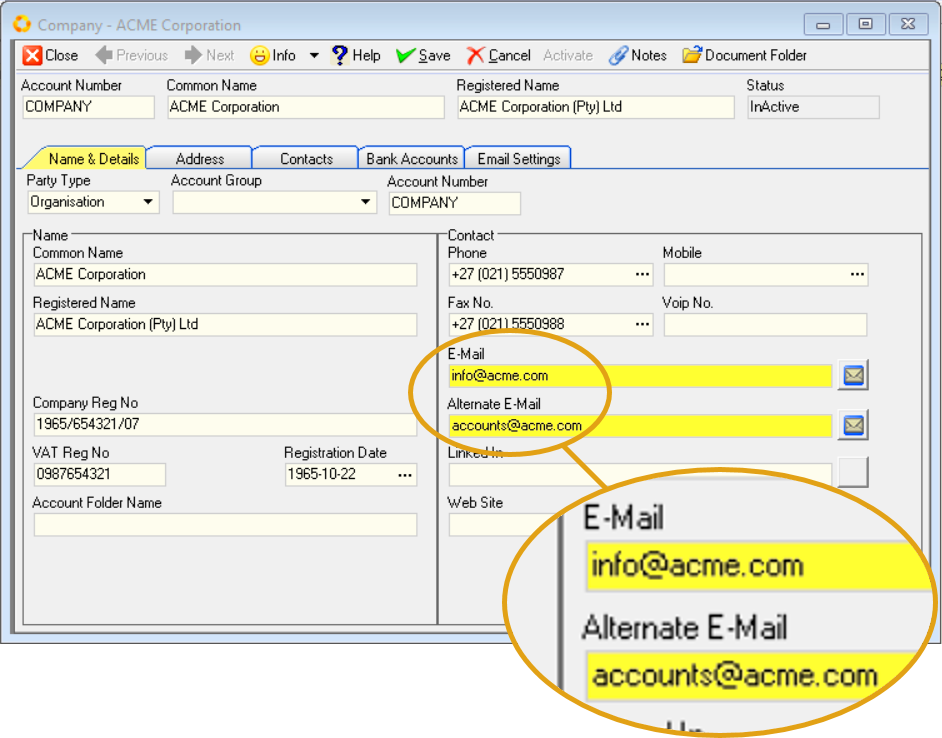
Your Company's Primary Email and Alternate Email addresses are captured in the Name & Details TAB sheet, under the Contact section.
-
Enter the Company's Primary Email address in the E-Mail field.
-
Type the Alternate Email address in the Alternate E-Mail field.
To send a test email, click on the Mail Icon on the right of any of these two fields.
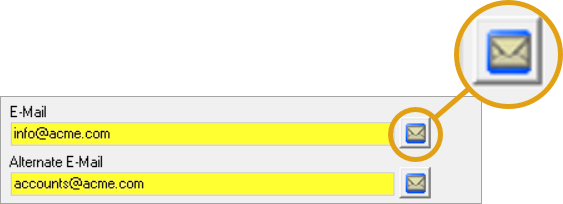
Your default email client application will open, enabling you to compose a new email and send it to the relevant address.
-
Once you have entered the necessary information, you should click on the Save button on the form Action Bar to save this information to the database.
-
To Activate the Company Profile, click the Activate button.
Employee Profile
Refer to the document titled "Capture Employee Information".
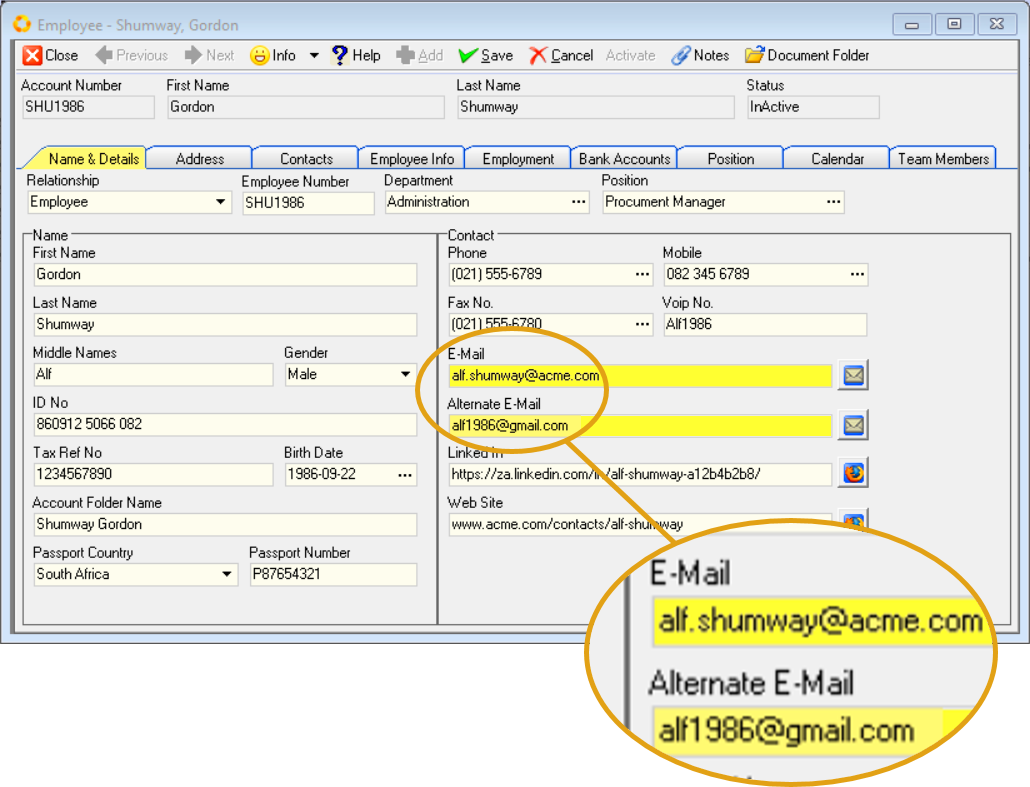
Employee's Primary Email and Alternate Email addresses are captured in the Name & Details TAB sheet, under the Contact section.
If the Status of the Employee Profile screen is Active, the various fields will be greyed out and won't be accessible.
To enter information and/or make changes to the Employee Profile screen, click the Deactivate button on the form Action Bar.
-
Enter the Employee's Primary Email address in the E-Mail field.
-
Type the Alternate Email address in the Alternate E-Mail field.
To send a test email, click on the Mail Icon on the right of any of these two fields.

Your default email client application will open, enabling you to compose a new email and send it to the relevant address.
-
Once you have entered the necessary information, you should click on the Save button on the form Action Bar to save this information to the database.
-
To Activate the Employee Profile, click the Activate button.
-
Click the Close button.
-
Repeat the steps above to capture email addresses for other Employees.
Customer Profile
Refer to the document titled "Capture Customer Profile".
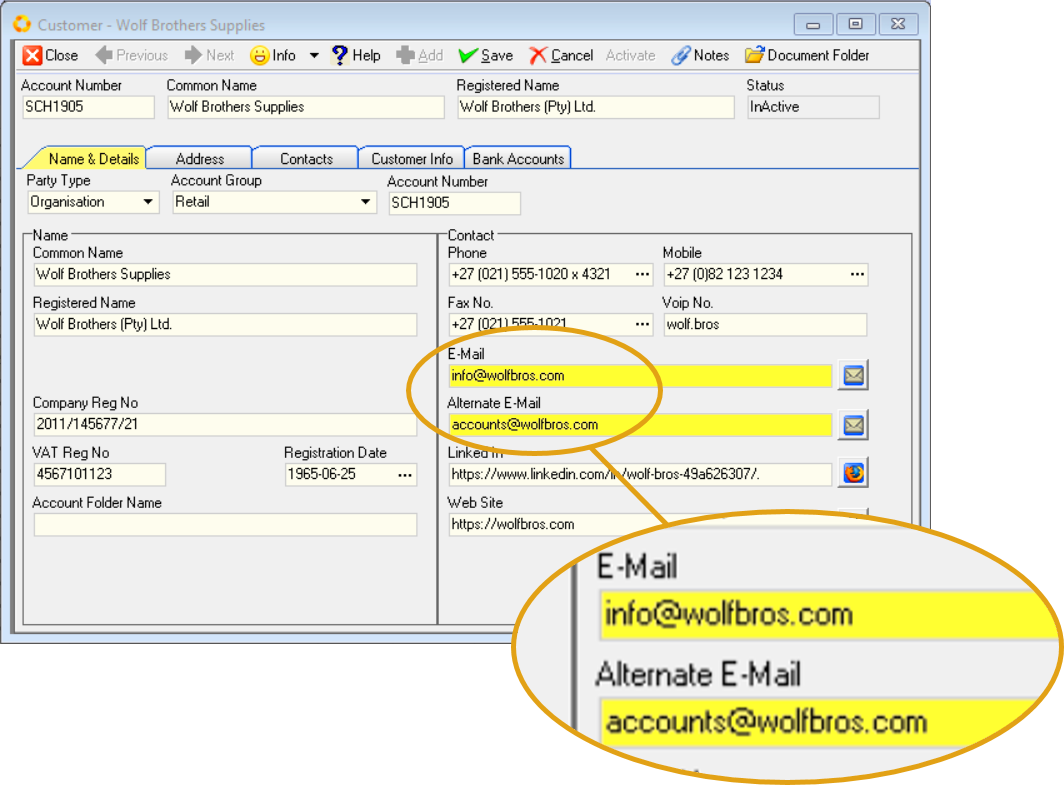
Customer Primary Email and Alternate Email addresses are captured in the Name & Details TAB sheet, under the Contact section.
If the Status of the Customer Profile screen is Active, the various fields will be greyed out and won't be accessible.
To enter information and/or make changes to the Customer Profile screen, click the Deactivate button on the form Action Bar.
-
Enter the Customer's Primary Email address in the E-Mail field.
-
Type the Alternate Email address in the Alternate E-Mail field.
To send a test email, click on the Mail Icon on the right of any of these two fields.
Your default email client application will open, enabling you to compose a new email and send it to the relevant address.
-
Once you have entered the necessary information, you should click on the Save button on the form Action Bar to save this information to the database.
-
To Activate the Customer Profile, click the Activate button.
-
Click the Close button.
-
Repeat the steps above to capture email addresses for other Customers.
Supplier Profile
Refer to the document titled "Supplier Information".
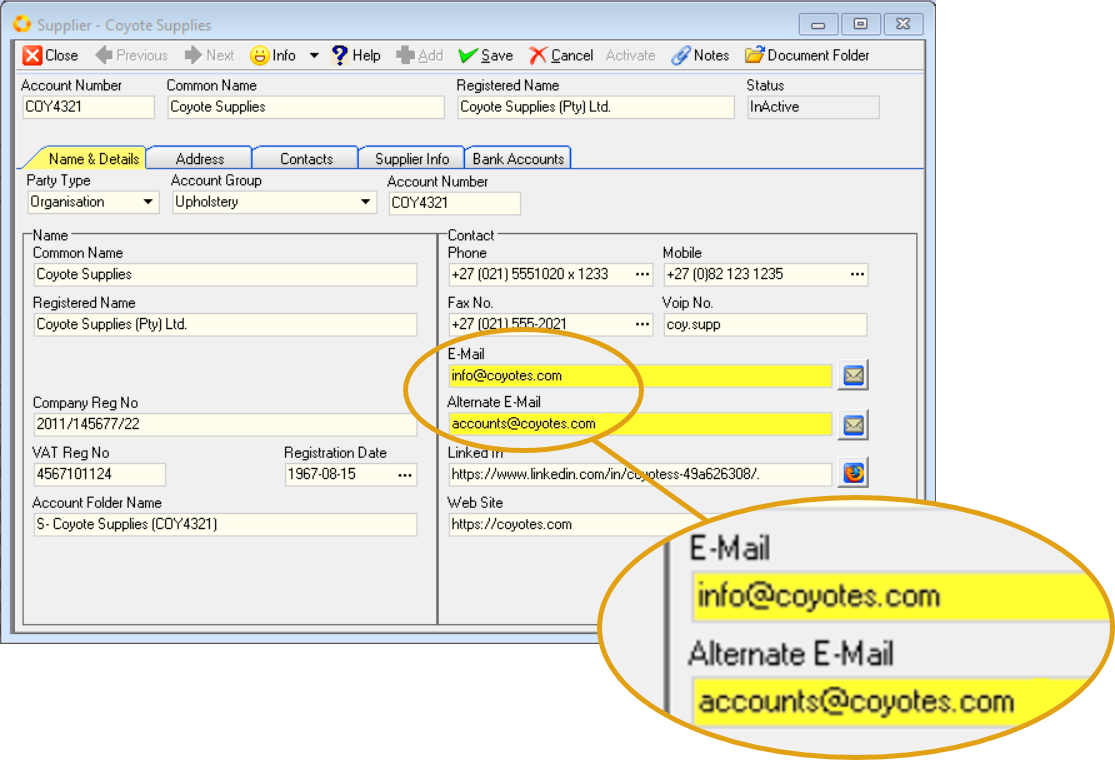
Supplier Primary Email and Alternate Email addresses are captured in the Name & Details TAB sheet, under the Contact section.
If the Status of the Supplier Profile screen is Active, the various fields will be greyed out and won't be accessible.
To enter information and/or make changes to the Supplier Profile screen, click the Deactivate button on the form Action Bar.
-
Enter the Supplier's Primary Email address in the E-Mail field.
-
Type the Alternate Email address in the Alternate E-Mail field.
To send a test email, click on the Mail Icon on the right of any of these two fields.
Your default email client application will open, enabling you to compose a new email and send it to the relevant address.
-
Once you have entered the necessary information, you should click on the Save button on the form Action Bar to save this information to the database.
-
To Activate the Supplier Profile, click the Activate button.
-
Click the Close button.
-
Repeat the steps above to capture email addresses for other Suppliers.
This is the end of this procedure.