Product Classification - Groups & Types
Product Classification Overview
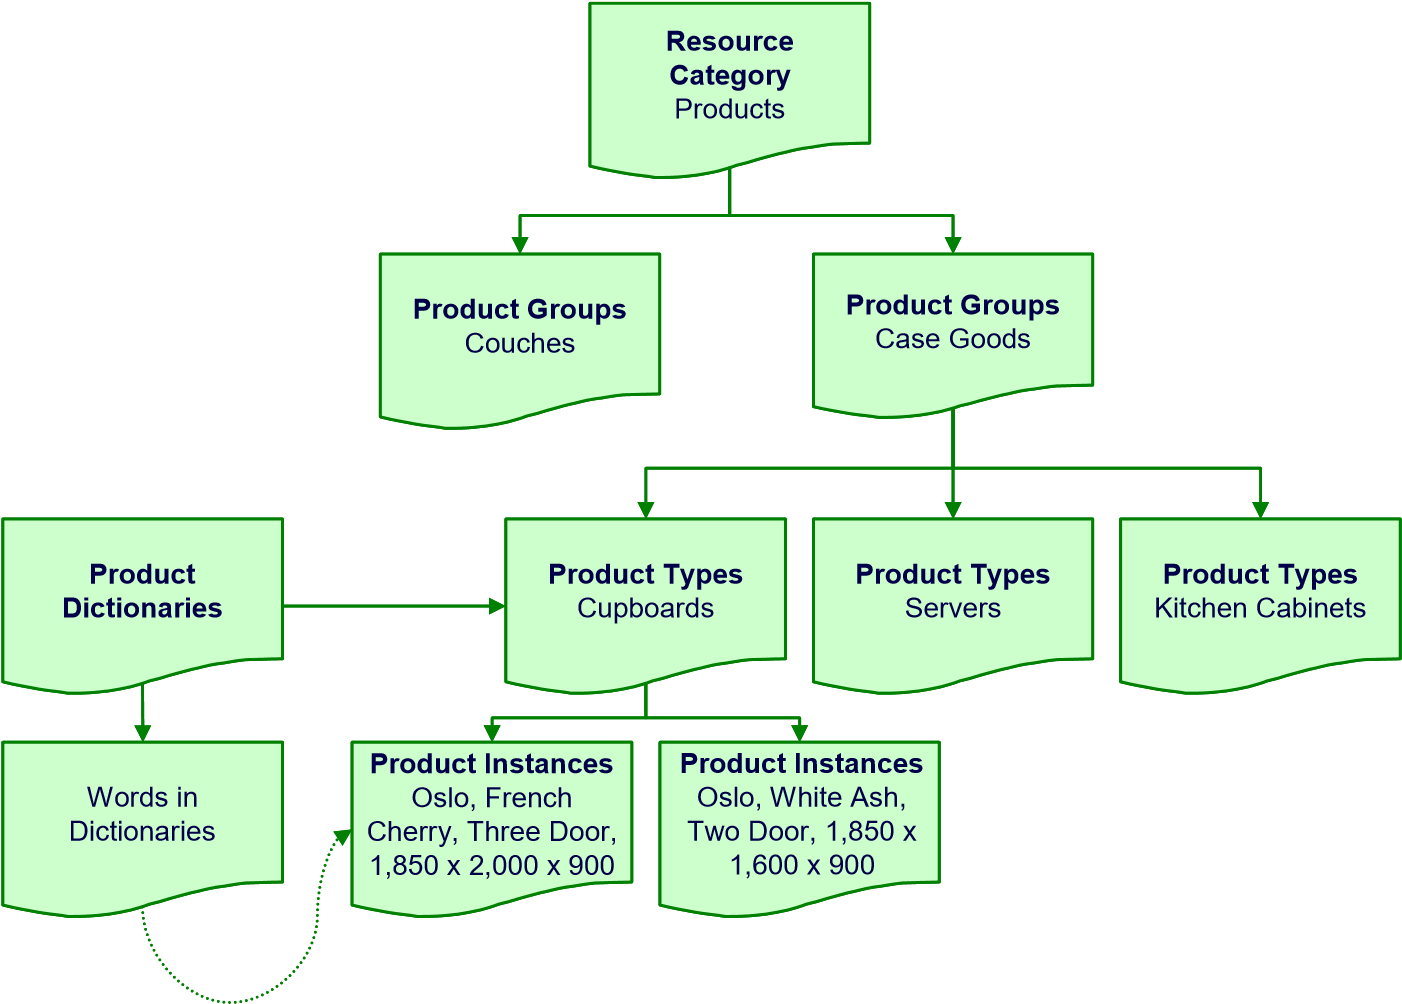
Information about Products is stored at four levels of detail in the Sense-i System.
At the top level, Resources are assigned to "Categories" such as Products, Materials, Machines, Facilities and so on.
Each Category is broken down into "Groups".
Each Group is further broken down into "Types".
Each Type consists of actual "Product Profiles" or instances of specific Products.
The Categories, Groups and Types are simply ways of arranging and storing information in the Sense-i database to make it easier to search for specific items from the entire list of everything that the company buys and sells.
The actual Products that your company sells to its customers are called Product Profiles.
Product Profiles are instances of specific products that appear in the Product Catalogue (also known as Price Lists) and are used on Sales Quotes, Sales Orders, Delivery Notes, Tax Invoices and so on.
The following diagram illustrates these classification levels.
Procedure Guideline
In this procedure we will explain the process of defining, and adding Product Groups, and Product Types within the Product Resource Category using the Setup features in the Inventory function.
Product Groups
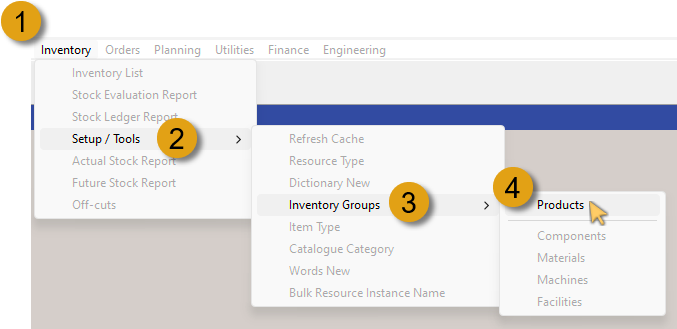
The first step in the process would entail navigating to the Product Group grid list.
-
Click the Inventory option on the Main Navigation Menu.
-
Click Setup / Tools in the drop-down menu.
-
Click Inventory Groups in the slide-out menu.
-
Then click Products in the side menu.
If you hover your mouse cursor over any menu option that has a right-arrow, the next level slide- / side menu will automatically be displayed, negating the need to click on that option.
The Maintain Product Group grid screen is displayed, listing all the Product Groups that have been defined in the system.
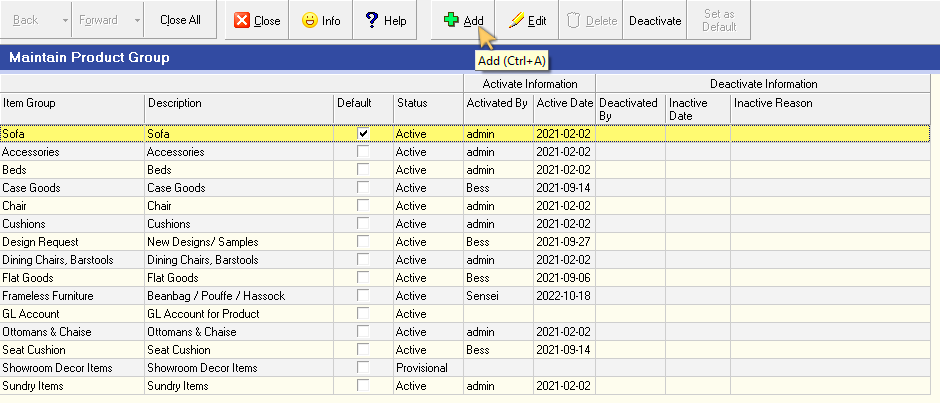
- Click the Add button on the Action Bar.
The Add Group screen is displayed.
-
Type the Name of the Group you would like to add in the Name field.
-
Type a short description in the Description field.
-
Click the Save button on the form Action Bar.
- Click the Close button to return to the Maintain Product Group screen.
The new Product Group, with the details you entered above is displayed in the grid list.
- Click the Activate button to change the status of the Product Group from Provisional to Active.
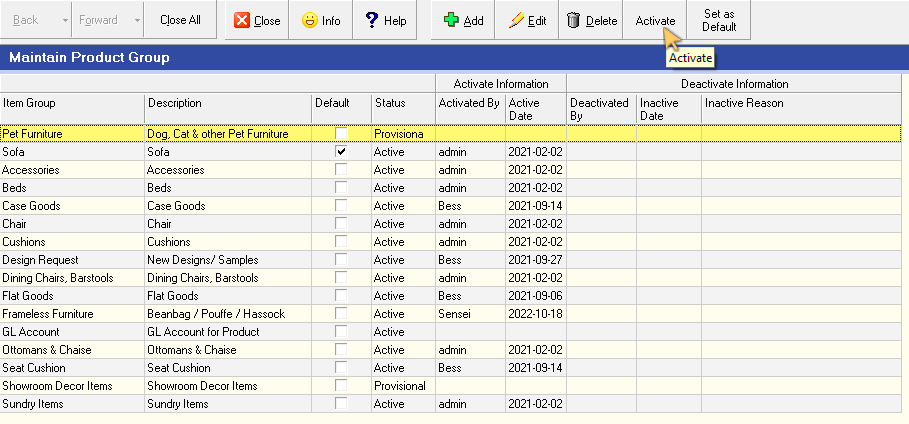
Repeat the steps above to add any further new Product Groups.
- Click the Close button to close the Maintain Product Group screen.
Product Types
Once the Product Groups have been defined, the next process involves adding Product Types associated with the appropriate Product Group.
-
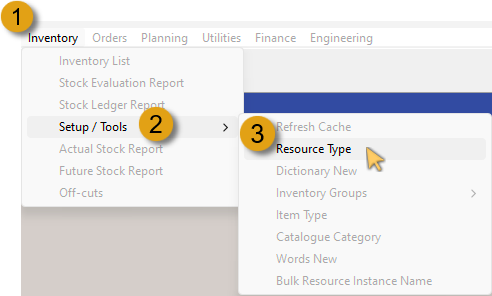
Click the Inventory option on the Main Navigation Menu.
-
Click Setup / Tools in the drop-down menu.
-
Then click Resource Type in the slide-out menu.
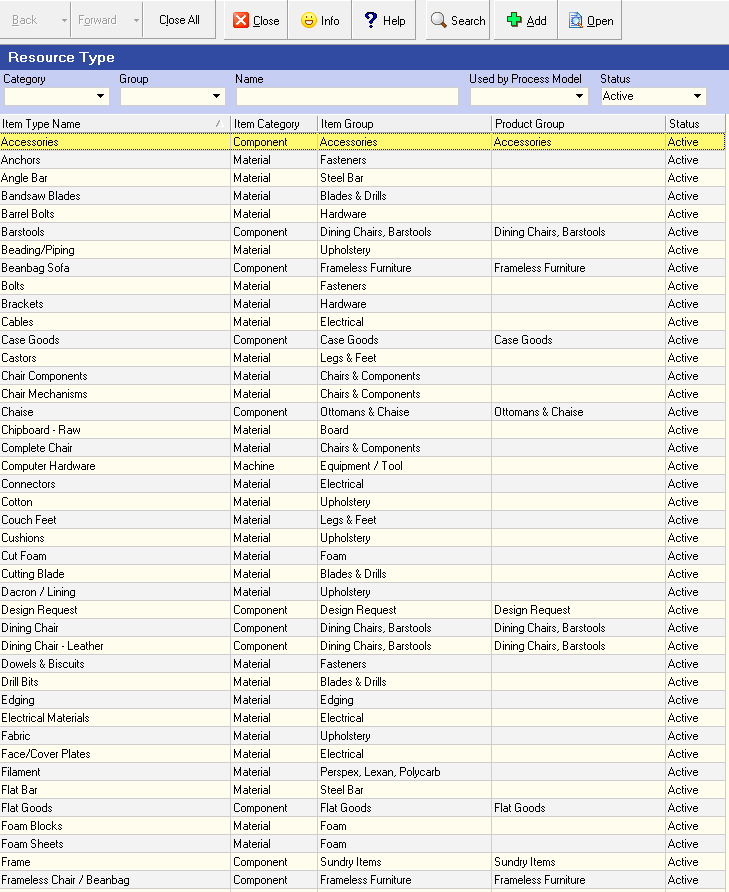
The Resource Type grid screen is displayed, listing all the Item Types that have been defined in the system.
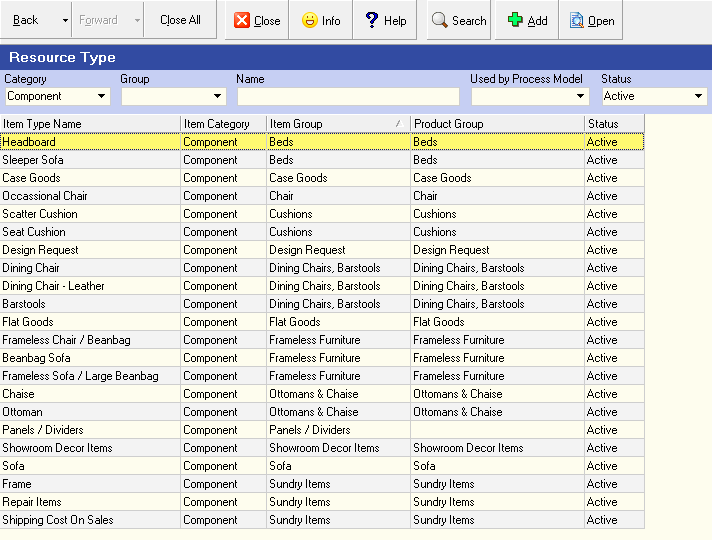
As we are working with Product Types, we should filter the grid list to display only those Item Types that fall under the Component / Product section in the Item Category.
-
Click the down-arrow button in the Category field.
-
Then click on the Component option in the drop-down menu list.
- Click the Search button on the Action Bar.
The Resource Type grid list now displays all the Item Types that fall under the Component / Product Category.
-
Click the down-arrow in the Group field.
-
Then (scroll down if needed), click on the Product Group option as defined previously.
- Click the Search button on the Action Bar.
The Resource Type grid list will be reloaded listing the Item Types previously defined for that Group.
If no Item Types have been defined, the grid will be displayed without any Item Types listed.
Add New Product Type
- Click the Add button on the Action Bar.
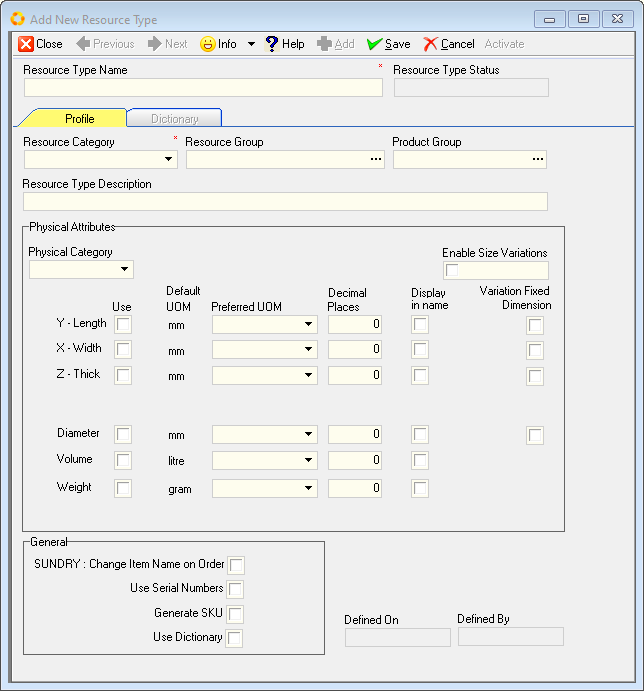
The Add New Resource Type screen is displayed.
-
Type in the name of the Product Type you wish to add in the Resource Type Name field.
-
Click on the down-arrow button in the Resource Category field, and select the Component option.
The Resource Type Name and the Resource Category fields are demarcated with a red asterisk, and MUST be completed/selected.
- Click on the three-dot button in the Resource Group field.
The Select Resource Group screen is displayed.
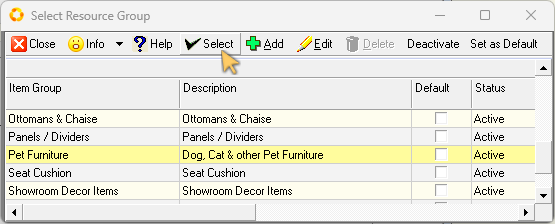
- Click on the relevant row in the grid list, and then click the Select button on the form Action Bar.
The system returns to the Add New Resource Type screen.
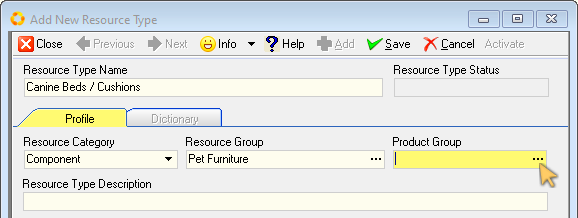
- Click on the three-dot button in the Product Group field.
The Select Product Group screen is displayed.
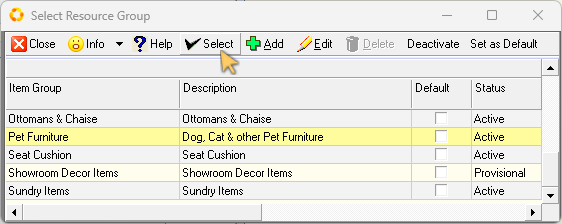
- Click on the relevant row in the grid list, and then click the Select button on the form Action Bar.
The system returns to the Add New Resource Type screen.
- Type a short description of the Product Type in the Resource Type Description field.
Product Type, Physical Attributes
In this part of the process we will capture the Physical Attributes of the new Product Type being added.
- Click on the drop-down arrow in the Physical Category field, and then click on the appropriate option in the drop-down list.
-
If this Product Type will include different sized Product Items, click the Enable Size Variations check-box field.
-
Click the Y - Length check-box (under the Use column) to select and use the Length attribute.
The Y - Length attribute MUST be selected for any Product Type that is defined as a Solid within the Physical Category list.
The system will display a Warning dialogue when attempting to Save the new Product Type without the Y - Length option checked.
-
Click the drop-down arrow in the Preferred UOM field if you wish to use a different Unit of Measure to that of the Default UOM.
-
Type in the desired amount of decimal places in the relevant Decimal Places field.
-
If your company uses the SEMS Dictionary Module, click on the relevant Display in name check-box field if you require the Product Type and associated Product Items to have the Length attribute included in the Product Instance Name.
-
Click on the relevant Variation Fixed Dimension check-box field if you require the Length attribute to be a Fixed Dimension in any product variations associated with this Product Type.
-
Repeat the steps above to define the Width, Thickness (Height), and where relevant, the Diameter, Volume and Weight attributes for the Product Type being added.
General / SUNDRY
-
Click the Change Item Name on Order check-box to allow Sales Representatives to change the name of Products (associated with this Product Type) when generating Sales Quotes, Orders and Invoices.
-
Click the Use Serial Numbers check-box if your company uses sequential serial numbers on Product Items.
-
Click the Generate SKU (Stock keeping unit) check-box to enable the manufacturing departments to generate unique alphanumeric codes that track product and price information.
-
Click the Use Dictionary check-box if your company subscribes to the SEMS Dictionary Module, and where Product Items & variants are uniquely defined using the descriptive features of this powerful module.
Save & Activate Product Type
Once you are satisfied that all the Product Type Profile information has been entered correctly, the next step will be saving and activating the Product Type.
- Click the Save button on the form Action Bar.
When the Product Type has been saved, the Dictionary TAB becomes available.
For further information on Dictionaries, refer to the document titled "SEMS Dictionary Module".
-
Click the Activate button.
-
Click the Close button.
The system returns to the Resource Type screen with the newly added Product Type listed as a record row.
Repeat the steps above to add other New Product Types.
This is the end of this procedure.