Sense-i Launcher - Advanced Configuration
Introduction
This document details the procedures needed to access the different Sense-i software applications, and step-by-step guidelines to configure specific database connections.
Once the Sense-i Launcher is open, access the Menu by selecting the menu icon near the top-left corner of the application.
The Menu options screen slides into display.
To close the Menu options screen, select the Home option... or click on the underlying screen.
Menu Options
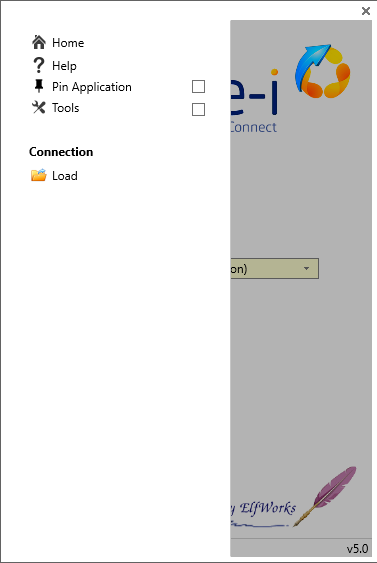
The Home button will take you back to the initial landing screen.
The Help button will open the Online Help document in your internet browser.
Pin Application
Click the Pin Application button to display the Application field on the Home screen.
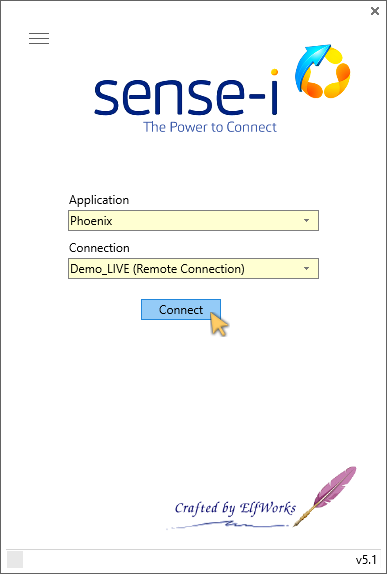
On the Home screen, the drop-down arrow in the Application field will allow you to choose the appropriate Sense-i Software Application required to access the associated Database.
In this example, we will choose the newly released Phoenix application, and then click the Connect button to open this exciting new Sense-i product.

Tools
The Tools button will open additional options on the Menu.
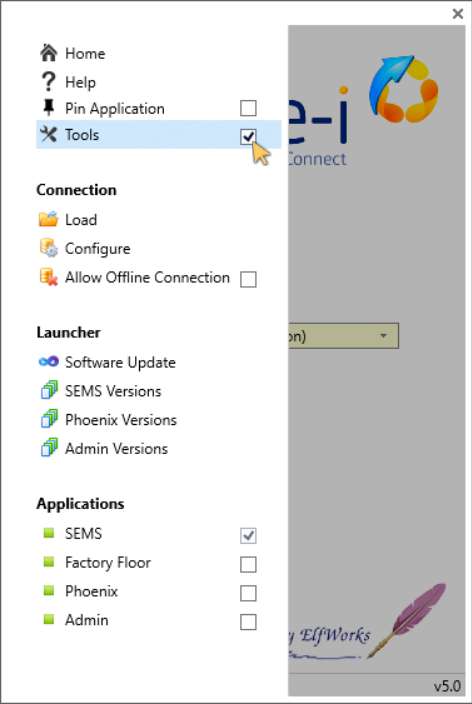
Manage Connections
The Load button will open the Load Connection screen.
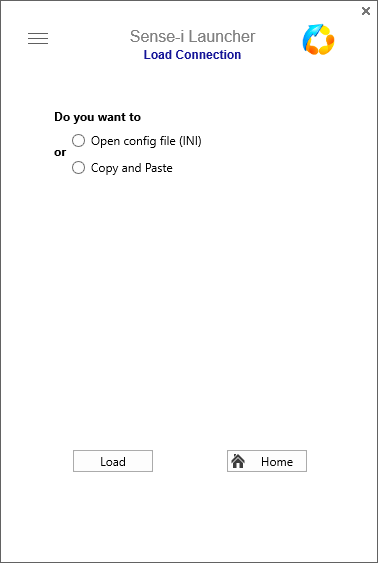
Refer to the Load Connection section, in Using the Sense-i Launcher document.
Tools - Configure
The Configure button will open the Configure Connections screen.
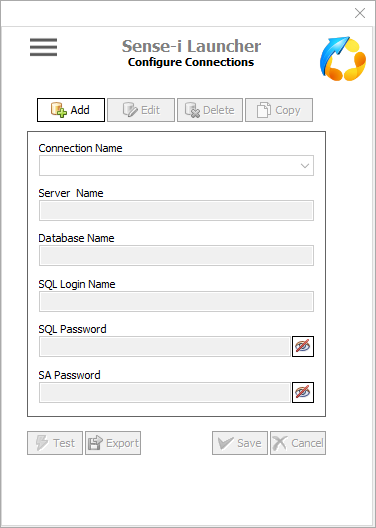
The Configure Connections screen is for SQL Database Adminstrators that have access to the specific configuration settings.
The [ Add ] button activates the connection settings fields to enable and add a new connection.
-
Connection Name - Capture the desired name (description). It is recommended practice to use a consistent format that includes Company name, database type (LIVE / TEST) and the connection method (Remote / LAN),
e.g. Acme_LIVE (Remote Connect). -
Server Name - This field includes the server IP, the SQL Server Instance and the incoming SQL port used.
The syntax is important and needs to be accurate. -
Database Name - This needs to reflect the exact name of the database.
-
SQL Login Name - This is the general login setting used by all SEMS users that access the specific database.
-
SQL Password - The password associated with the SQL Login Name.
-
SA Password - This password field is optional and only known and used by Database System Administrators.
The SQL Login Name and Passwords are defined, captured and maintained by Database System Administrators using SQL Server Management software.
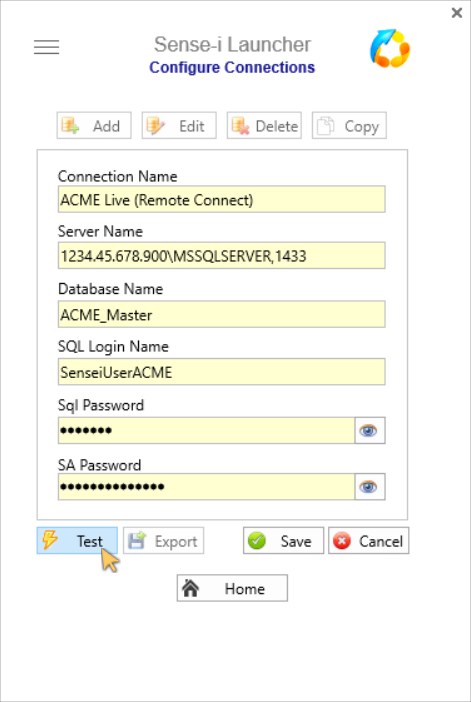
Click on the [ Test ] button to ensure the connection settings have been configured correctly.
Once the connection setting(s) have been captured and saved using the [ Save ] button,
the [ Edit ], [ Delete ] and [ Copy ] button options are enabled for
further amendments and to configure additional connections as necessary.
Click on the [ Export ] button to create the relevant .ini file that can be distributed to SEMS users.
The Export button will append additional connection settings to an existing .ini file if selected.
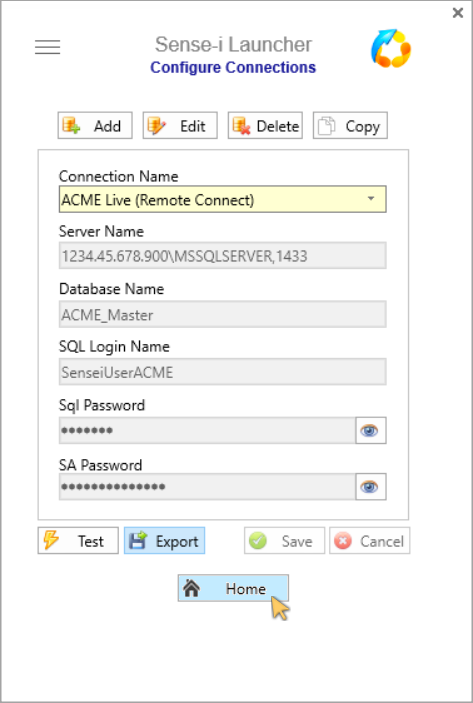
Click on the Home button to return to the Sense-i Launcher Home screen.
The newly configured connection is now available and is displayed in the Connection field.
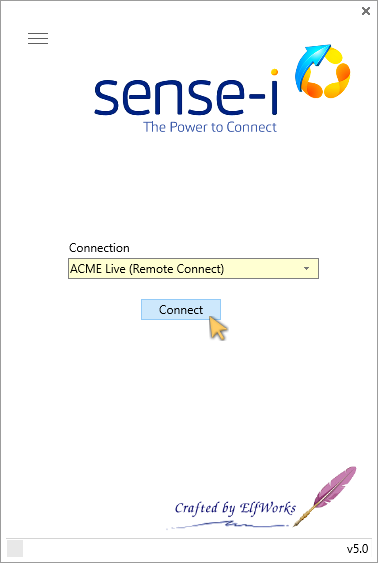
Update Launcher
The following steps will upgrade the Sense-i Launcher software to the latest version;
Access the Menu by selecting the menu icon near the top-left corner of the Sense-i Launcher application.
-
Ensure the Tools option is selected.
-
Select [ Software Update ].
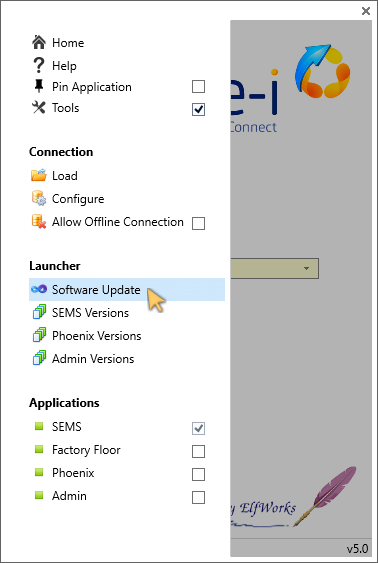
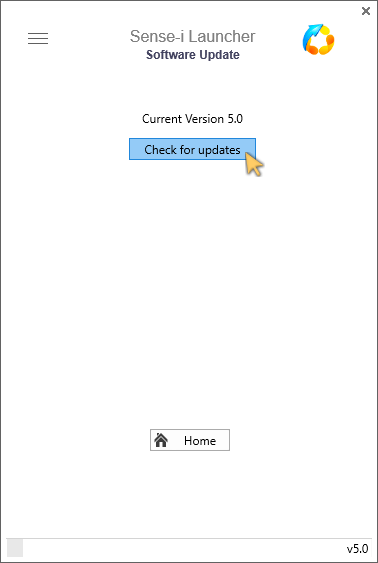
The Software Update screen is displayed.
- Click on the [ Check for updates ] button.
- Click on [ Upgrade Software ].
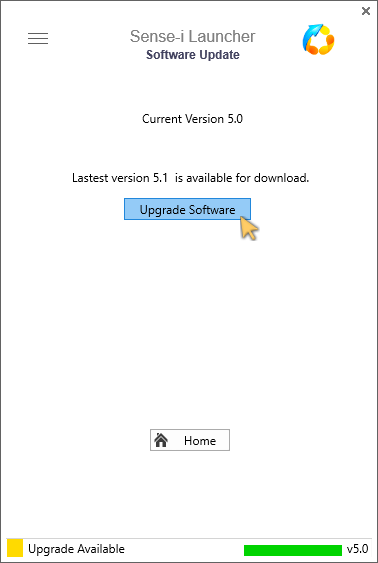
The Launcher Upgrade dialogue box is displayed.
- Click on the [ Continue ] button.
- The system will download the relevant .ZIP file, automatically extract the necessary files and install the latest version of the Launcher.
When the upgrade has completed, click the Open button.
The Sense-i Launcher home screen is displayed, with the Launcher version number in the bottom-right corner.
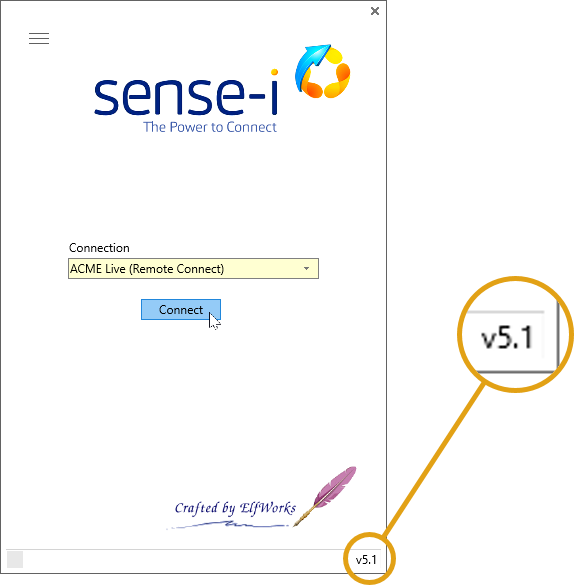
From the Home screen connect to the SEMS application & relevant database.
Launch (specific) Application
Access the Menu by selecting the menu icon near the top-left corner of the Sense-i Launcher application.
- Ensure the Tools option is selected.
The SEMS toggle button is set to active by default.
-
When the SEMS toggle button is active, clicking on the [ Connect ] button (underlying Home Page) will launch the SEMS application.
-
Click on the [ Factory Floor ] toggle button to use the Sphere_Mini (also known as Maestro) application.
Click [ Yes ] to set Factory Floor (Sphere_Mini) as the default application.
Click [ No] to keep SEMS as the default application.
Selecting the No option will enable you to connect using the Factory Floor during the current session - and will revert back to the SEMS application on a subsequent Connect.
- Click on the [ Phoenix ] toggle button to use the newly released Phoenix application.
The confirmation dialogue box is displayed.
Select [ Yes ] to set Phoenix as the default application.
- Click on the [ Admin ] toggle button to use the Admin application.
The default application, SEMS / Factory Floor / Phoenix or Admin (as confirmed above) will now always run when selecting the Connect button on the Home screen.
In addition, selecting the Pin Application option will ensure efficient connection to the relevant database using the
desired Sense-i Application on a subsequent Launch!
This is the end of the Sense-i Launcher procedure.