Add Process Model Inputs
Procedure Guideline
Once you have opened the Process Model screen you can add the Materials needed to complete the Process from those defined in the Supplier Material Catalogue.
This enables the system to calculate what Materials are required in Production when Sales Orders are received from Customers, and assist relevant employees with the Purchasing of the correct Materials needed.
Navigate to Inputs TAB
- To view a list of all the Inputs required by the selected Process Model, click the Inputs tabbed worksheet.
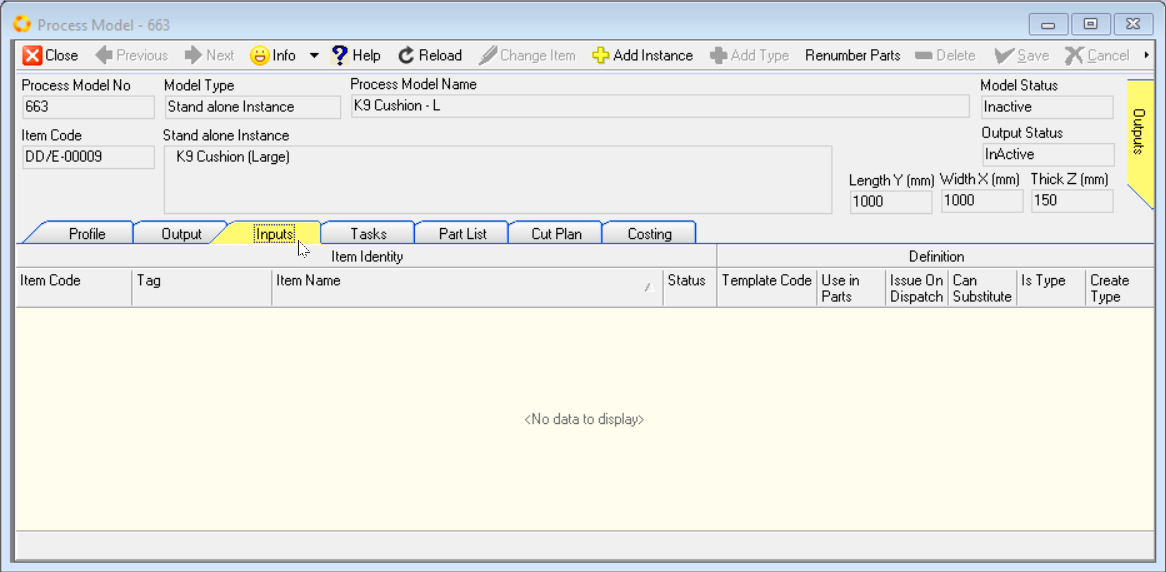
- The system will display the Process Model Input List sheet.
This sheet will list (once added) each of the Materials that have been defined as Inputs to the selected Process.
- To link a new Material as an Input to the Process Model, click the Add Instance button on the form Action Bar.

- The Item List screen is displayed.
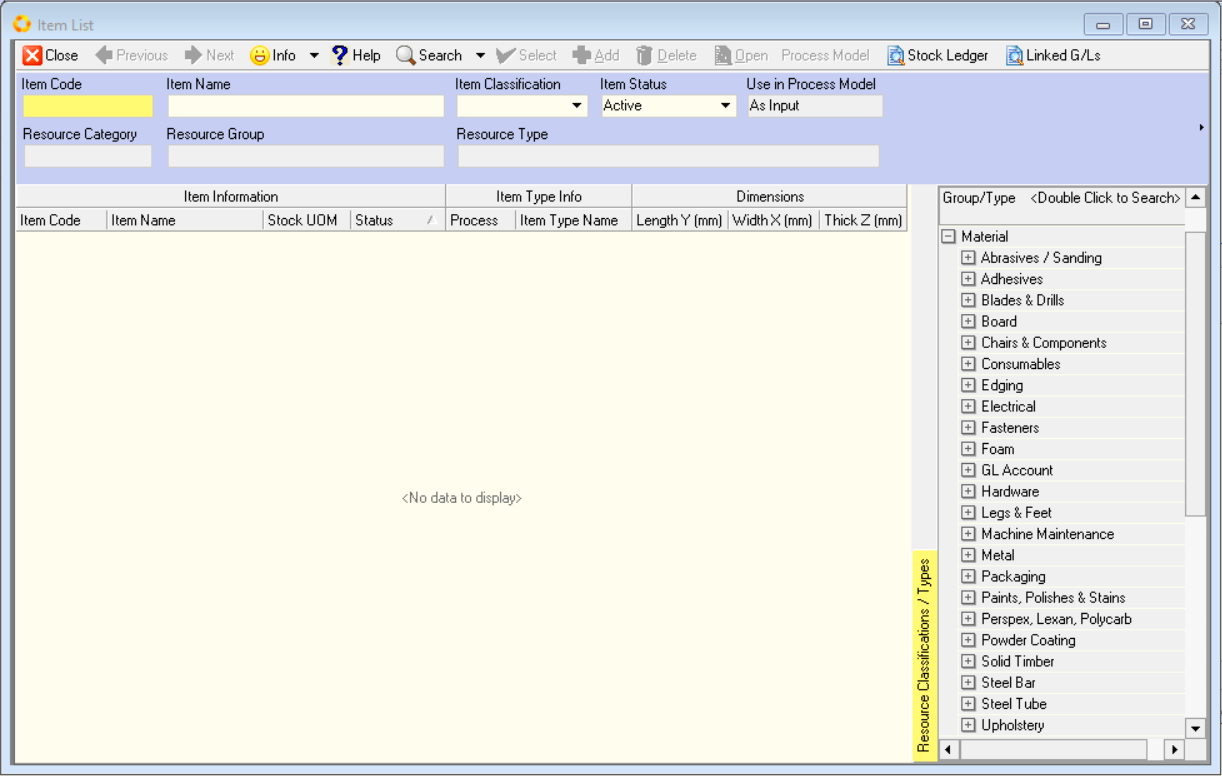
Material / Item search
-
You can search for Materials by selecting any of the Material Groups in the Selection Panel (right-hand side of the screen).
-
Click on the [+] button of the selected Material Group to display the list of Material Types.
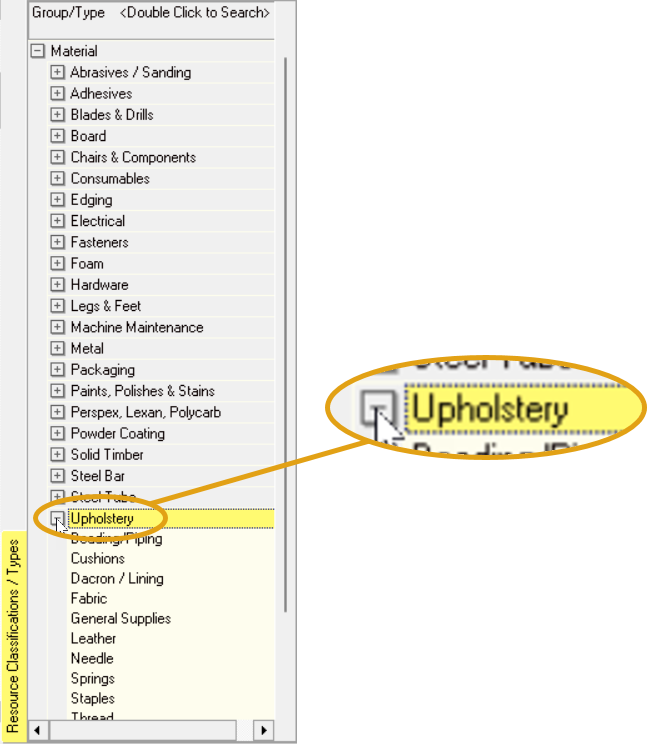
If you double click on any of the Group or Type records the system will display all matching Materials in the Catalogue.
- To search for a specific item, simply double-click on the record in Material Group/Type tree that best describes the Material Group or Material Type of the specific item you want to work with.
For example, you could select "Upholstery", and under this select "Fabric".
-
Once you have entered the basic Search Criteria, click on the Search button on the form Action bar.
-
The system will now display a list of all Items that match the "filters" you have selected in the Material Group/Type Selection panel.
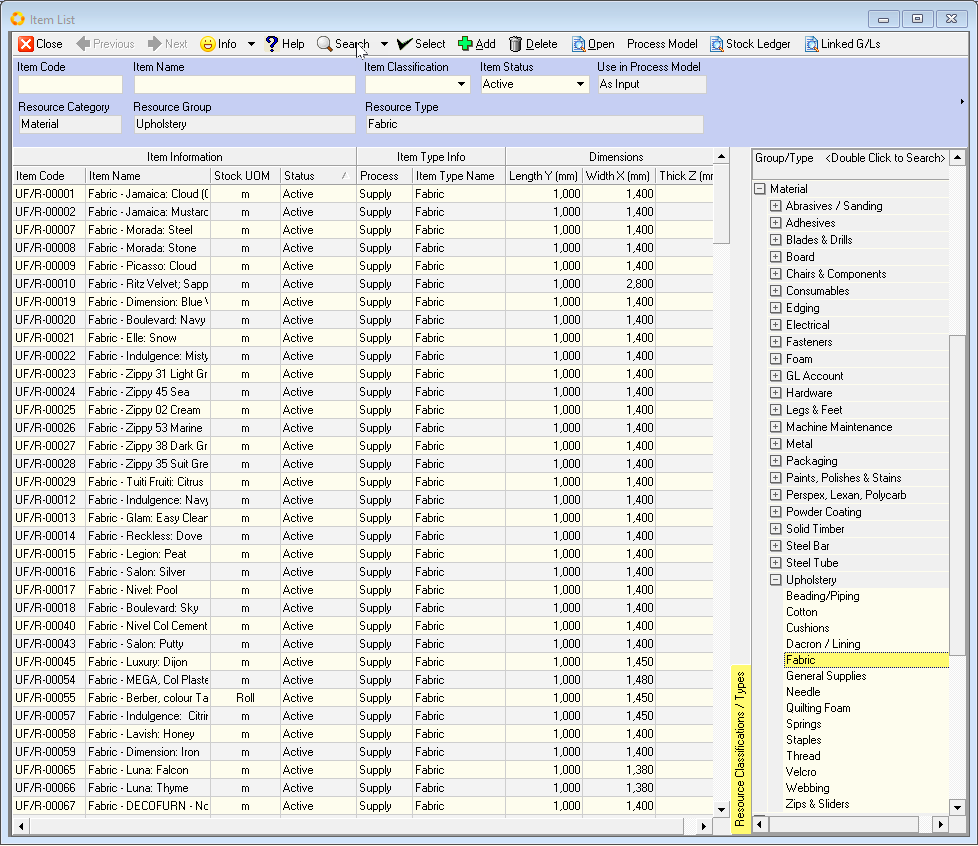
- If you know the code for the specific item you are looking for, type the Item Code in the Item Code field, then click on the Search button on the form Action Bar.

- You can also search for specific Items by typing a word that is contained in the Material Name in the Item Name field, then click Search.
You can use the Quick Filter controls at the top of each column heading.
This makes it very quick and easy to search through long and complicated Item Catalogues to find the items you wish to include in your Process Model.
Refer to the document titled "Customising Information Display".
-
Once you have found the item you want to include as an Input in the Process, click on the relevant row, then click the Select button on the form Action Bar.
-
You can repeat the steps above for each Input you need to link to the Process Model.
-
Once you've selected all the necessary items, click the Close button on the form Action Bar.
-
The system will return you to the Process Model Inputs screen.

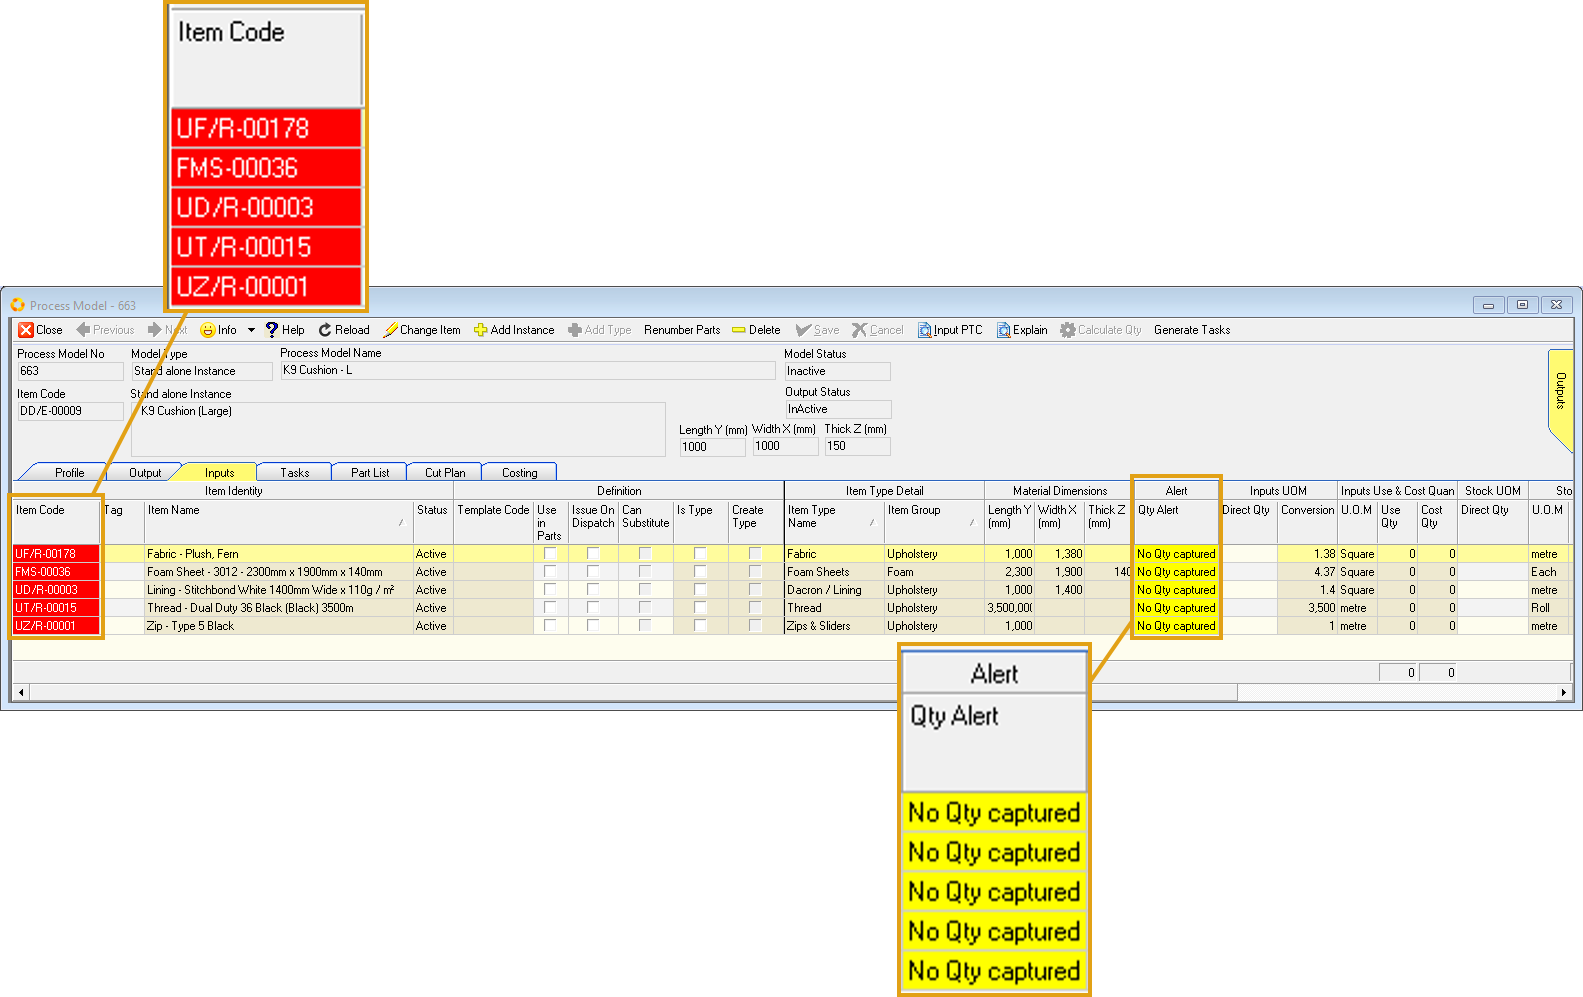
You will notice that the record fields under the Item Code column are coloured red.
-
Scroll across to the Alert / QTY Alert column.
The alert information "No QTY captured" is hi-lighted in yellow. -
Enter the Quantity for each Input Item under the Direct Qty column.
You can enter the Direct Quantity in either the Input UOM (Unit of Measure) OR the Stock UOM band, depending on which value your product designers have determined.
The system will automatically set the other based on the conversion value between the Input and Stock UOM.
The grid is now updated with the Item Codes no longer coloured red, and Alert(s) resolved.
- When you have completed adding the inputs, the next step in the process would be to add a series of Tasks necessary to create the Product. Refer to the document titled Process Model Tasks.
This is the end of this procedure.