Sales Order (SAF-154)
Introduction
You would use this procedure whenever you wanted to create a new Sales Order for a customer, as a result of a direct request from the customer, usually in the form of a Customer Purchase Order.
This procedure differ's slightly when compared to the scenario where a Sales Order is converted from an existing Sales Quote.
In this regard, see the section Convert Quote to Sales Order procedure in the Sales Quote document.
-
Click on the Customer bar on the Main Navigation Menu at the top of the screen.
-
Then select Sales Order option from the drop-down Menu.
- The system will open a screen titled "Maintain Sales Order".

Search
This screen lists all the Sales Orders that have already been captured in the system, where the Due Date falls within the From Date and To Date specified in the Search Criteria Panel.

You can change the information displayed in this list by changing the dates and other information in the Search Criteria Panel.
Add New Sales Order
- Click on the
button on the Form Bar to open an Add New Sales Order form.

You will first need to decide which department makes the products that you want to include in the Sales Order you are preparing.
This is the department or branch for whom you are capturing the Sales Order.
-
Use the
drop-down button in the "Owner Dept." field.
-
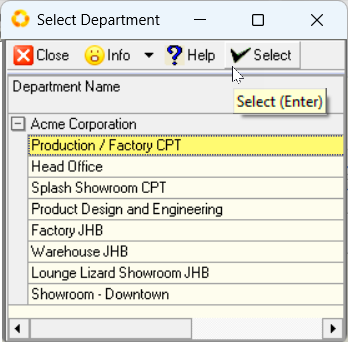
The system will open a screen just below the department field called Select Department.
This screen enables you to select a specific department or branch from a list of all the departments / branches defined for the company.
-
Click on the name of the department you wish to use, (usually this is Production).
-
Click the
button on the form menu bar.
-
The system will return to the Add New Sales Order screen and display the name of the department you have chosen on the screen.
Next you will need to select the customer for whom you are preparing or capturing the Sales Order.
- Use the
three-dot button in the Customer field.

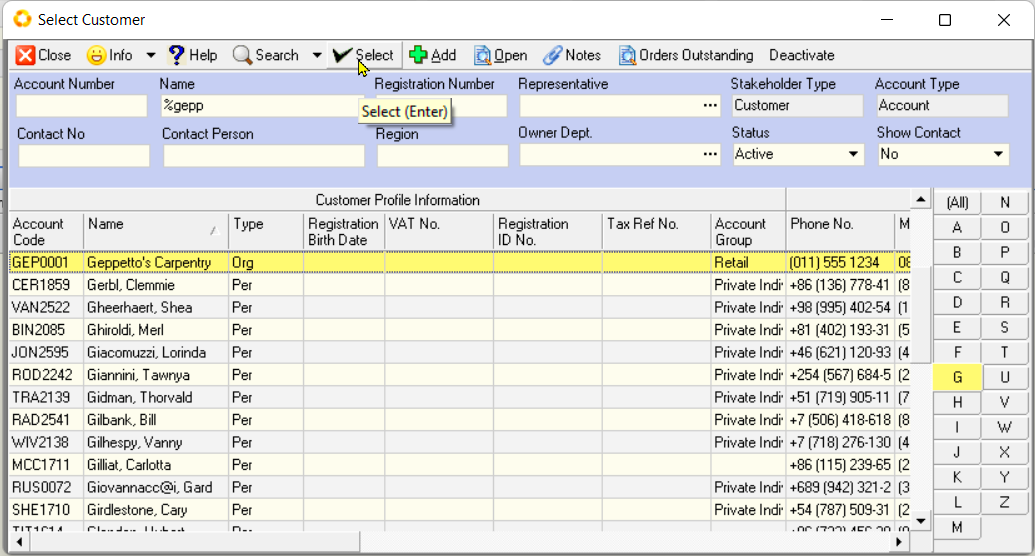
- The system will open a screen titled Select Customer that enables you to select a specific customer from a list of all the customers that have been captured in the system.
If the customer you wish to use is not on this list you can add their details directly from here. Use the procedure titled Customer Information to do this.
-
You can search a long list of customers to find a specific customer by typing in the " % " symbol and a few letters from the customer's name in Name field.
-
You can search by physical location, Region, or any of the other Search fields in the top of the screen.
-
You can also narrow down the list of customers on the screen by using the Alphabetical Divider on the right of the screen to select the letter that matches the first letter of the customer name you wish to use for the Sales Order you are creating.
-
Alternatively, you can click in the customer Name column and simply begin typing the name of the customer and the program will find the row that matches the letters you have typed on your keyboard.
Once you can see the name of the customer you wish to use for this Sales Order on the screen, click on this name in the list.
- Then click the
button at the top of the form.
The program will return to the Add Sales Order screen
- The program will display the name of the customer you have chosen in the Customer field.

You can press the [TAB] key on the keyboard to move from field to field and enter the remaining information about the Quote.
You need to enter information such as the;
- Due Date
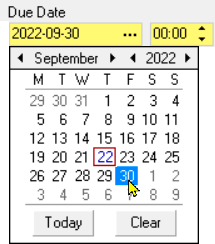
The due date is the date (and optionally time, depending on how your company and customer arrange deliveries) by which the products need to arrive at the customer’s specified location.
To set the Due Date, simply click on the required date from the pop-up date control displayed under the Due Date field.
You can adjust this at any stage with the Adjust Due Date function if this changes.
- Shipping date
The Shipping Date is the date by which the items must be despatched.
This is normally calculated by deducting the Shipping Duration and any buffer times allowed as a safety margin, from the Due Date above.
To set the Shipping Date, simply click on the required date from the pop-up date control displayed under the Due Date field.
This too can be changed at any time with the Adjust Shipping Date function.
- Payment Terms
The Payment Terms will determine how the customer will need to pay for the products or services included in the Sales Order.
As a default, each Customer is assigned a payment term which is applied to their account.
The Sense-i system also allows you to select some form of split payment terms, where for example, the customer is required to pay a deposit of say 50% and then to pay the outstanding portion on Invoice.
Sense-i will calculate the portions for each payment automatically and use this to update the cashflow projections.
To change the payment terms for a specific transaction, click the down arrow in the Terms field to select the payment terms you wish to apply to the transaction you are creating.
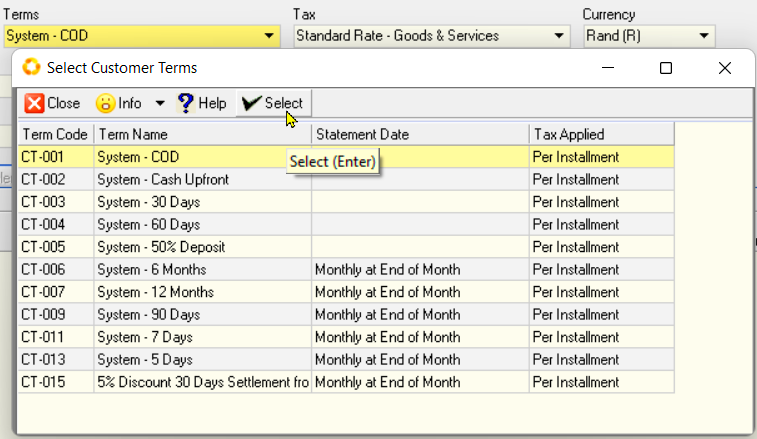
Refer to the document titled Customer Payment Terms for more information if required.
- Delivery Address
On each order you need to select the address at which the services will be provided or the goods on the Sales Order handed over.
This can either be a Customer address or, if the items are being collected from your company, would be your company’s address.
To define the address click the down arrow on the right of the Deliver To field.

The program will display a list of addresses associated with the Customer for whom you are creating the Sales Order.
You can click on the correct address in the list if this already exists and click the button at the top of the form.
If the address does not exist, you can add a new address by clicking on the button at the top of the form.
For more instructions on how to create a new address read through the Customer Address Information procedure in the Customer Information document.
If the customer is going to collect the products on the order, then click the [ Collect ] button at the top of the form.
The system will then change the list of Addresses displayed on the screen to show only those Addresses that are associated with your company’s locations.
- Customer Contact
To make it easy to provide follow-up service and communicate with the correct person at the company, you should make sure that you link the correct contact details for the person representing the customer in the Contact Person field.
Click on the drop-down button on the right of the Contact Person field.
The program will display a list of all the contacts that have been defined for the Customer.

You can click on the row that contains the details for the appropriate contact person in the list if this already exists and click the button at the top of the form.
If the contact person for whom you are preparing this transaction does not exist, you can add the details of a new contact by clicking on the button at the top of the form.
For more instructions on how to create details for a new contact person read through the Add Contacts procedure in the Customer Information document.
- Capture the Customer Reference or Order Number in the Customer Reference field.
Once you have entered the "Header" information about the transaction you need to save this and then begin selecting products from the company's Product Catalogue.
- Click the
button on the form Menu bar.
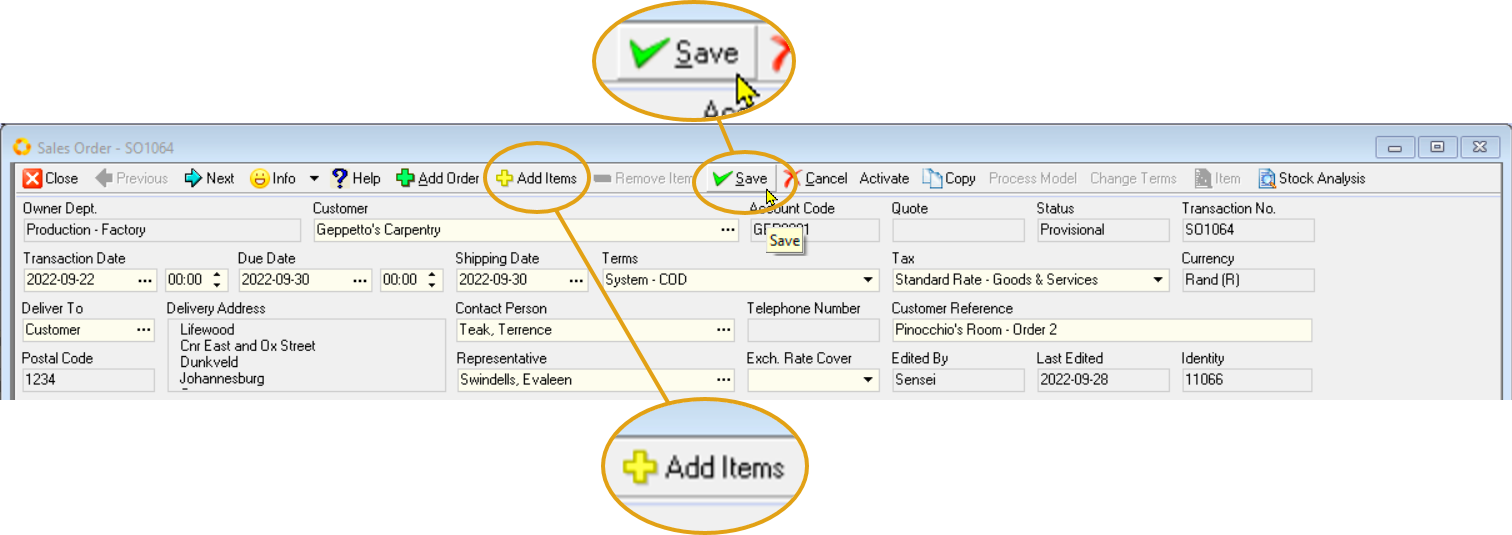
The system will save the information about the Sales Order and enable the button.
Add Items to the Order / Select Products from Catalogue
-
Click the
button to open the company's product catalogue.
-
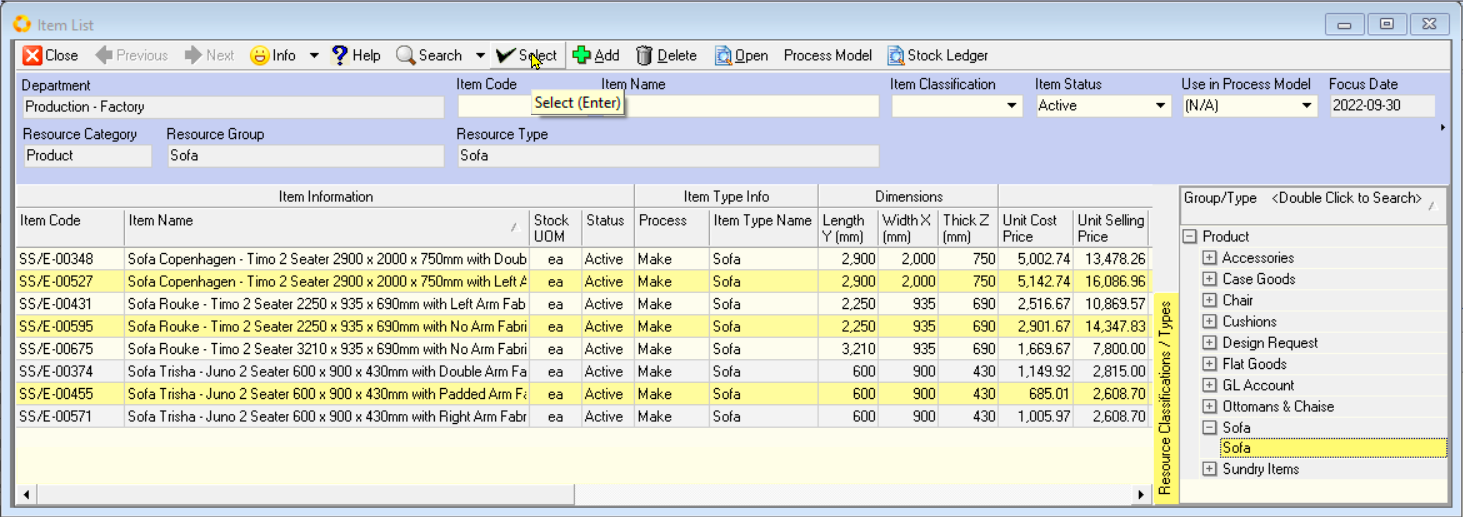
The system will display a screen titled Item List.
-
You can search the Item List for specific items by typing in the % symbol and part of the product name in the Item Name field.
-
Click the
button on the form bar.
-
You can narrow the list of Items displayed on the screen by clicking one of the Product Types on the right of the screen.
The program will then filter the list of Items displayed in the grid and show only those items or products that match the one you have clicked on in the Product Type Panel on the right of the screen.
-
You can click in the Item Name column and simply begin typing the name of the item and the program will find the row that matches the letters you have typed on your keyboard.
-
Click on the name of the product you wish to include in the Sales Order.
You can hold down the [SHIFT] key and select a group of adjacent products from the list,
OR,
you can hold down the control key [CTRL] on the keyboard and then select various products from the list that are not grouped together.
If you are unable to find the product you are looking for, or if the customer wants you to initiate a change to an existing product, use the relevant procedure in the Product Information document to capture this information as a new item request. You can then continue with the next step.
-
Then click the
button on the form Menu bar.
-
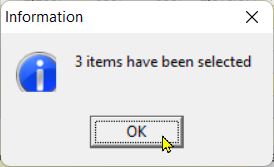
The program will display a dialog informing you of how many products you have added to the Sales Order you are creating.
-
Click [OK].
-
The program will leave the Item List screen open so that you can continue searching for and selecting other products you wish to add to the Sales Order you are creating.
-
Once you have selected all the products you need for your Sales Order, click the
button at the top left of the screen.
The program will return you to the Sales Order screen and display the products you have selected in the detail of the Sales Order.
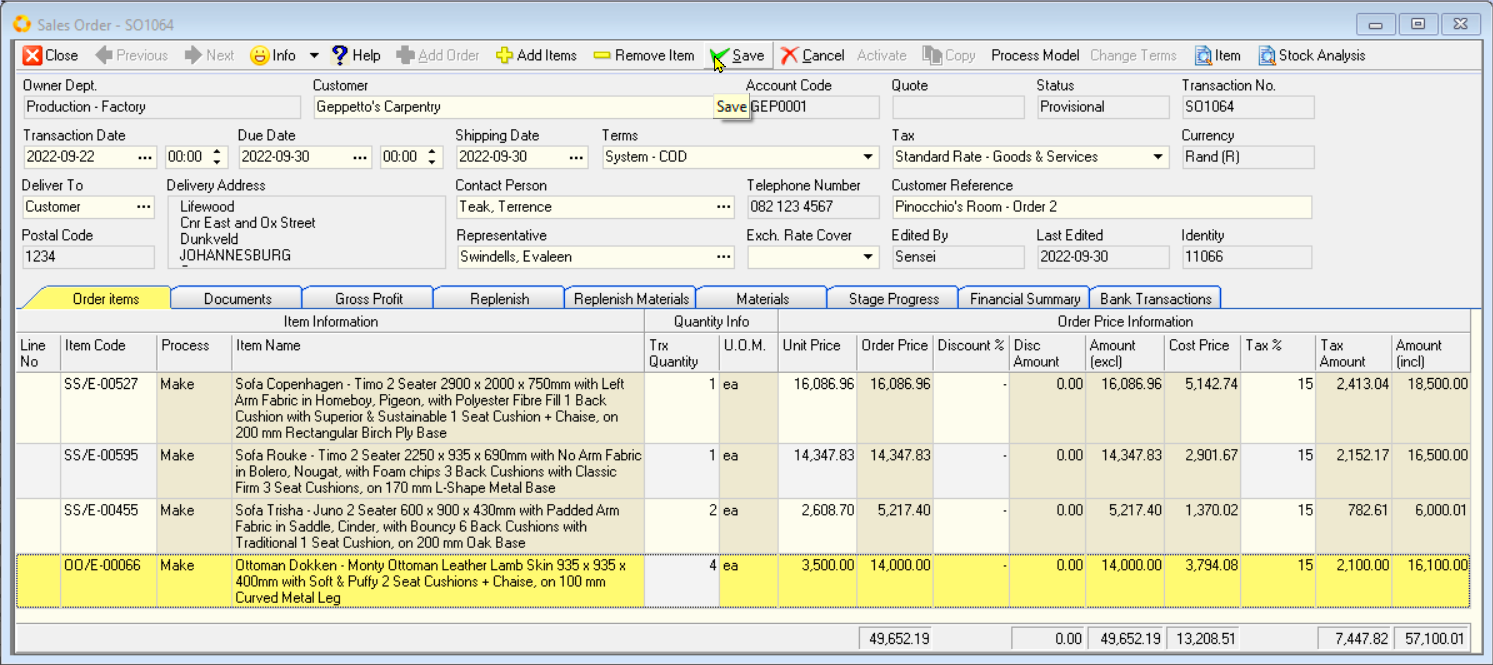
- Enter the Quantity of the item that you are quoting to the customer in the Trx Quantity field (press the up and down arrow keys to enter the quantities for each item).
The system will display the Selling Price for the item in the Unit Price column.
The price is based on the Price set by the company that applies for the due date you entered above.
If you have the relevant security rights, you can change the Selling Price for the item in the relevant Unit Price box.
-
You can enter a discount percentage that you wish to give to the customer on this item in the Discount % column.
-
The system will display the default tax rate applicable to the customer and the item being ordered in the Tax Rate column. You can override this if you need to change it.
-
You can enter any specific notes about the item in the Notes column.
-
You can press the [TAB] key on the keyboard to create space for another product to be included on the order or you can click the
button to view and select from the Catalogue.
The program automatically saves each of the changes to the order as you make them without you having to click any buttons.
-
Repeat the above steps until you have captured all the items you need to include on the Sales Order for the customer.
-
Once you have completed entering all the details on the Sales Order, click the
button on the Form Menu Bar to save the information you have entered to the database.
Activate Sales Order
- To confirm and post the Sales Order to the database and prevent any further changes, click the Activate button at the top of the form.
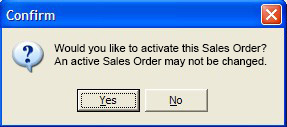
Depending on the settings in the program, the program may display a message asking you if you wish to Activate the Sales Order.
-
If you choose [No] you are in effect saying that the Order is still in draft mode and that you will edit the details in future.
-
If you are sure that the details on the Order are correct and that you have finalised the details of the Sales Order, click the [Yes] button.
-
You will then notice that the status of the Sales Order has been updated to show that has changed from Provisional to Active.
This means that the Sales Order is now finalised and can be sent to the Customer.
Other users can now rely on the information in this order as firm and know that it will not change.
- The program will return you to the Maintain Sales Order screen.
You can also simply right-click the mouse on the Sales Order in the list and select Activate.
Once you have Activated the Sales Order you can choose to Print or Email it.
Print
Click the Print Button on the Form Bar.
- The system enables you to alter the format of Sales Orders to suit the specific requirements of each of your company or your customers.
When you click the Print button, the system displays a list of the different Sales Order Layouts that have been defined.
-
If you do not have any customized layouts defined for your Sales Orders, then the system will only show the Standard Layout. If custom layouts have been defined, they will be listed underneath the Standard Layout.
-
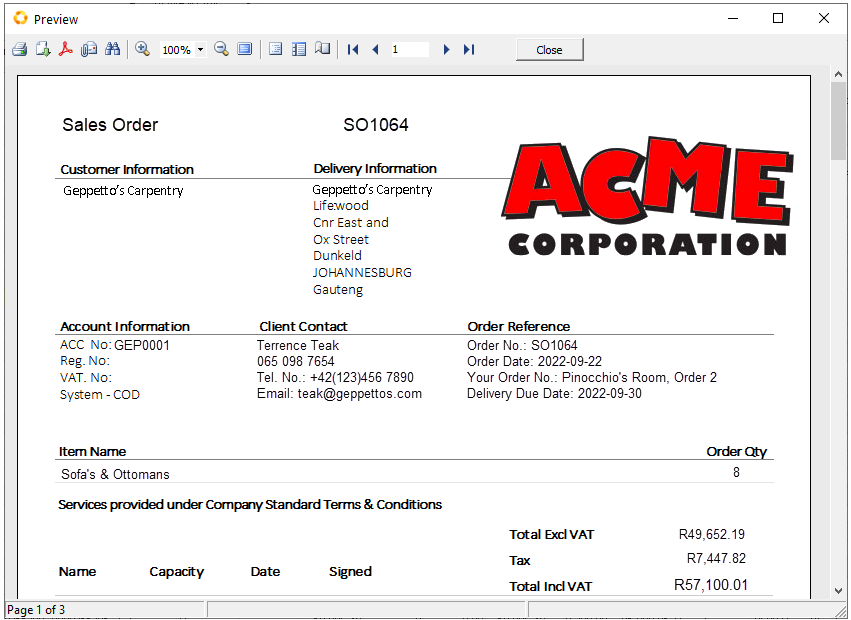
Once you select the appropriate layout or format you wish to print or email, the system will display this in a Print Preview window.
-
To simply Print the Sales Order, click the Printer Icon
-
To close this screen, click the [Close] button at the top of the screen.
The system will close this screen and return you to the Maintain Sales Order screen to view a list of all the Sales Orders in the system that match the Search Criteria you have entered.
Save as PDF
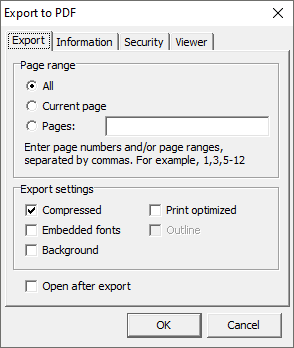
- If you decide that you wish to save the Sales Order as a PDF document then click on the PDF icon
at the top of the preview form. The system will display the Export to PDF settings dialog.
-
Click the [Ok] button once you have selected the desired options.
-
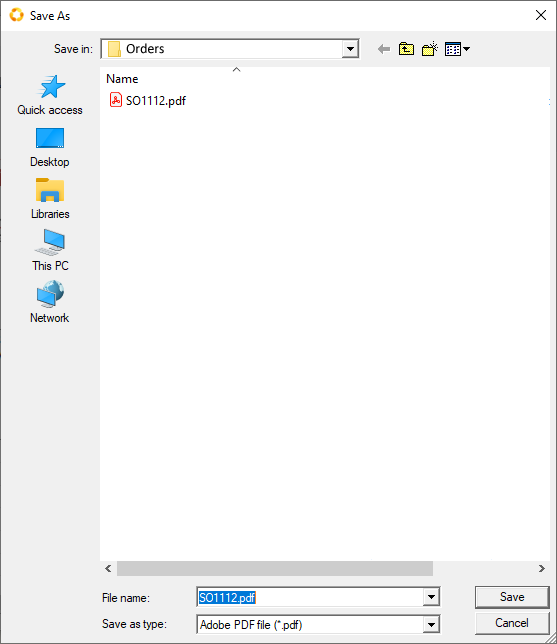
The standard File Manager Save As dialog window opens allowing you to save the .pdf to a specific location.
This location could be to a relevant folder on your computer or a shared folder on your Local Area Network.
-
Once you have selected the folder and named the file click the [ Save ] button.
-
To close the Print Preview screen, click the [ Close ] button at the top of the screen.
The system will close this screen and return you to the Maintain Sales Order screen.
Email
- If you decide that you wish to email the Sales Order to the client, the click the Send by E-mail icon
at the top of the Preview window.
- The program will display the Email window.
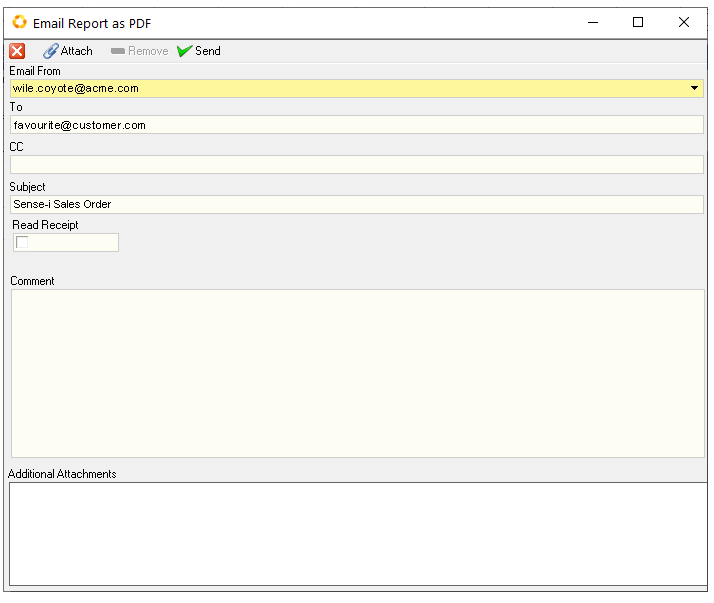
- If your email details have been setup on the system, they will appear in the Email From field at the top of the screen.
For more information on setting up your email in the system, refer to the document titled Configure Email Settings.
-
If you have defined a contact for the Sales Order as described above, then the program will display the email address for the selected contact in the To field.
-
You can add additional email addresses as required in either the To or Copy (CC) fields.
-
The program will automatically populate the Subject line. Alter this if needed.
-
You can add the text for the email you are sending in the Comment field.
-
And you can add any addition attachments to the email by clicking the
button at the top of the form.
-
When you have completed your email, click the
button at the top of the form.
The Information dialog will display "Message Sent".
- Click [ Ok ] to continue.
The system will automatically send the e-mail to your own e-mail address - this for your records.
Check the Inbox in your Email Client application (e.g. MS Outlook).
- To close the Print Preview screen, click the [ Close ] button at the top of the screen.
The system will close this screen and return you to the Maintain Sales Order screen to view a list of all the Sales Orders in the system that match the Search Criteria you have entered.
Final Search

-
This is the screen that lists all of the Sales Orders in the database that match you're the criteria you have entered in the Search Panel at the top of the screen.
-
Click the
button and make sure that the End Date (To Date) in the screen is later than the Due Date of the order you have just entered.
-
Once you have completed entering all the Sales Orders you need to capture in the system, click the
button on the Form Menu Bar.
Status - Activate / Deactivate
For more information on how transaction Statuses work in the Sense-i program please refer to the document titled Understanding Status in Sense-i.
When a record in Sense-i is still in “provisional” state, the button to control the status of the read has the caption "Activate".
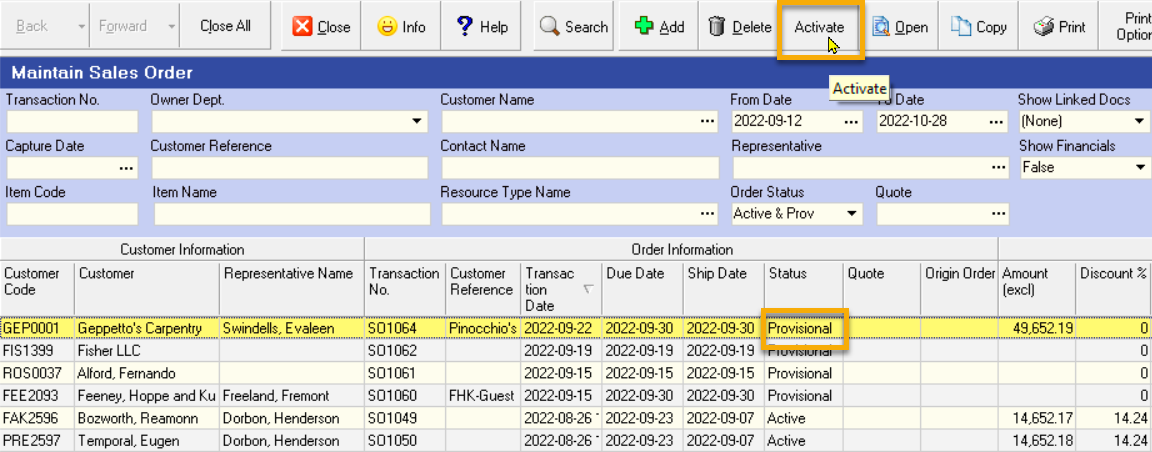
You can see in the image above, when the record is in Provisional status, the Status button at the top of the screen will allow you to mark is as finalised by changing it to Active.
- To change the status of a provisional record to active, click on the record in the list and click the Activate button at the top of the screen.
When a record has been Activated (but only if no subsequent transactions have been captured against it), it is possible to change the status to Inactive so that you can edit the record as necessary.

You can see in the image above, when the record is in Active status, the Status button at the top of the screen will allow you to Deactivate the record so that you can change it, but only if no subsequent transaction has been created.
- To change the status of a active record to provisional or inactive so that you can edit the record, click on the record in the list and click the Deactivate button at the top of the screen.
The program will change the status of the record and you can then make the necessary changes.
- Once you have edited a record, you can set its status to Active again by clicking the Activate button at the top of the form.
Remember that the status of a record can only be changed from Active, Cancelled or Closed if no subsequent documents were created from it.
Open
You can view the details of any record or transaction in the system if you have security permission to do so.
To open or view a record, simply click on the row in the grid that contains the name or number of the record you wish to view and then click the button at the top of the form.
Copy
With some records and transactions you can use an existing record to create a new record though the copy function.
To copy one Sales Order and create a new Sales Order from it, you should find the Sales Order you wish to use as the source document, click on the record for this Sales Order in the grid and the click the button at the top of the form.
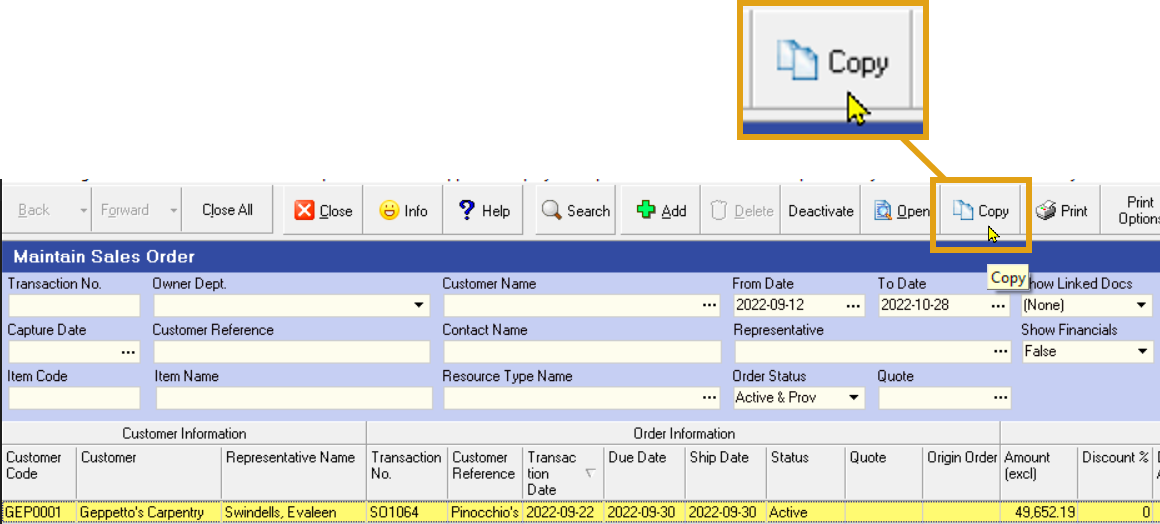
The program will display a form that will allow you to enter certain key information that is required for a copy, for example the Due Date, and the option to retain prices from the original order.
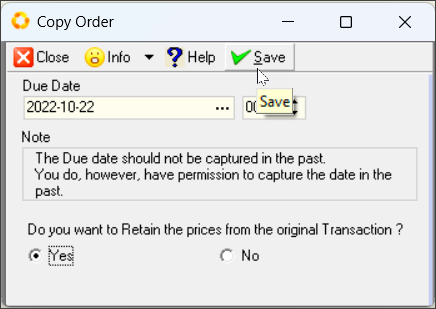
Once you have completed this form, click the button at the top of the form.
The program will then create the copy of the original document you selected and it will set the status of the copied document to Provisional so that you can edit the transaction as required.
Cancel Outstanding
Remember from the introductory training to Sense-i that all transactions (except the final transaction in a sequence, or Transaction Stream) follows in a set sequence.
So for example a Sales Opportunity becomes a Sales Quote, which can in turn become a Sales Order, which in turn becomes a Sales Order Delivery Note and finally a Sales Order Invoice.
Because each transaction represents either the request for some work to be done (such as make or deliver and product) or records the actual work being done (for example an actual delivery), it is possible that the quantity on one document is not completely fulfilled by the subsequent transaction.
So a customer may order 10 chairs, but the first delivery might only be for 8 chairs because 10 chairs are not available.
When this happens, it is possible to either leave the original order open (meaning that the shortfall must still be delivered), or if the outstanding balance is no longer required, then you can change the status of the transaction by clicking the Cancel Outstanding button at the top of the form.
This will set the status of the selected transaction you have cancelled to "Closed" or "Cancelled".
If a transaction has been partially fulfilled and you choose to Cancel Outstanding, then the status of the transaction will be set to Closed.
If a transaction has not been fulfilled at all and you choose to Cancel Outstanding, then the status of the transaction will be set to Cancelled.
Notes
You can add notes to any party, any item or any transaction in the Sense-i program and share these notes with users in the company.
For more information on working with notes in Sense-i refer to the document titled Using Notes In Sense-i.
This is the end of this procedure.