Capture Sales Order Delivery Note (SAF-156)
If you have accessed this document from the associated Help link in the Sales Order Delivery section of the SEMS application, it is important to add / initiate the creation of a Delivery Note by clicking on the relevant preceding Sales Order record and then the Deliver button on the Sales Order screen.
Step-By-Step Guideline
Search for Specific Sales Order
Once the items listed in a Sales Order are ready, the next step is to create a Delivery Note.
-
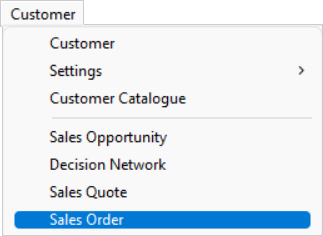
Select the Customer option from the Main Navigation Menu.
-
Then click on Sales Order.
-
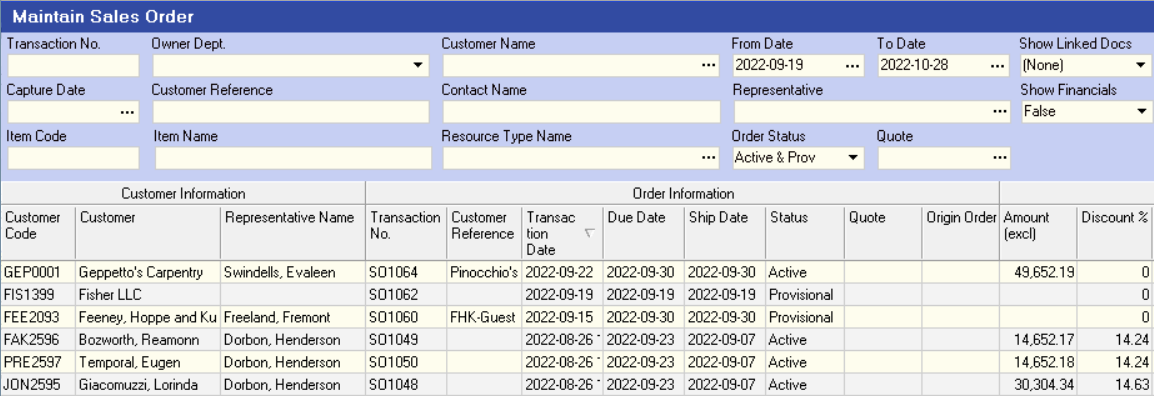
The system will open a screen titled "Maintain Sales Orders".
This screen lists all of the Sales Orders that have been captured in the system.The screen provides a quick and powerful way to keep track of what Sales Orders have been received from the Company's Customers.
-
Search for the specific Sales Order against which you wish to capture a Delivery Note.

Create the Delivery Note
Once you have found the correct Sales Order,
-
Click on the row in the list and then...
-
Click the Deliver button on the Form Bar.

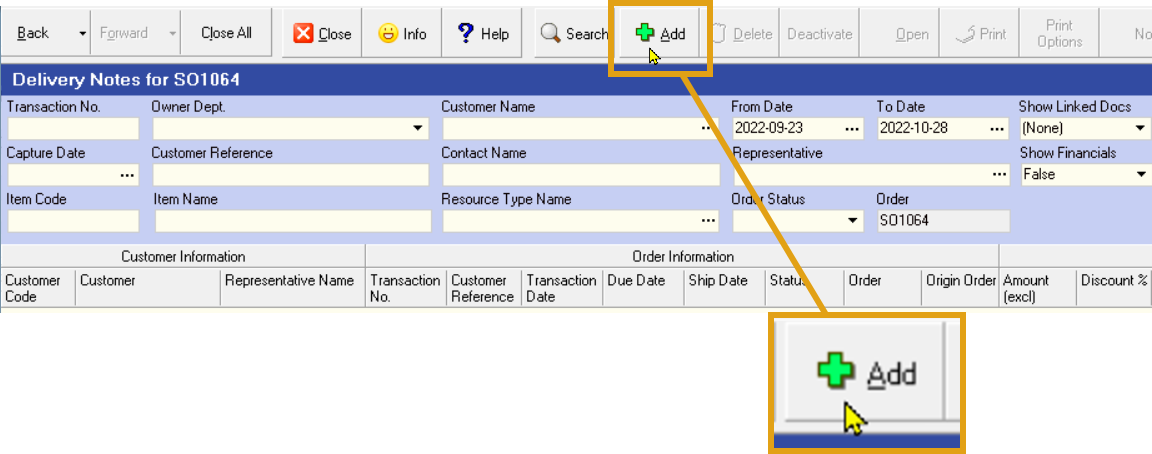
- The system will display a screen titled "Delivery Notes for S0####" (the Sales Order number relevant to the specific Sales Order record selected).
This screen lists the Delivery Notes (if any) that have previously been captured against the selected Sales Order.
-
To add the new Delivery Note, click the Add button on the Form Bar.
-
The system will open a screen titled Sales Delivery Note, with the Sales Order Delivery Note Number (- SODN###) automatically generated by the system.
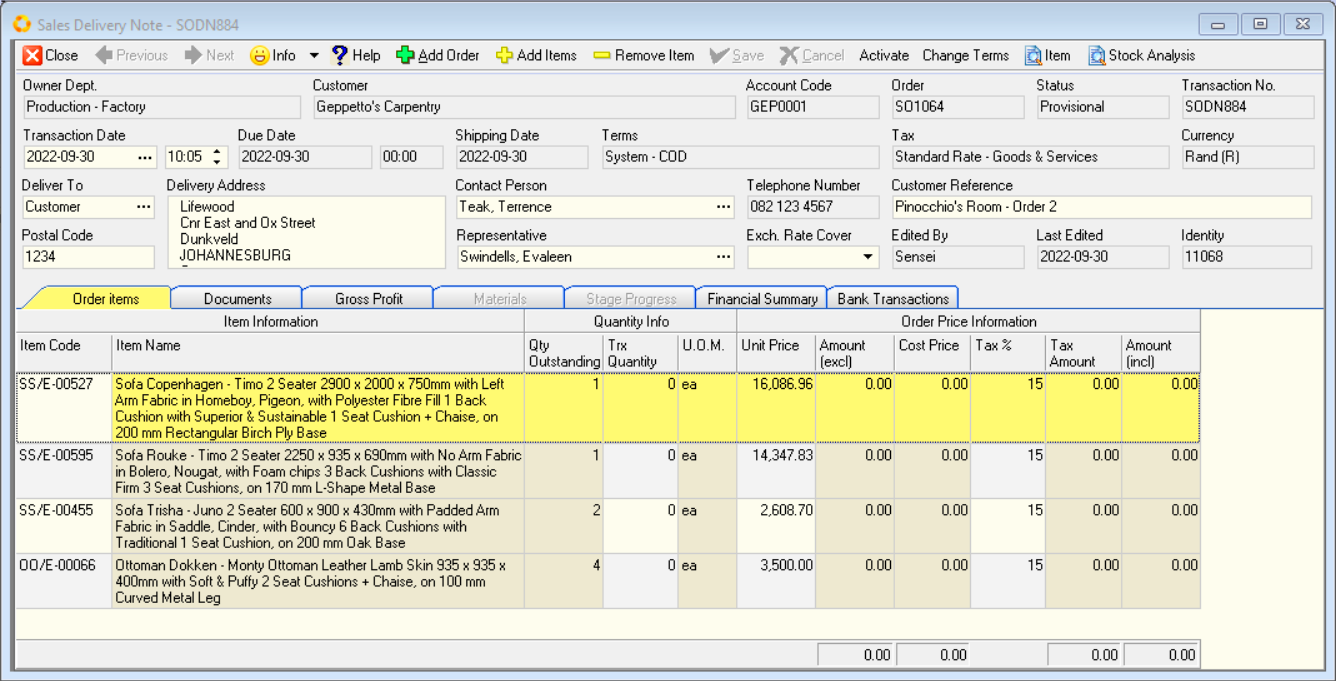
This screen lists all the details that were captured on the Sales Order, excluding any items that have been delivered in full.
Capture Item Quantities to be Delivered
You will notice the system displays a column called Qty Outstanding.
This column lists the difference between the quantity originally ordered by the Customer and the total of all previous Delivery Notes.
- Enter the Quantity that you will be delivering on the Delivery Note you are capturing in the Trx Quantity Column. Leave the Quantity where no items are being delivered as 0.
- Once you have entered all the information for items being delivered, click on the rows that have 0 Trx (transaction) Quantity and then click the Remove Item button on the form bar.
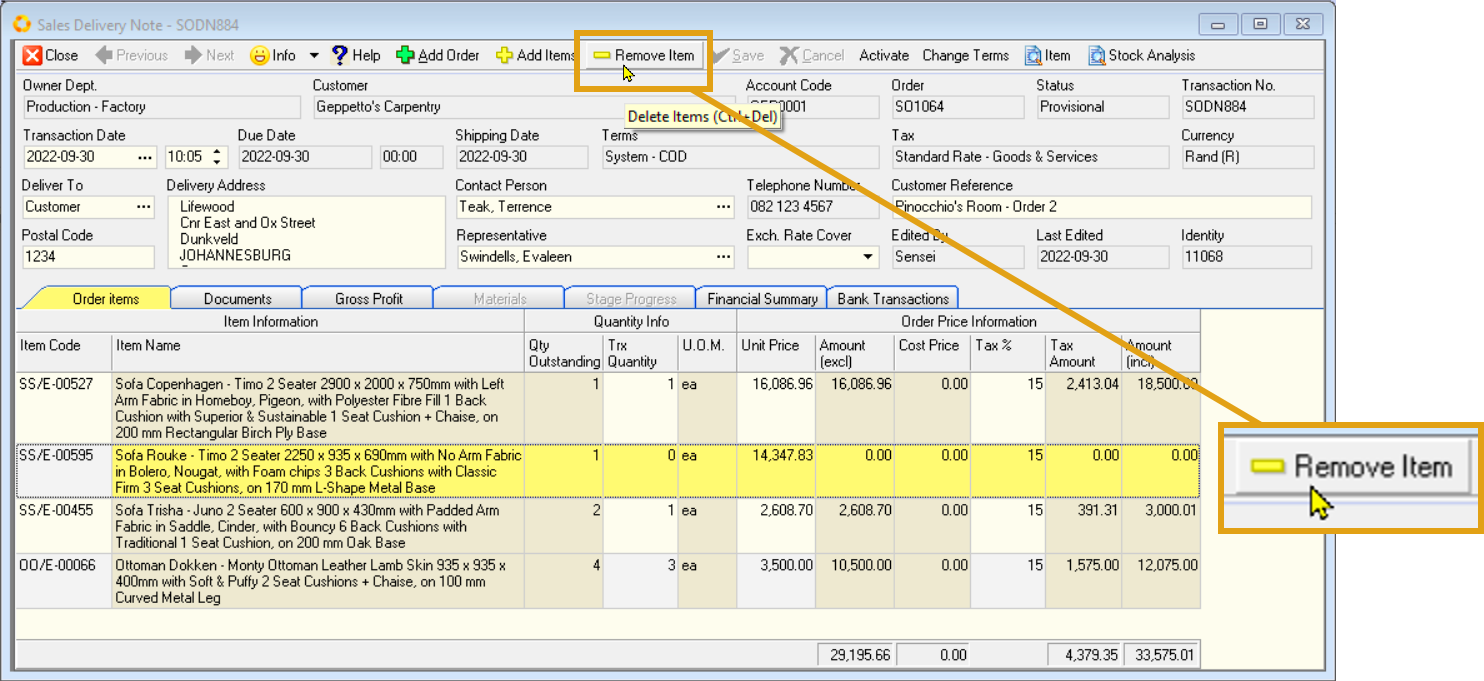
The system removes the details of this product from the Delivery Note but leaves the details in place on the Sales Order so that future Delivery Notes can be captured against the outstanding items.
Finalise the Delivery Note
-
Once the Delivery Note has been finalised, click the Save button.
-
Select the Activate button to Activate the Delivery Note. Activating a Delivery Note finalises the details of the Delivery Note in the system, prevents future changes and allows you to print a Delivery Note for the Customer to sign.
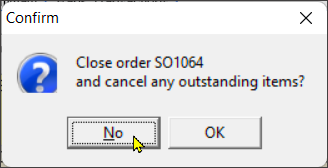
- The system will then present a dialog that asks you if you wish to cancel any outstanding items. Normally you would choose "No" so that you can deliver any items still outstanding on the Sales Order at a later stage.
You should only choose "Yes" if the Customer wants to Cancel the remaining items they ordered and does not want you to deliver these in the future.
-
Once the Delivery Note has been finalised, click the Close button on the form bar.
-
The system will return you to the Delivery Notes for Sales Order screen.
-
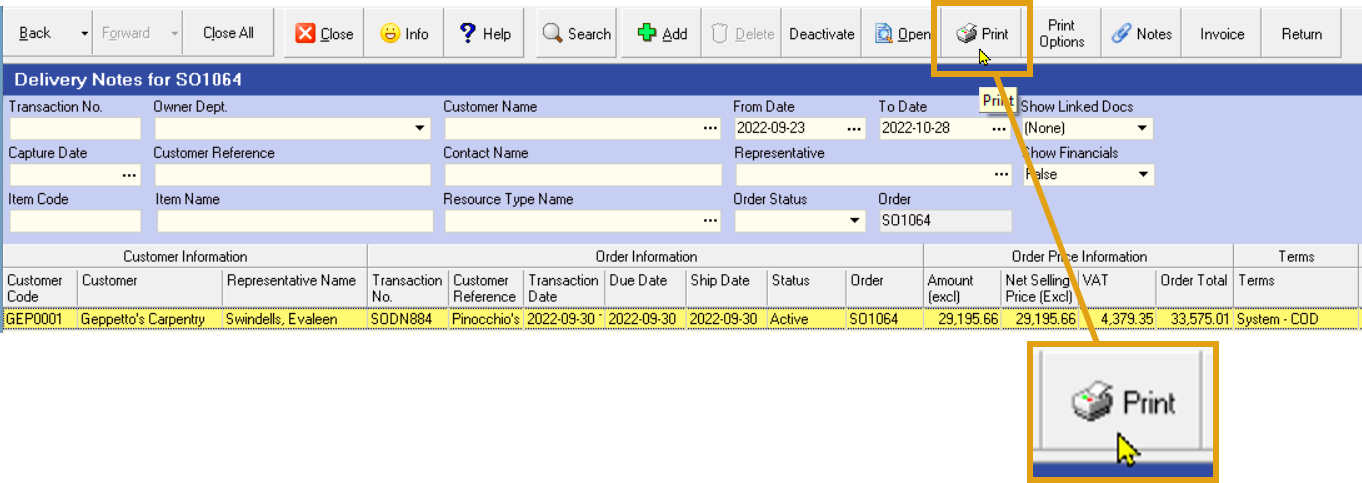
The system will display the details of the Delivery Note you have just captured in the grid.
-
Click on the row that contains the details of the Delivery Note you have captured.
-
Then click the Print button on the form bar.
-
The system will display the standard Print Preview screen so that you can then view and print the Delivery Note.
This is the end of this procedure.