View & Print Customer Statement (SAF-4041CS)
Procedure Guideline
Introduction
What is the Purpose of this procedure?
The purpose of this procedure is to describe the steps you need to take to generate a report of that lists all transactions that have occurred between the Company and its Customers. This document, called a Customer Statement, is generated for each customer and sent to each customer to provide them with a guide for making payments to the company by showing them what transactions have been captured and what transactions are due to be paid.
When would you use this procedure?
You would use this procedure either during the course of a month if you were querying the status of a customer's account and then at the end of the month you would generate statements for all customers to advise them what payments they will need to make during the coming period.
Step-By-Step Guideline
To generate a Customer Statement perform the following steps...
-
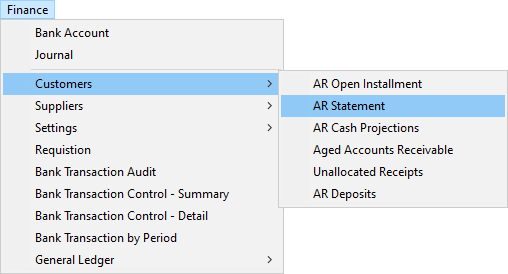
Click Finance on the main menu.
-
Click Customers on the drop down menu.
-
Select AR Statement (for Accounts Receivable) on the side menu.

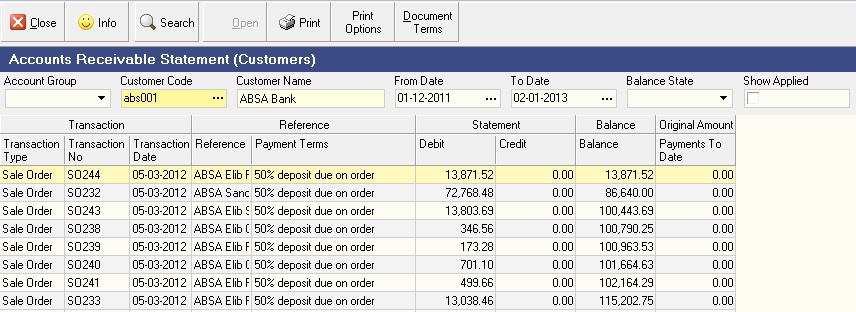
The system will open a screen titled "Accounts Receivable Statement." This provides you with a set of criteria that you can use to filter the information that will be used to generate Customer Statements.

You will notice that as you enter the screen there is no information displayed. This prevents the system from running unnecessary queries and instead you need to enter some information in the search panel at the top of the screen before the system will display any information in the report.
Search Options
Using the Search Options in the Search Panel
-
You can filter the list of transactions in the Accounts Receivable Statement screen to show only those transactions that belong to a specific CUSTOMER GROUP. To do this select one Customer Group from the drop down list of Account Groups.
-
You can also choose to view only those transactions that occur for a specific customer. To do this, enter the customer's account code in the Customer Code field in the search panel. You can also click on the three-dot button in the Customer Code field and search for a specific customer by name using the pop-up Select Customer window.
-
You can choose to view only those transactions that occur AFTER a specific date. To do so select the starting date from the drop down calendar that is displayed in the From Date field.
-
You can choose to exclude transactions that occur AFTER a specific date. To do so select the ending date from the drop down calendar that is displayed in the To date field.
-
When you have entered specific information in the Search Panel, click the Search button on the form bar. Note that you can also choose to click the Search button without entering any information in the Search Panel and the system will then display all the information related to Customer transactions on the screen.
On-screen Information
Understanding the Information in the Screen
The system displays a comprehensive list of information about the various transactions captured against each customer's account in the columns on the screen.

-
The customer's account code is displayed in the Code column.
-
The name of the customer is displayed in the Customer Name column.
-
The transaction type is displayed in the Transaction Type column.
The instalment can be caused by a deposit that needs be paid when placing a Purchase Order, then the Transaction Type will be SO or...
The instalment can be caused by an invoice received from a customer, then the Transaction Type will be SO Invoice.
A payment received from a customer is assigned a Transaction Type of Receipt.
-
The system displays the transaction number in the Transaction No column. This allows you to easily find any transaction that has been captured against that customer's account.
-
The system displays the date of the transaction in the Transaction Date column.
-
Any additional reference number, such as an internal order number or job number that was captured on the Sales Order or Sales Order Invoice is displayed in the Reference Number column.

-
The system displays the Term Detail Name in the Payment Terms column. This is the rule in the payment terms that created the instalment displayed in the list.
-
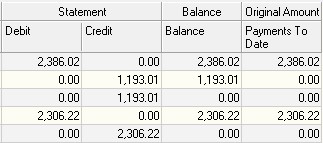
The system displays any transaction that increased the customer's account balance in the Debit column.
-
The system displays any transaction that decreased the customer's account balance in the Credit column.
-
The system displays the running balance after each debit or credit transaction in the Balance column.
-
The system display information about any payments made to date against a specific installment in the Payments to Date column.
Print Customer Statement
-
To print a statement for the customer, click the Print button on the form bar and
-
then click the Customer Statement menu item.
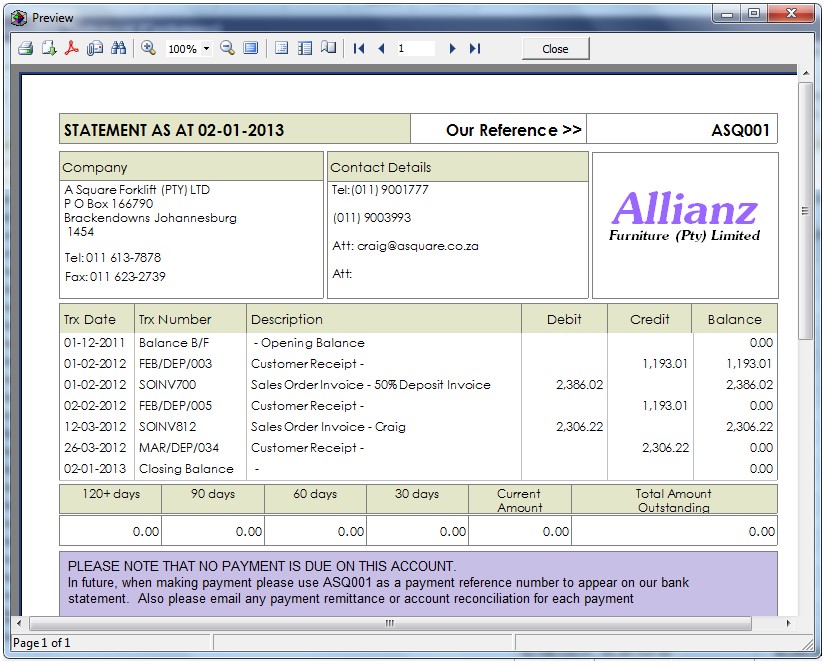
- The system displays the statement in a Print Preview window.

You can choose to either print, fax or email the statement to the customer.
-
If you decide that you wish to email the Statement to the customer you can create a PDF copy of the Statement and then attach it to an email. To do this click the PDF button on the top of the Print Preview screen.
-
To simply Print the Sales Quote, click the Printer Icon.
-
To close this screen, click the close button at the top of the screen.
This is the end of this procedure.