Manage Schedule Capacity - Factory Floor Terminal (Sense-i Maestro)
Procedure Guideline
The Production Schedule function in the Sense-i system enables you to manage Production Batches for Scheduling purposes, and enables linking items that have been ordered by customers that need to be manufactured.
The Production Scheduling Batch determines when these batches should be manufactured and shows how this impacts the available capacity in the production department.
To manage and maintain a Production Schedule in the Sense-i Maestro system, you need to perform the following steps;
Step-by-Step Guideline
- Click the File menu item and then the Log In menu item.
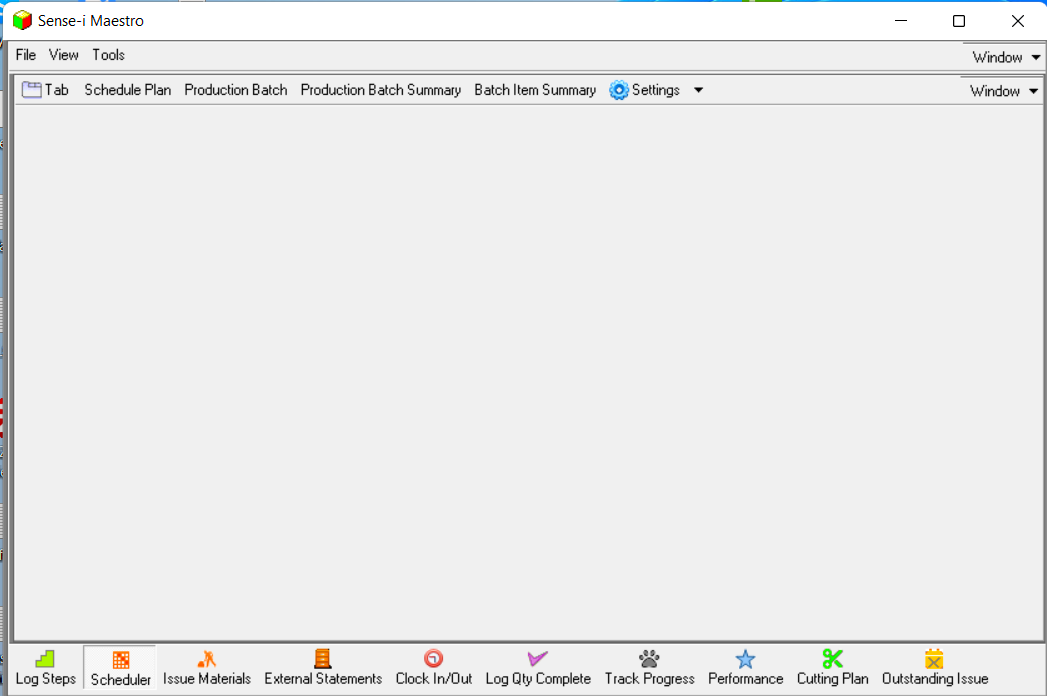
- Once you have logged in you need to open the Scheduler system. To do this click Scheduler at the bottom of the screen.

- The application will the open the Production Scheduler system.
The Goal
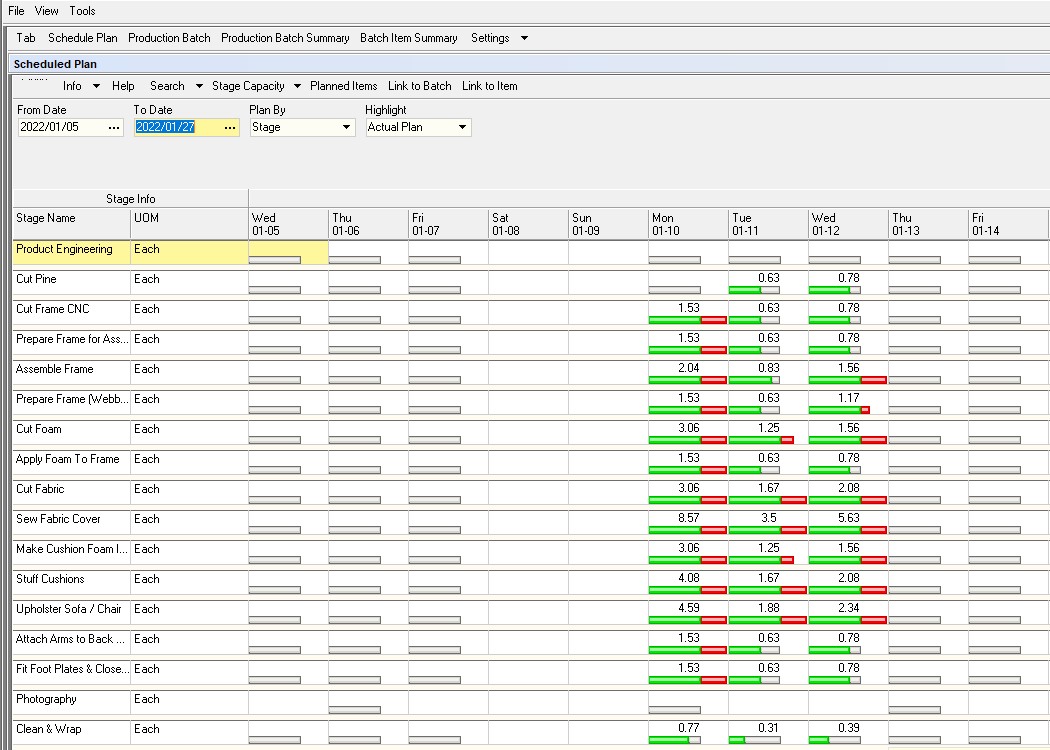
When you open the Scheduler module and open the Schedule Plan screen, you will see how much production capacity has been used up in each Stage for each day.
-
To view the details of what has been scheduled for each stage for each day, click the Production Batch button at the top of the screen.
-
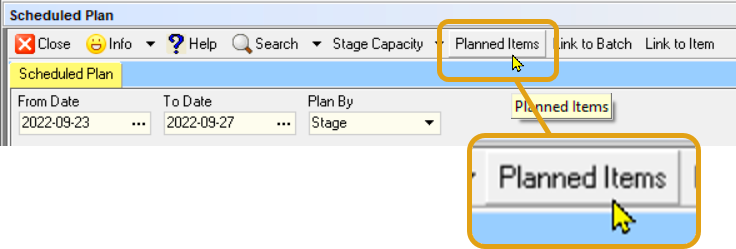
On the Schedule Plan screen, click the Planned Items button and the program will then show you the list of tasks scheduled to be completed at each Stage on each Day.
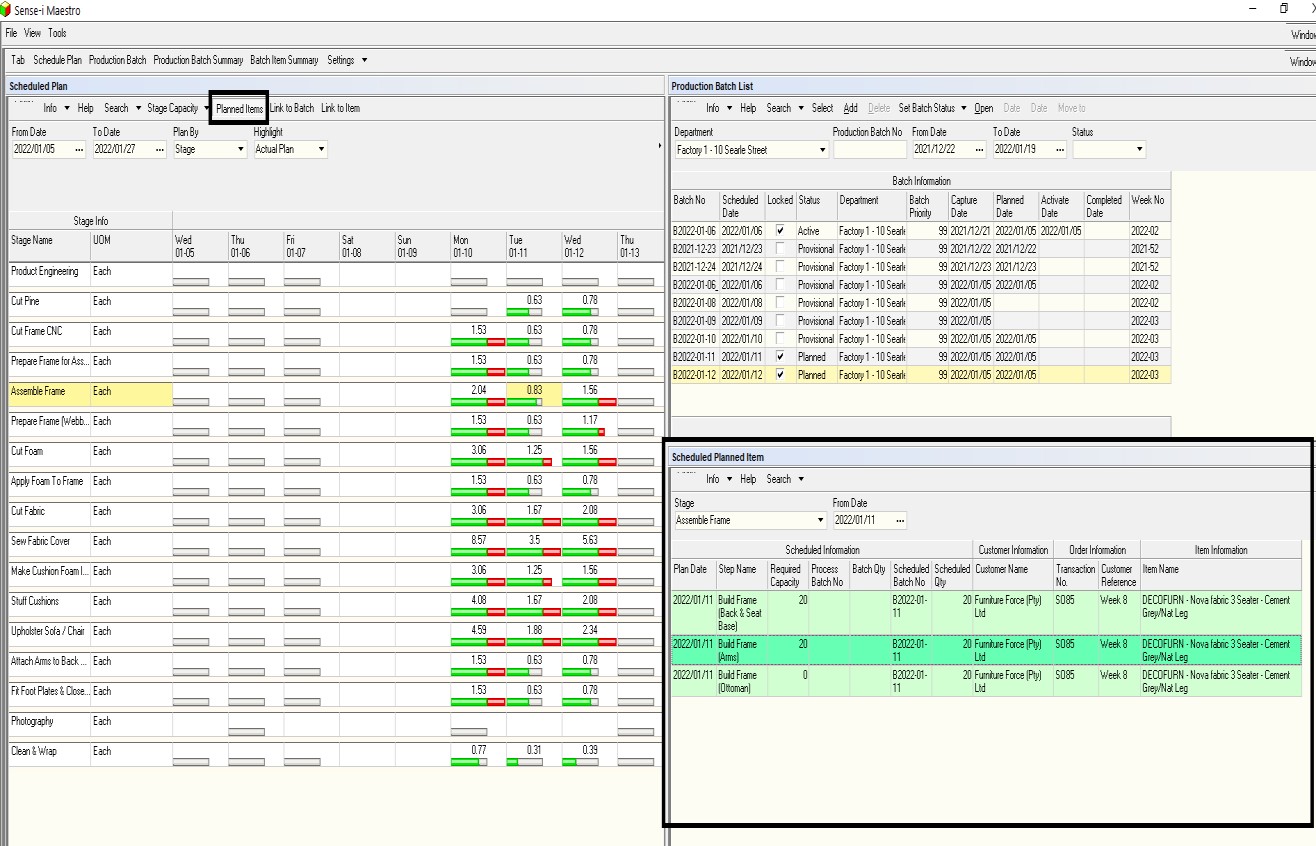
The following steps will detail the process to achieve the goal as outlined above.
Production Scheduler Screen Layout
-
The first thing you need to do is to arrange multiple window positions on the Scheduling system screen.
-
To do that click the Tab button at the top of the screen...
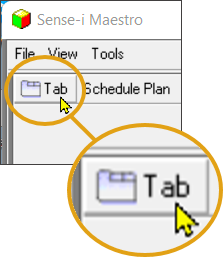
The program displays a floating window titled Empty...
- Drag the floating window into the Sense-i Maestro application screen.
This process is known as Docking. After clicking on the Tab button, the floating window(s) can be Docked and arranged to suit your preference.
- Then repeat steps 2 and 3 twice more to create a screen layout that looks like the one in the image below.
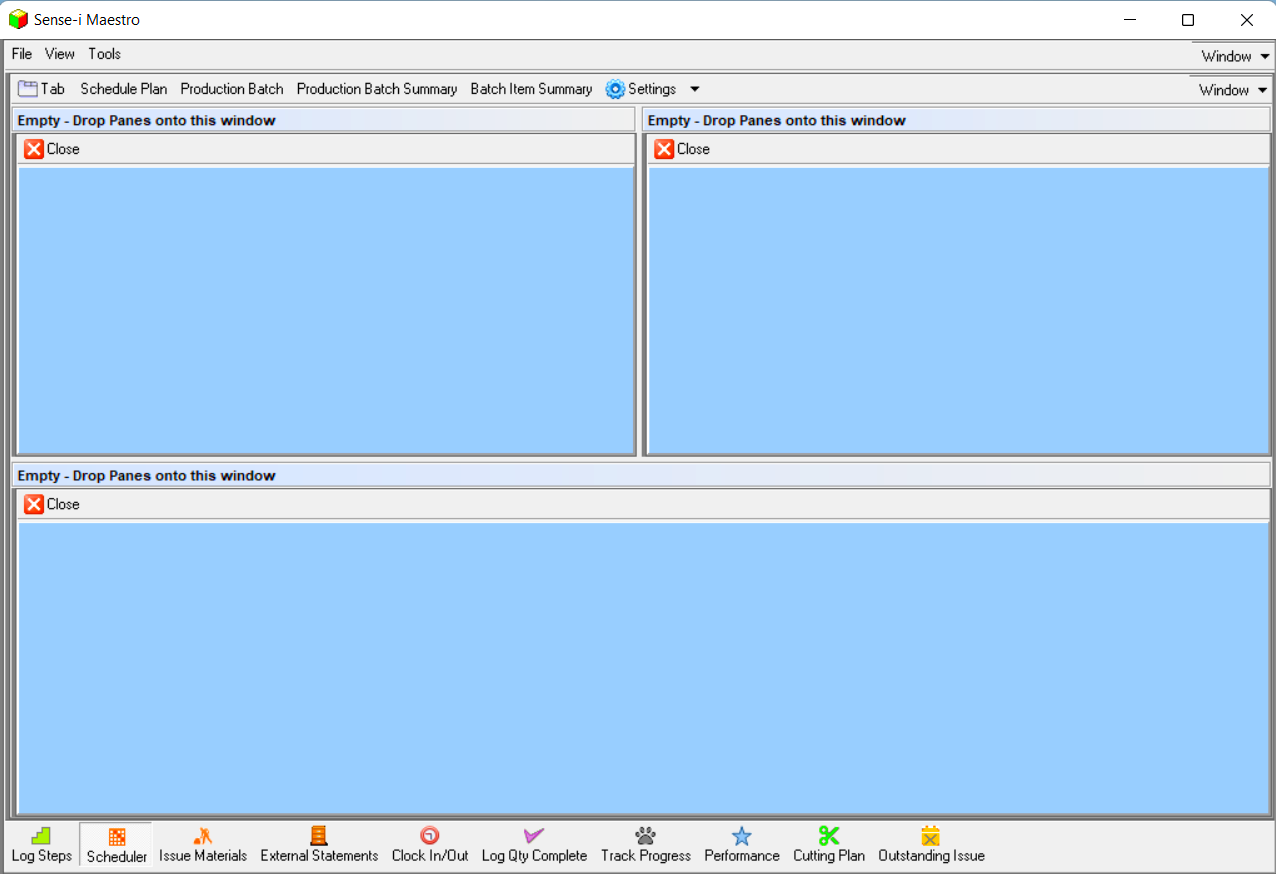
Production Scheduling
- Next, you need to open the main Production Scheduling screen.
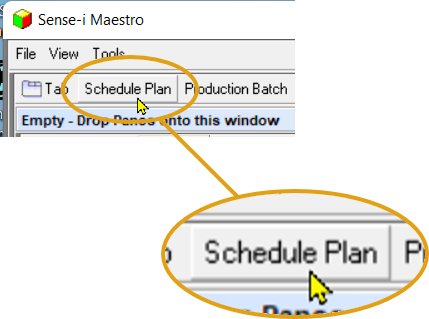
To do this click the Schedule Plan button.
-
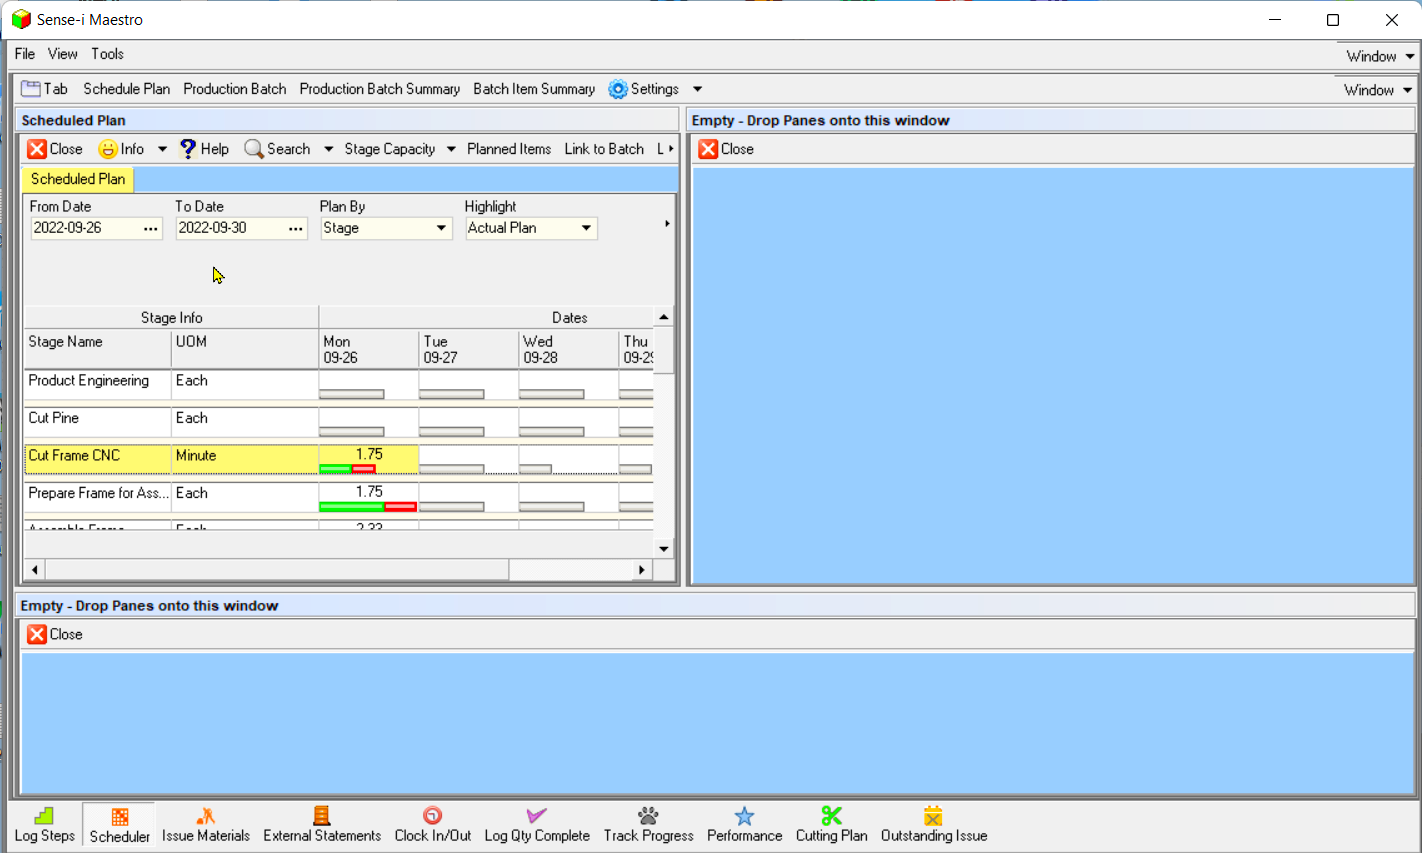
The system will open the main Scheduler screen - you will see that this is called the Scheduled Plan screen.
Drag this screen into position in the top left panel.
-
Next, open the screen that enables you to set the Available Production Capacity for each Stage.
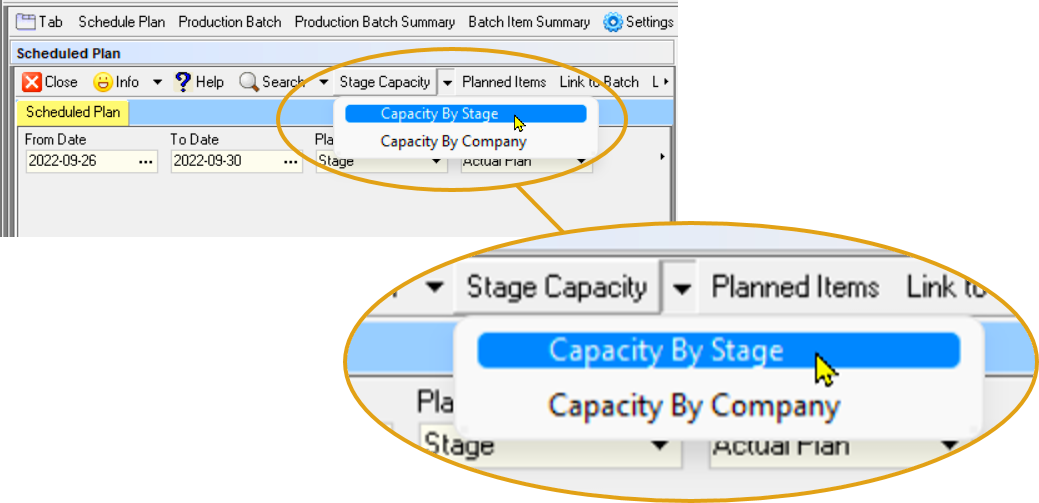
To do this, click the Stage Capacity button, and then click on Capacity By Stage (Scheduled Plan screen, Form Navigation bar).
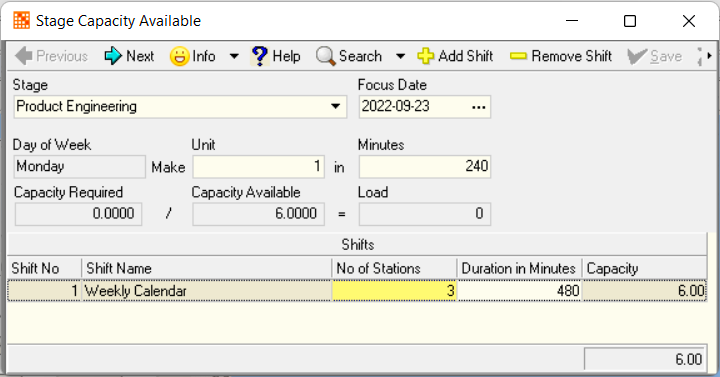
- The system will open a screen titled Stage Capacity Available.
-
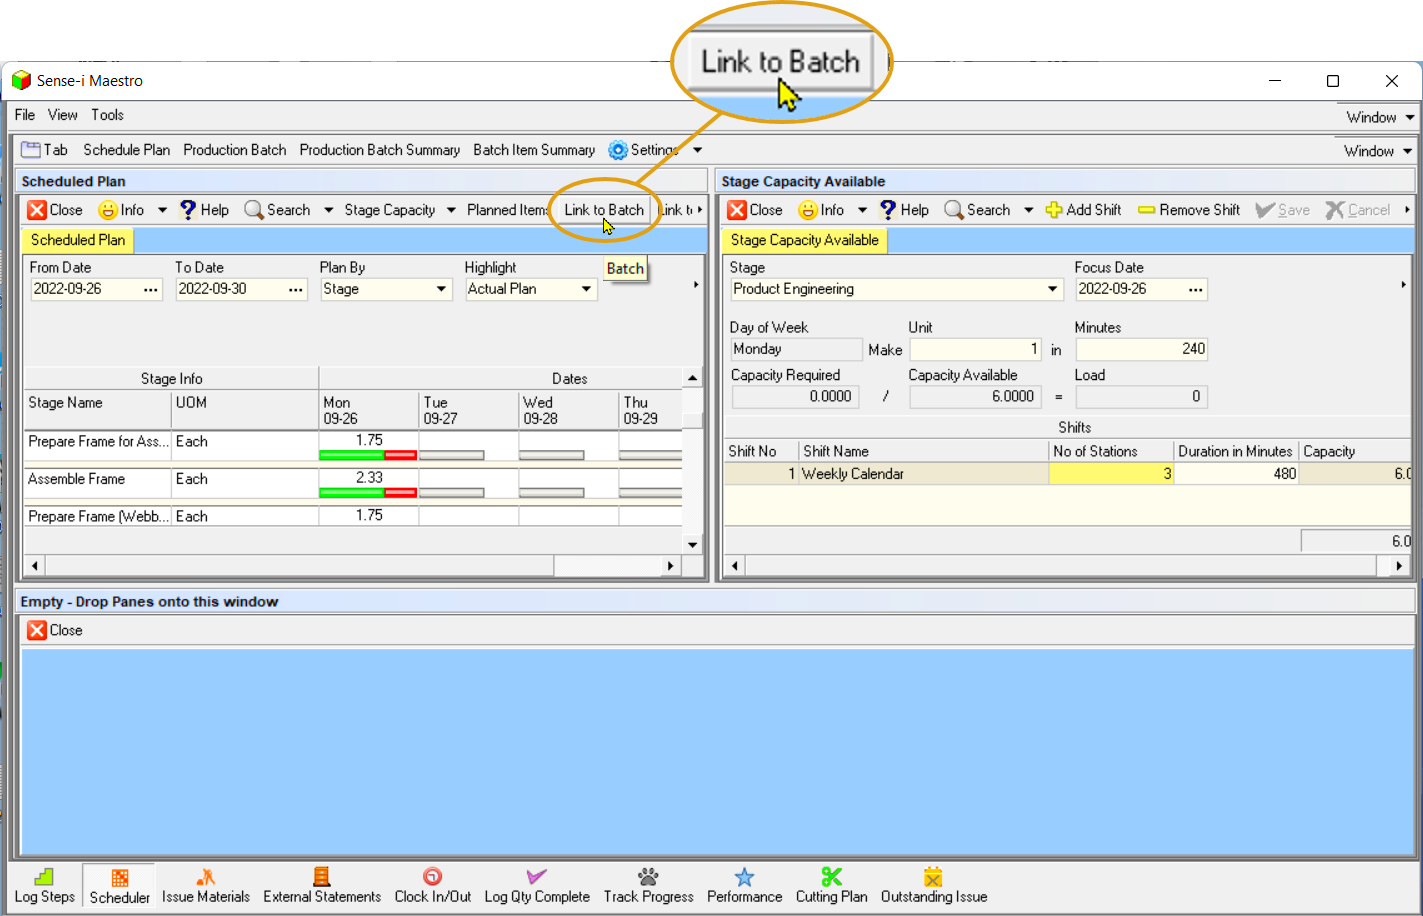
Dock the Stage Capacity Available screen in the top right panel so that you screen now looks like the one in the image below.
-
Click the Link To Batch button in the Scheduled Plan, Form Navigation bar .
Production Batch
- Next, you need to open a window that shows you what Production Scheduling Batches exist in the system.
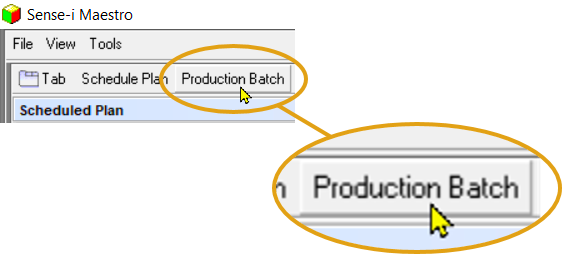
To do this, click the Production Batch button at the top of the screen.
-
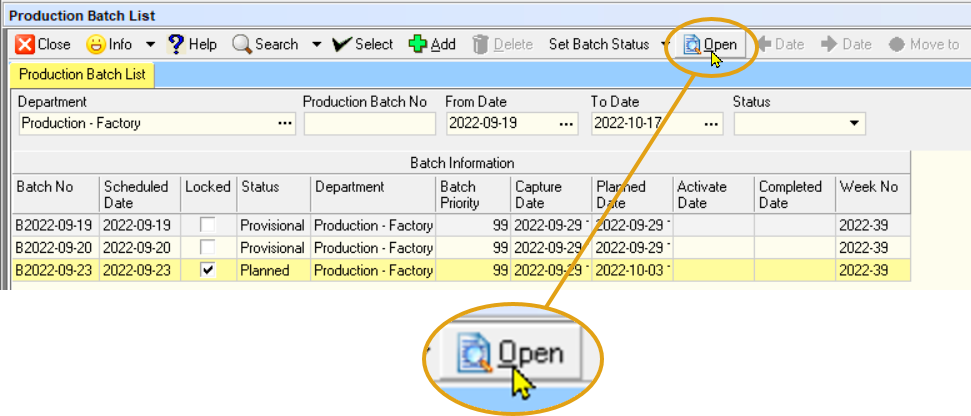
The system will open a screen titled Production Batch List.
-
Dock the Production Batch List window in the horizontal bottom pane.
-
To view the details of the items in each Production Batch, select the relevant batch row in the Production Batch List, then click the Open button to open the Production Batch View screen.
-
The system will open the Production Batch View screen.
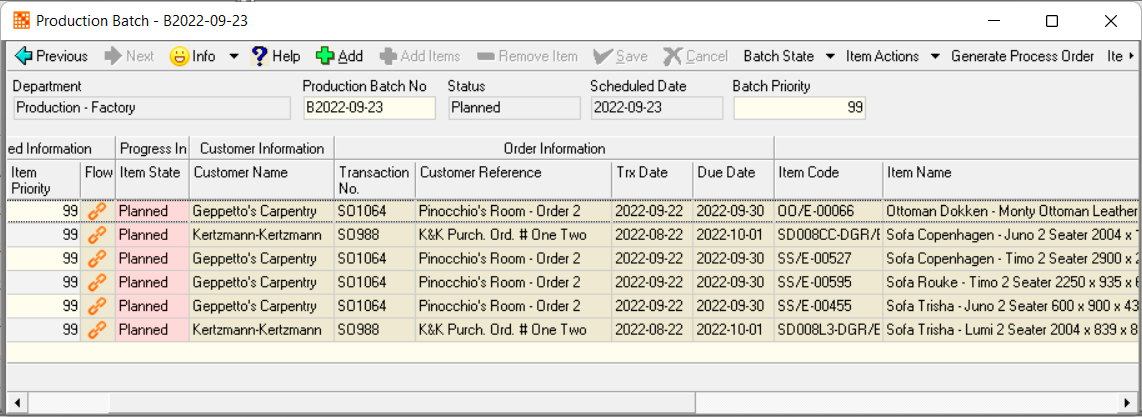
This screens shows you the details of each product or item that have been included in a Production Batch.
- Dock the Production Batch View screen in the bottom horizontal panel - on top of the Production Batch List Screen.

The system creates two Tabs from these screens - one on top of and to the right of the other.
View Scheduled Planned Items
Finally, open a screen that enables you to view the Steps or Activities that need to be performed in each Stage for the work that you have scheduled.
-
To do this, click the Planned Items button.
-
The system will open a screen titled Scheduled Planned Item.
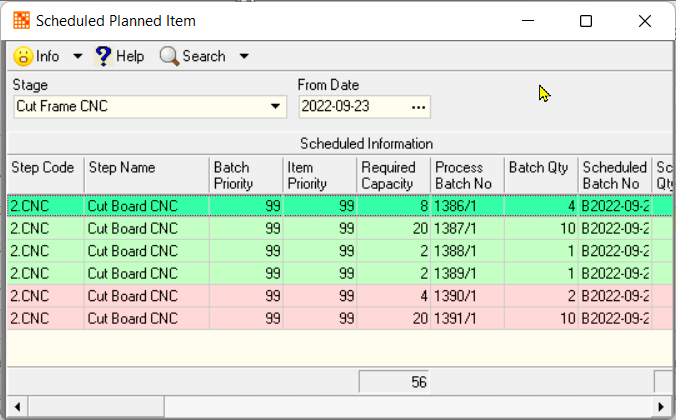
- Dock this screen as a third tab in the bottom horizontal panel.

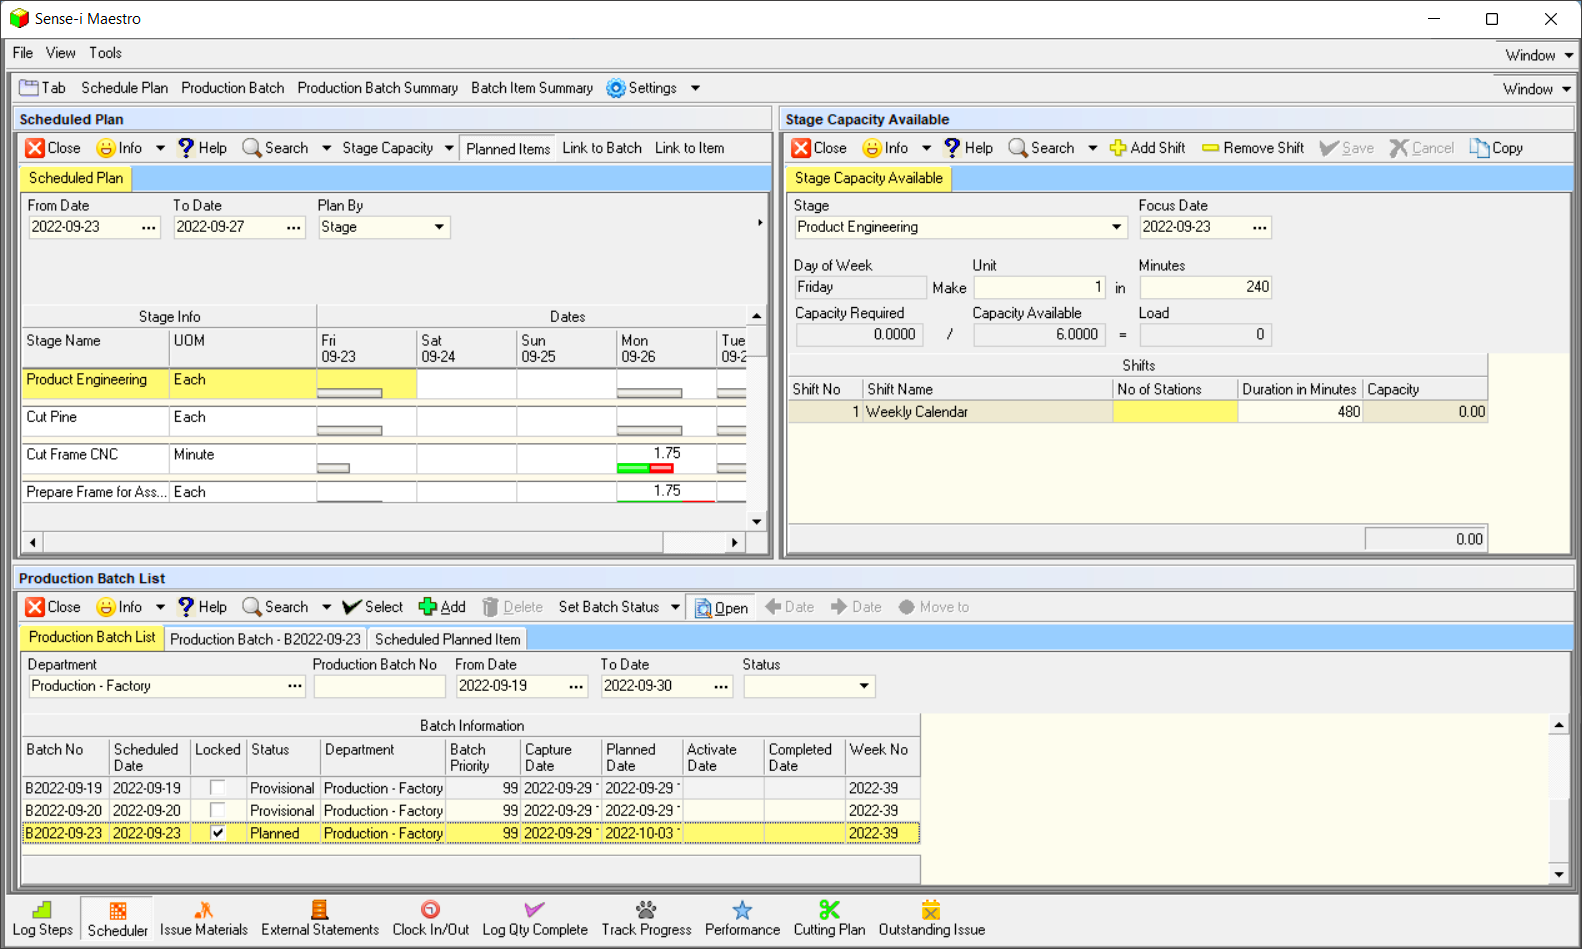
- The scheduling system should now have the following layout...
Unscheduled Process Orders (REVIEW Required)
-
Next, you need to view a list of the items that have been ordered by customers that have not yet been scheduled.
To do this, click the Unscheduled List.
-
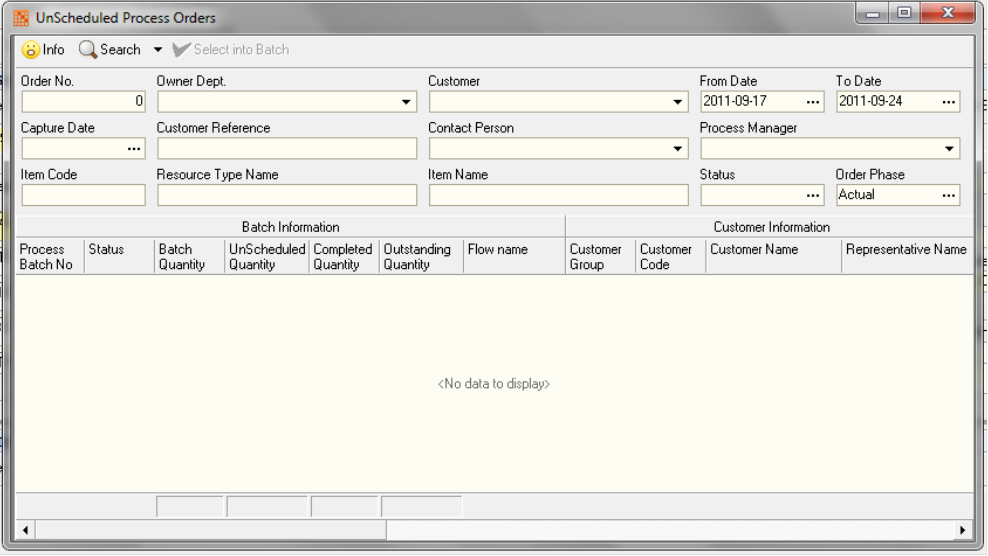
The system will open a screen titled Unscheduled Process Orders.
This screen lists all the Process Orders that you have created via the Replenishment function.
If you have items on Sales Orders in the system and you have not yet used the Replenish function to create Process Orders they will NOT APPEAR IN THIS LIST.
- Dock the Unscheduled Process Orders window in the horizontal bottom pane.
Scheduling Items
The first step in actually scheduling items that have been ordered is to create a Production Batch and then select order items from the Unscheduled Process Orders list and include them in the Production Batch.
-
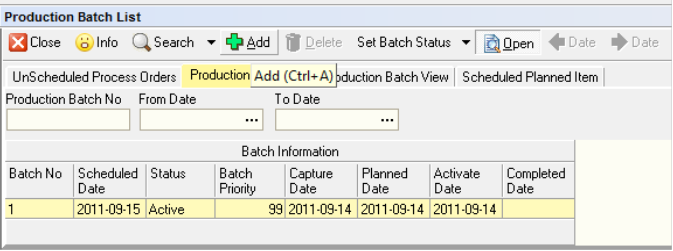
To do this, click the Production Batch List Tab, and
-
then click the Add button.
-
The system will open the Add New Production Batch Screen.
-
Click on the three-dot button in the Department field and then select the relevant Department.
-
Enter a Production Batch No.
-
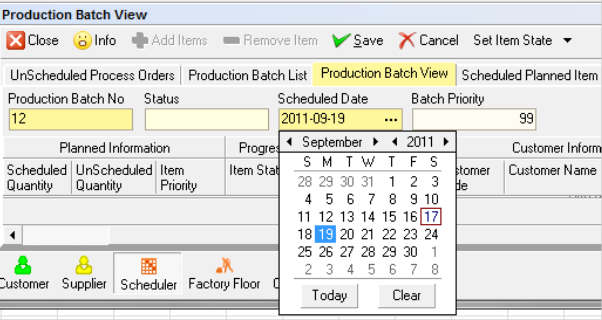
Select a Scheduled Start Date, this is the date on which production will start on this batch.
- Enter a Batch Priority.
If there is more than one Production Batch starting on the same date the Batch Priority will control the sequence in which these start.
1 is the highest priority, i.e. it will start first and 99 is the lowest priority.
- Click Save.
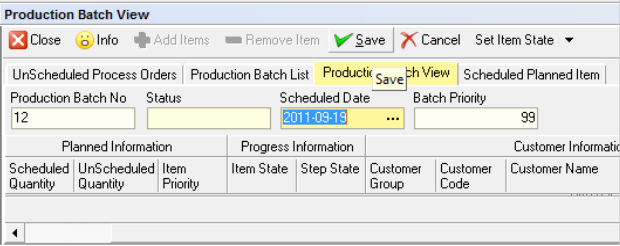
The next step is to add items from the Unscheduled Process Order list.
To do this, click on the Add Items button
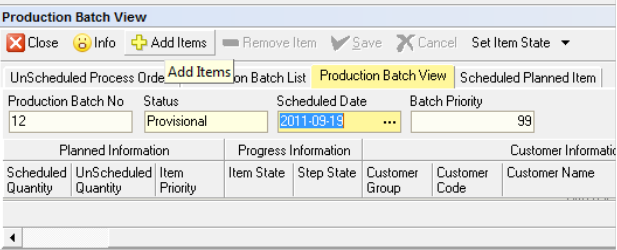
- Next, decide on how you want to batch items, you can do this by selecting or grouping items...
-
By Sales Order
-
By Due Week, then Product Type
-
By Due Date
-
By Flow Name
- The system will take you back to the Unscheduled Process Orders screen so that you can select which items you want to include in a Production Batch.
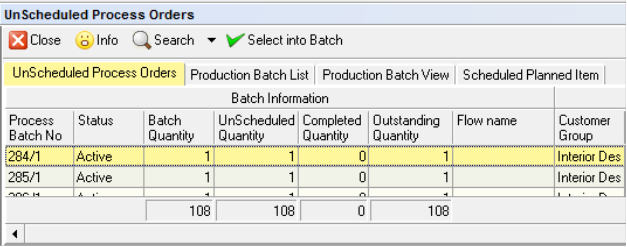
- Click on the items you want to include in the Production Scheduling Batch you are creating.
Remember to use the Quick Filter to select items according to the most appropriate set of criteria for your company. These could be...
-
By Sales Order
-
By Due Week, then Product Type
-
By Due Date
-
By Flow Name
-
Then click the Select Into Batch button.
-
The system will return you to the Production Batch View screen.
-
Click the Production Batch List screen.
-
Click the Set Batch Status and set the status to "Planned".
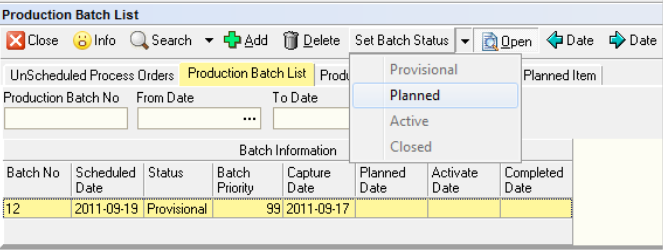
- Click the Production Batch View to view the list of items that are included in the batch.

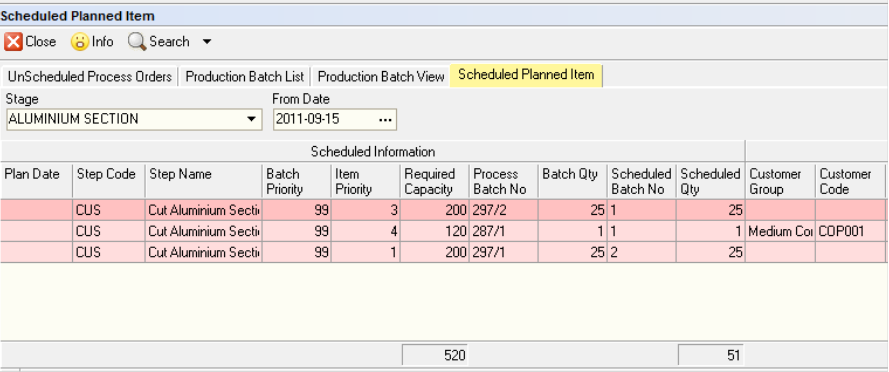
- Once you have selected items into a Production Scheduling Batch you can view the activities or steps for a particular stage by clicking on the Scheduled Planned Items screen.
-
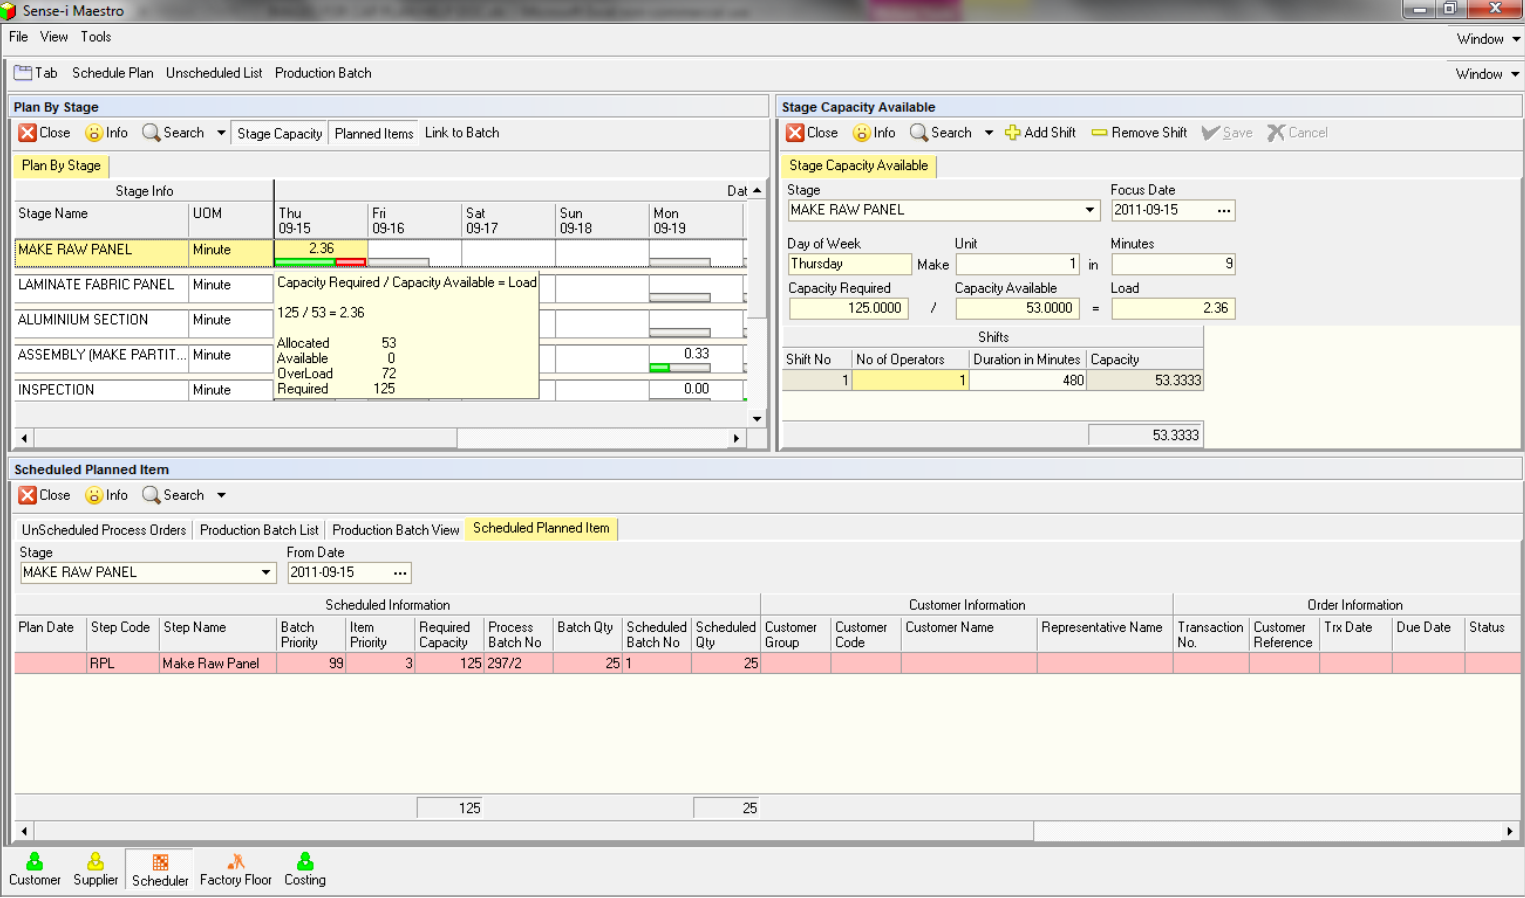
Then note that if you have clicked the Link to Batch button...
-
As you click on different Stage Names and Dates in the Plan By Stage matrix both the Stage Capacity Available and the Scheduled Planned Items screens show you the details of the items that are used to calculate the Loading for each Stage and day.
Production Schedule Optimisation
- All that remains now is for you to try to optimise the Production Schedule so that the Loading for each day is as close to 1 as you can practically achieve.
You can do this by changing the Inputs to the Production Schedule, i.e.
-
Adjust Stage Capacity Available within reasonable constraints by changing the;
-
Number of Operators in a Shift
-
The Duration of a Shift, i.e. work some overtime
-
Adding a New Shift
-
Or Changing the Production Rate.
-
-
Once you have reached the limit of the Available Capacity ...
-
remove items from the production batch
-
or change the quantity of an item you will make in a batch
-
-
Once you have done all you can to optimise your Production Schedule you can then move on to Tracking the Progress of the items in a Production Schedule through the factory.
This is the end of the procedure.