Purchase Order Invoice (SAF-152)
Step-By-Step Guideline
-
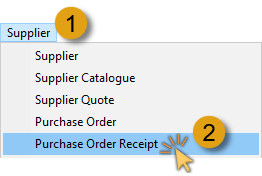
Click on Supplier in the Main Menu.
-
Then click the Purchase Order Receipt option on the Drop Down Menu.
The system will open a screen titled "Maintain Purchase Order Receipt."
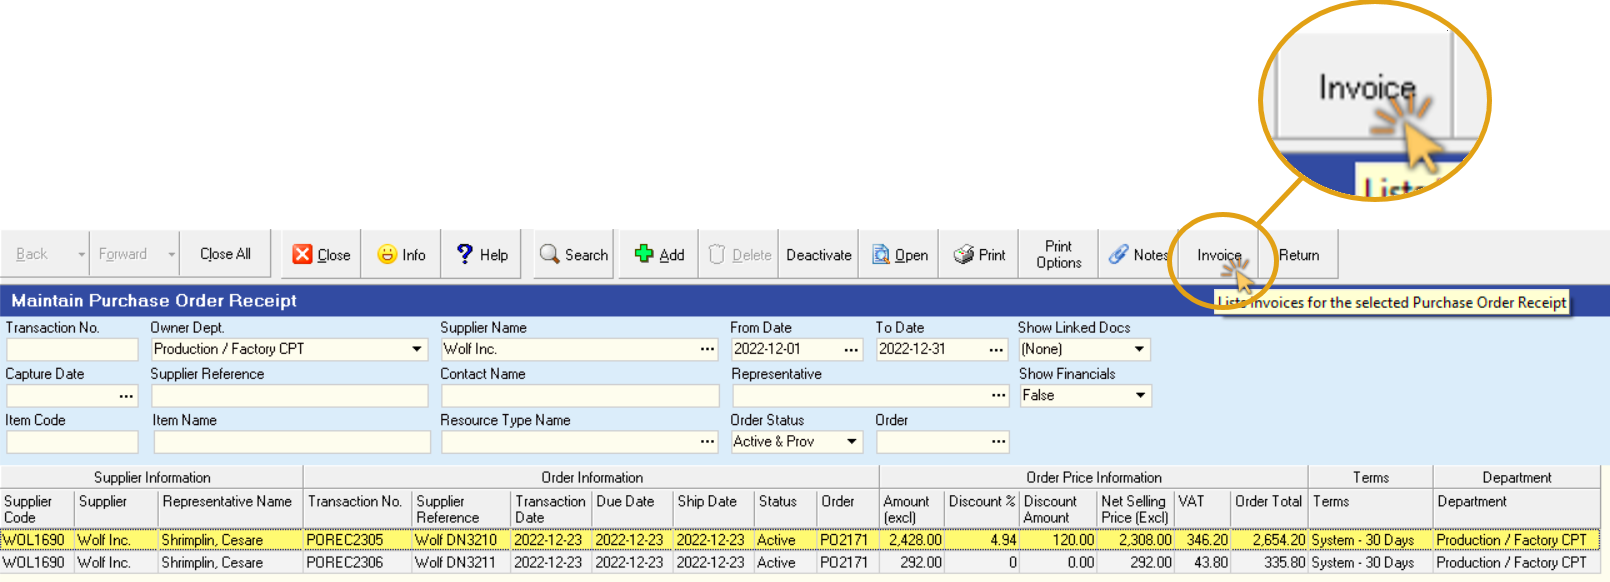
This screen lists all of the Purchase Orders Receipts (also known as Goods Received Notes) that have already been captured in the system within the From and To Date specified in the Search Panel.
You can change the information displayed in this list by changing the dates and other information in the Search Criteria Panel above the list of orders.

- Click on the Purchase Order Receipt in the list for which you wish to capture an Invoice.
You can sort the information in the list using the Column Sort or Quick Filter functions.
It is a good idea to find the name of the Supplier for whom you wish to capture an invoice.
- Click on the Invoice button on the Form Bar to view a list of Invoices that have been captured against this Purchase Order Receipt.
The system will open a screen titled "Invoices for POREC ###". This screen will show a list of all the Invoices that have been captured against the selected Purchase Order Receipt.
If this is the first time you are capturing an invoice against this Purchase Order Receipt, the system will not list any Purchase Order Invoices.

- Click on the Add button on the form bar to open the Add Purchase Order Invoice screen.
The system will display a screen titled "Purchase Order Invoice - POINV####".
This screen will automatically list all of the details that were captured on the Purchase Order Receipt you selected in step 3 above.
This screen consists of three parts, the Header, the Detail and the Footer.
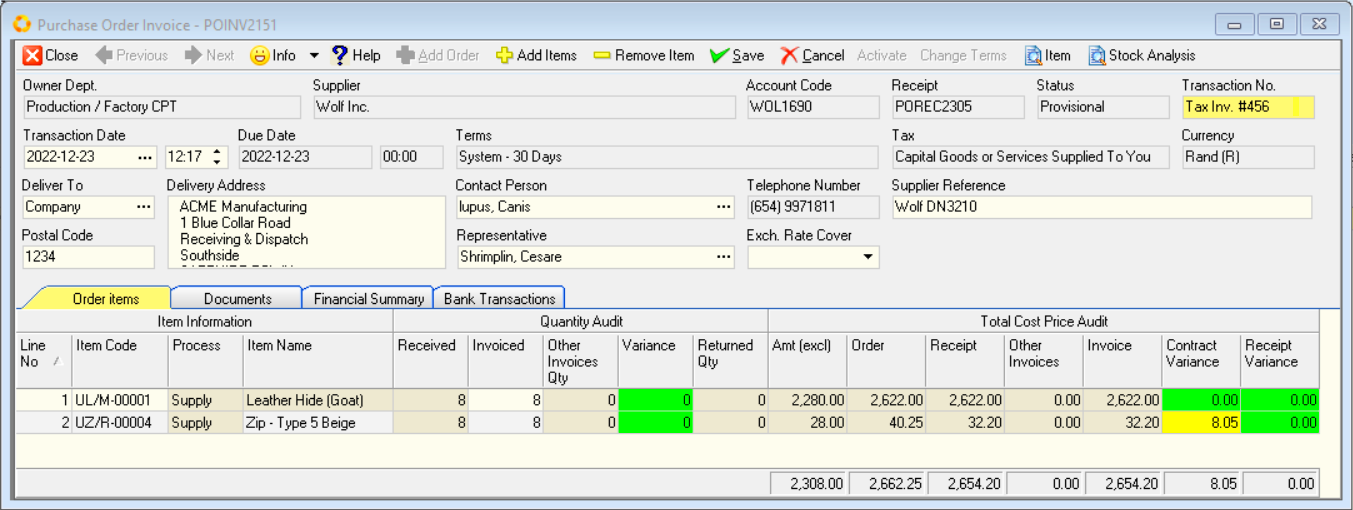
The Header is displayed at the top of the screen and displays information about the Supplier, the transaction numbers, dates, payment terms, delivery address and so on.
The Detail is displayed in the middle of the screen in a worksheet or grid and lists each of the individual items that were delivered by the Supplier.
The Footer displays the total value for the order at the bottom of the screen.
- You need to enter the Invoice Number as it appears on the Supplier's Invoice in the Transaction No. field.
Simply overtype the correct Supplier Invoice number in this field.
- You can enter a Reference number in the Supplier Reference field, if this invoice is for a specific order.
OR you can leave the reference number the same as it was captured on the Purchase Order Receipt.
The grid at beneath the Order Header lists the item code, the item name and the quantity received for each item as they were captured on the Purchase Order Receipt.

- You need to check that the quantity for which you are being invoiced corresponds to the quantity that was booked into stock on the Purchase Order Receipt.
- Once you are satisfied that the quantity for which you are being invoiced matches the quantity that was received, you need to check the Unit Cost Price being charged by the supplier.
If you notice a difference, you can change the Unit Price in the grid by typing the correct Unit Price in the Invoiced field.
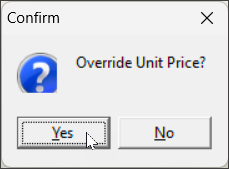
Click on the Yes button on the Confirmation Dialog pop-up screen to override the Unit Price.

-
Check that the Discount % and Tax % amounts are correct.
-
Check that the Amount (excl) on the screen matches the Amount Excluding Tax on the Supplier's Invoice.
-
Repeat steps 8 through 11 for each item listed on the screen.
-
Once you are satisfied that you have captured in the details for the Supplier Invoice correctly on the system, click the Save button on the form bar.
-
If you are confident that all the information is accurate, click the Activate button.
-
You can now exit the form by clicking on the Close button.
-
The system will return you to the Invoices for POREC#### screen and list the Invoice that you have captured against the selected Purchase Order Receipt.

- To print the Purchase Order Invoice and attach it to the Supplier's Invoice Note, click the Print button.
The system will display the Purchase Order Invoice in the Print Preview screen.
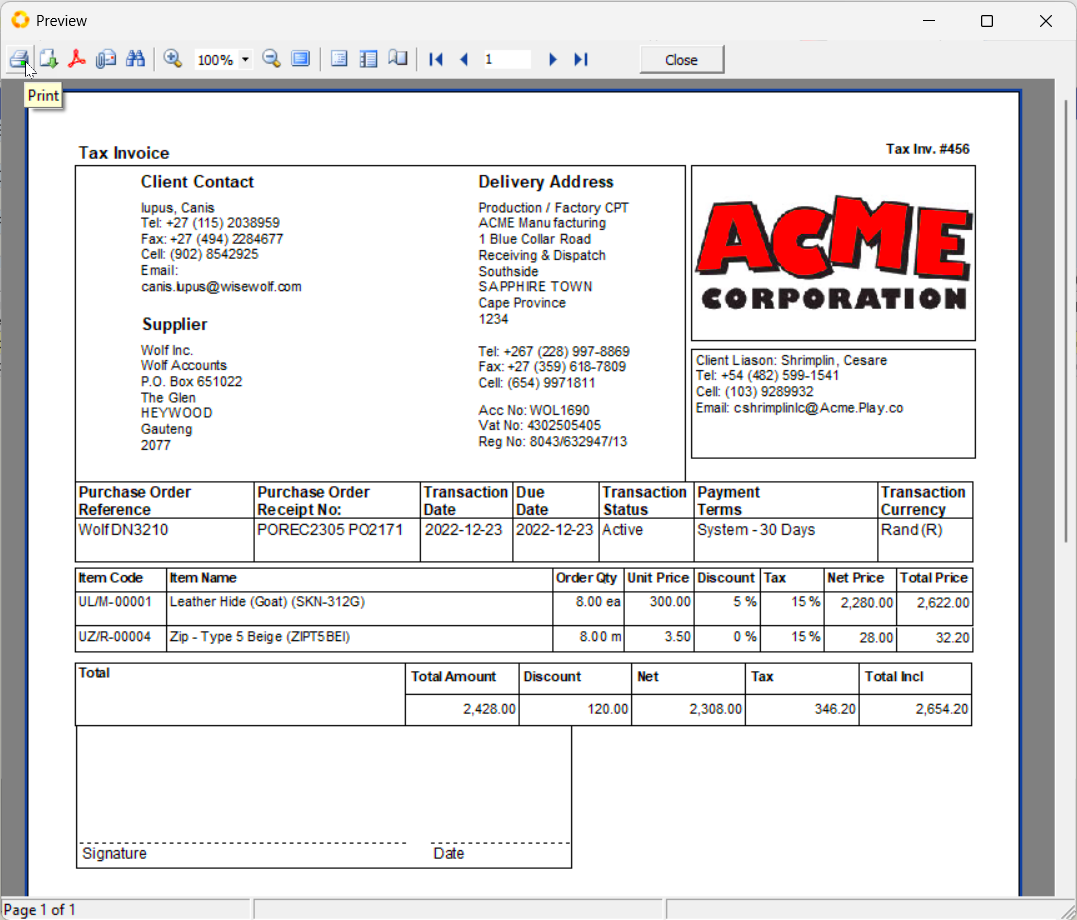
- To Print the document as previewed, click the Printer Icon on the top-left of the screen.
The system will print the Purchase Order Invoice.
-
Retrieve the printed Purchase Order Invoice and staple it to the original Tax Invoice received from the Supplier and then file these two documents.
-
Once you have completed capturing the invoice, click the Close button on the form Action bar.
This is the end of this procedure.