View and Adjust Clock Events (SAF-739)
Procedure Guideline
-
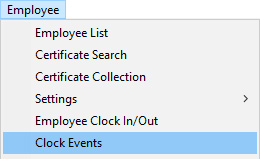
Select Employee on the main menu.
-
Click Clock Events from the drop-down menu.

The system will display a screen titled Clock In/Out Search. This screen lists each of the clock events that have been recorded in the system.

You will notice that above the list of clock events a number of fields are displayed. These are search fields that you can use to find clock events that match specific criteria. For example, you could choose to display all clock events for a specific department, or you could choose to display all clock events between two dates.
-
Enter the search criteria you wish to use to filter the list of clock events in the appropriate search fields.
-
Then click the Search button the form bar.
-
The system will display a list of all Clock Events that match the Search Criteria you have entered.
-
You will notice in this example that only a single clock event is displayed.
-
If the Employee has made a mistake and the Clock Entry Time needs to be adjusted the system allows you to do this easily. To Adjust a Clock Event, click the Adjust button on the form bar.
-
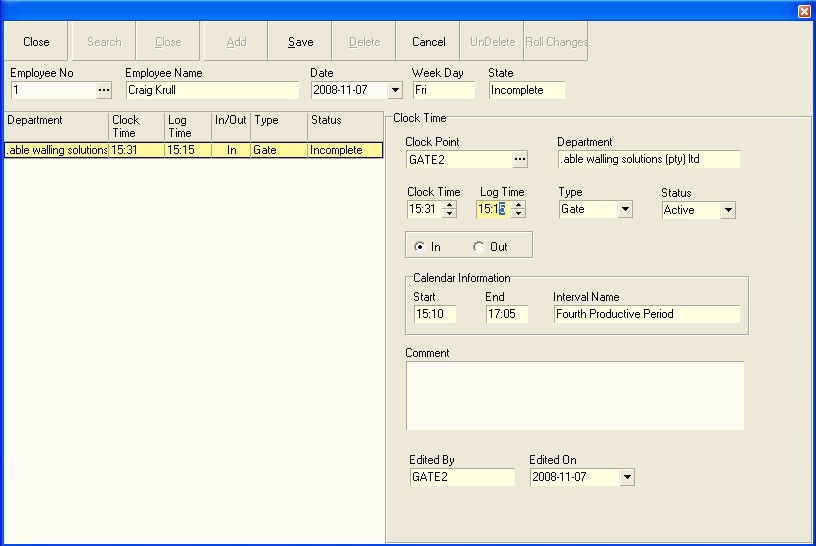
The system will open the Clock Manual Adjustment Screen.
-
The system displays the details as follows:
On the left hand side of the screen the system displays all the Clock Events for the selected Employee for the selected Date.

-
To change a time you can enter a different time in Log Time field. You will notice that as you change the Log Time, the Clock Time (that is the time at which the Employee clocked on the Fingerprint Recognition Device) remains unchanged. This is done for audit purposes.
-
If the employee has clocked incorrectly, and you need to change a Clock In Event to a Clock Out Event, then click the In or Out toggle buttons on the screen.
-
If you need to roll the changes forward click the Roll Changes button. This would automatically fix any situation where two clock events we incorrectly paired. For example, a Clock In, Clock In, Clock Out, Clock In would be changed to Clock In, Clock Out, Clock In and Clock Out.
-
Once you have made the necessary changes you need to click the Save button.

- You will notice too that the Status column will provide some indication of any problems that may exist with the Employees Time and Attendance records. If for example an Employee does not have a complete set of records for the day and some are missing, you can click the Add button and the system will create the missing record.

- You need to set the time (in the Clock Time field) and Clock Direction (either In or Out) to ensure the Clock Event you are capturing manually is correct.

-
Click the Save button and the system will then resolve any errors that are solved by the manual entry. Notice in the example above that the status has changed from Incomplete to Ok.
-
Continue adding any manual clock entries as required for the selected employee, then repeat this procedure for each employee for which any errors exist.
This is the end of this procedure.