Review Financial Statements (FNS-9999)
Step-by-step Guideline
-
Click on the Finance option on the Main Menu.
-
Then click the General Ledger menu item on the drop down menu.
-
Then click Financial Statements.
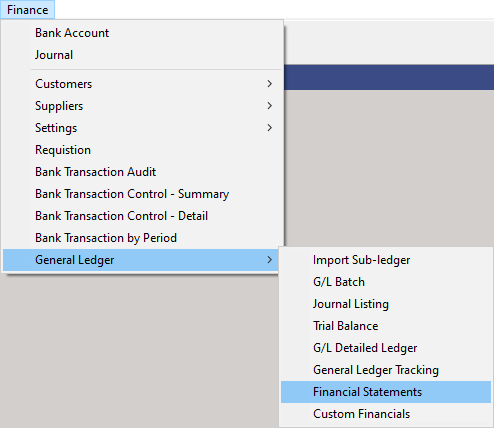
The system will open a screen titled "Review Financial Statements."
This screen lists a series of three tabs, one for each of the standard
Financial Statement Types. Each of the Financial Statements provide
you with a picture of the Financial Position and Activity in your
business to enable you to make informed decisions about what is
working and what needs to be improved.

In order to view the Financial Statements for the company, you first need to define the Start and End Accounting Period that the system will use for retrieving the information needed to generate the Financial Statements.
- To select a Starting Accounting Period, click the three dot button in the From Period field.
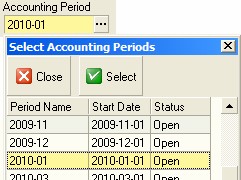
The system will open a Select Accounting Periods window.
-
Click on the Accounting Period you wish the system to use as the STARTING DATE for the Financial Statements it will generate.
-
Then click the Select button.
The system will close the Select Accounting Periods window and display the Accounting Period you have selected in the From Period field.
- To select a Ending Accounting Period, in other words the last period used for generating the Financial Statements, click the three dot button in the To Period field.
The system will again open a Select Accounting Periods window.
-
Repeat the steps 5 to 7 above to select an Ending Accounting Period for the Financial Statements you wish to view.
-
Then click the Search button.
The system will then retrieve the information from the General Ledger required to create the Financial Statements.
You will notice three tabs at the top of the screen...
Each of these tabs will display a different Financial Statement Type.
-
To view each of the financial statements created by the system, click on the tab to view each statement. Note how the Active or Selected Tab is displayed in a slightly darker colour that those that are not the one in focus.
-
The tab not in focus is displayed in a lighter colour. To switch to a non-active tab and a different Financial Statement Type, simply click on the Tab you wish to use.
The Balance Sheet
-
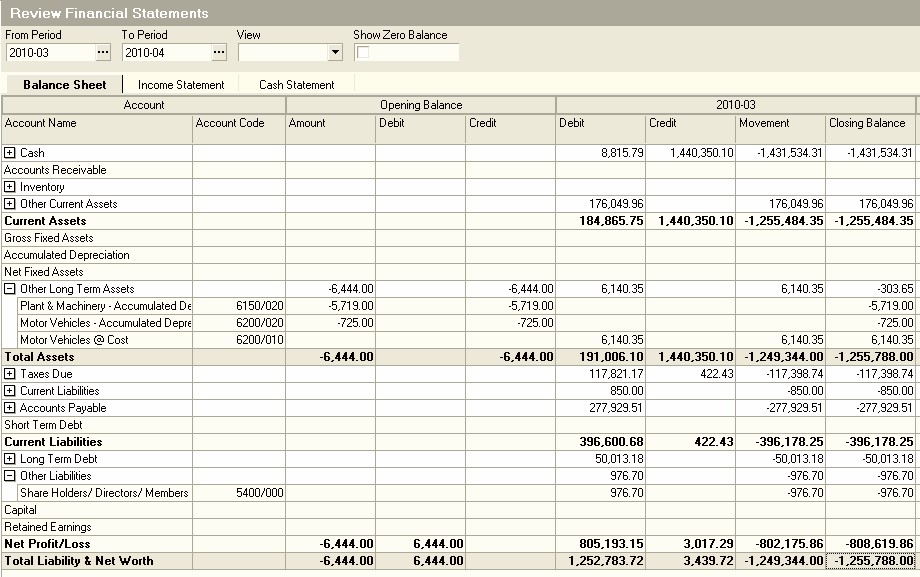
Note how each of the Accounting Periods you have selected is represented in a Band at the top of the Financial Statements.
-
Note how the system displays the SUM TOTAL of the amounts in each of the different statements at the ACCOUNT GROUP level.
-
Select an Account Group and then click the + sign on the left of the Account Group name and the system will...
-
Display an additional row for each of the Accounts in the Chart of Accounts that is linked to the selected Account Group.
-
On each row the system will display the Total Value of all the Transactions posted to the selected Account in the period.
-
You can choose to display rows containing any Accounts that have a Zero Balance (and therefore no posted transactions) by checking the Show Zero Balance option at the top of the screen. The default is to hide all Accounts that have no transactions posted to them.
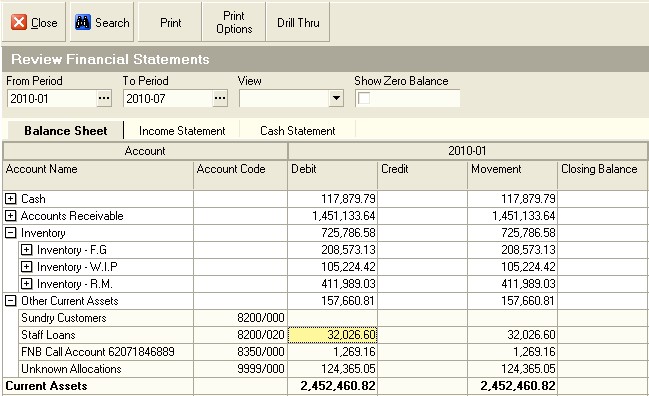
If you wish to see how the system has calculated the amount displayed for any account you can drill into a detailed breakdown called the General Ledger Detailed Ledger report.
-
Click on the cell that contains the value you wish to analyse.
-
Then click the Drill Thru button on the Form Bar.
The system will open a window on top of the Financial Statement you are viewing and in this window will display the details of every transaction posted to the account you have selected to drill into.
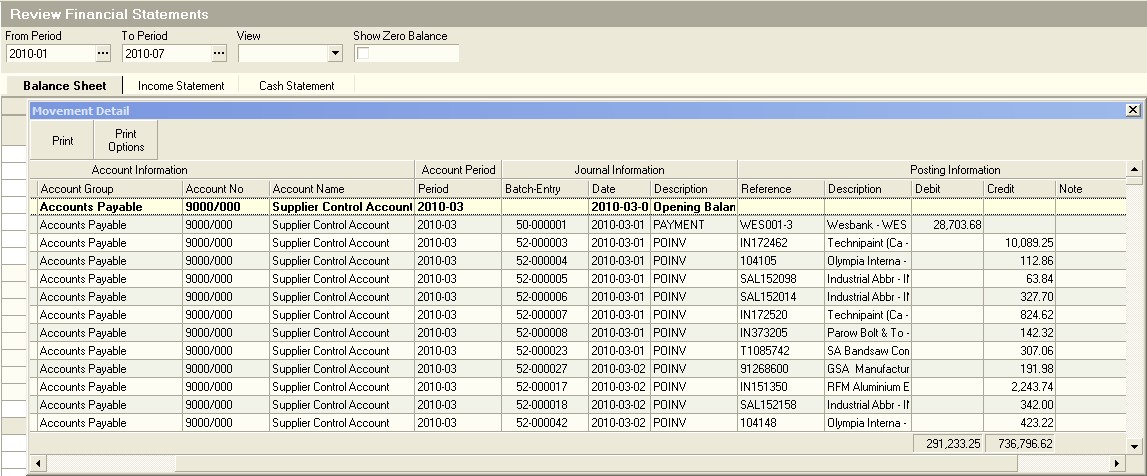
- You can print the transactions listed in the Detailed Ledger by clicking the Print button.
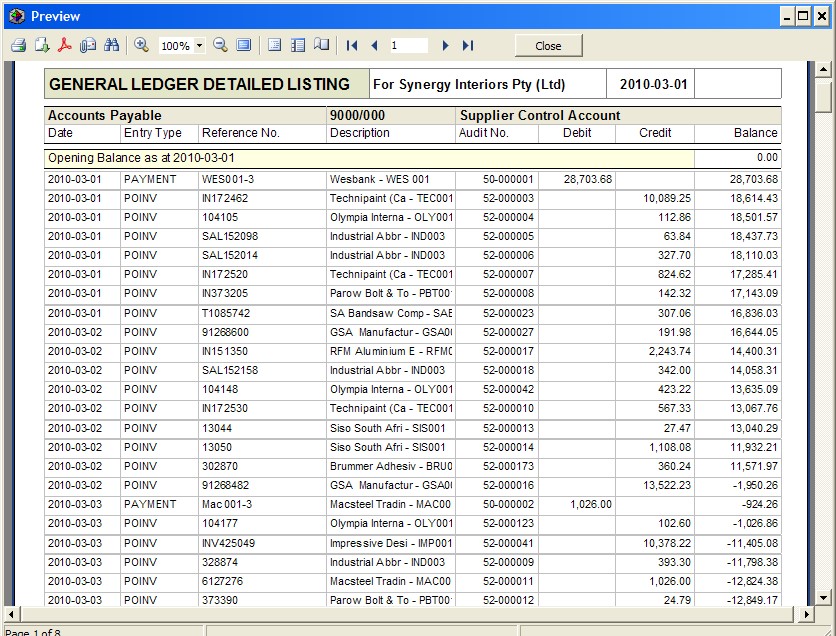
The system will display the General Ledger Detailed Listing for the selected account in a Print Preview window. You can save and email this report as a PDF or Print the Report directly from this screen.
- To print the report, click the Printer Icon displayed at the top left of the screen and then select the appropriate print settings.
-
When you have completed printing the report, click the Close button.
-
When you want to close the Detailed Ledger Drill Through screen, click the Close icon on the top right of the window.
The system will then close the General Ledger Detailed Listing Drill Through screen and return you to the Financial Statement in which you are working.
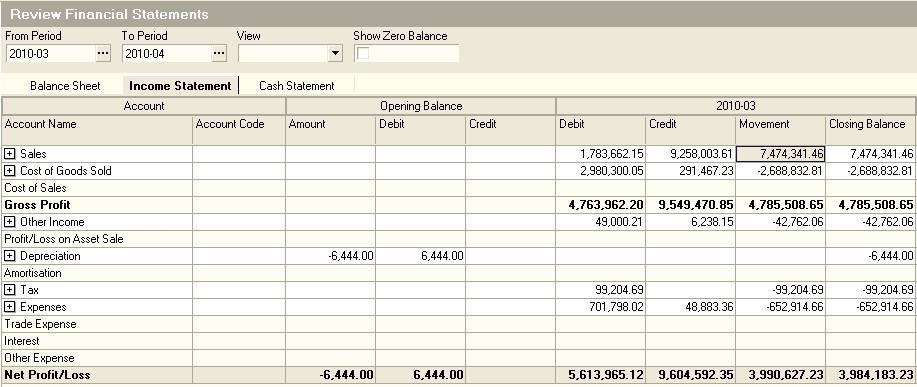
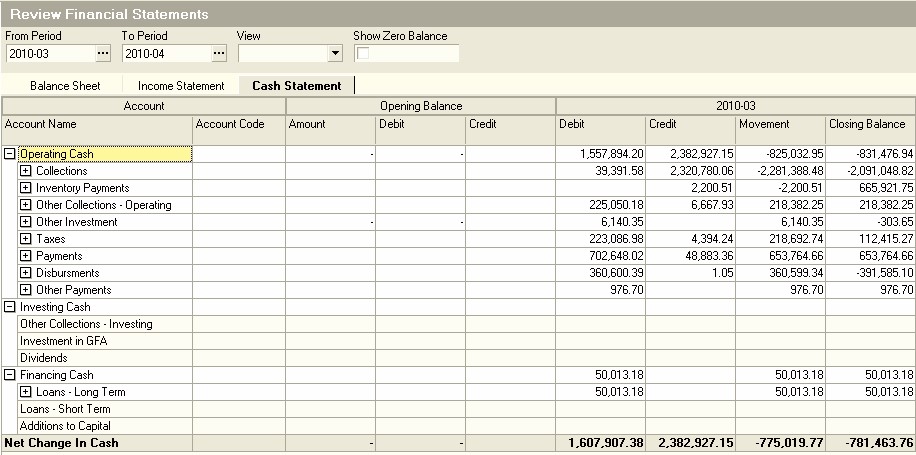
You can now view Financial Information for the Income Statement and Cash Statement in the same way you have viewed the Balance Sheet and also drill through to view the detail of the transactions posted to each account.
The Income Statement
The Cash Statement
- When you have completed Reviewing Financial Statements for your company, click the Close button.

- The system will close the Review Financial Statements screen.
This is the end of the procedure.